The Process Launchpad is designed to help you organize all your processes in one central location. It simplifies starting and completing cases and also provides access to Process Analytics and Guided Templates. Process Launchpad includes the following features:
View and search through a list of processes organized in categories, and get an overview of each process and its purpose.
Start a process.
Track and complete cases of a process, and view detailed status updates.
Filter your cases and tasks.
Add additional case/task lists using Saved Searches.
View charts for viewing the case counter, in-progress and completed cases, providing a bird’s-eye view of key performance metrics of your processes.
Access Guided Templates to create new processes.
Display images and videos in a collapsible carousel to help users understand how to use the process.
Quickly access process documentation.
New in Spring 2025
One-click access to the Launchpad from the Modeler allowing designers to seamlessly switch between designing workflows and tracking live processes.
View Process Launchpad
Follow these steps to view the Process Launchpad:
Ensure that you are logged on to ProcessMaker Platform.
The Process LaunchPad can be access from two locations depending on whether you are just a participant or a designer as well.
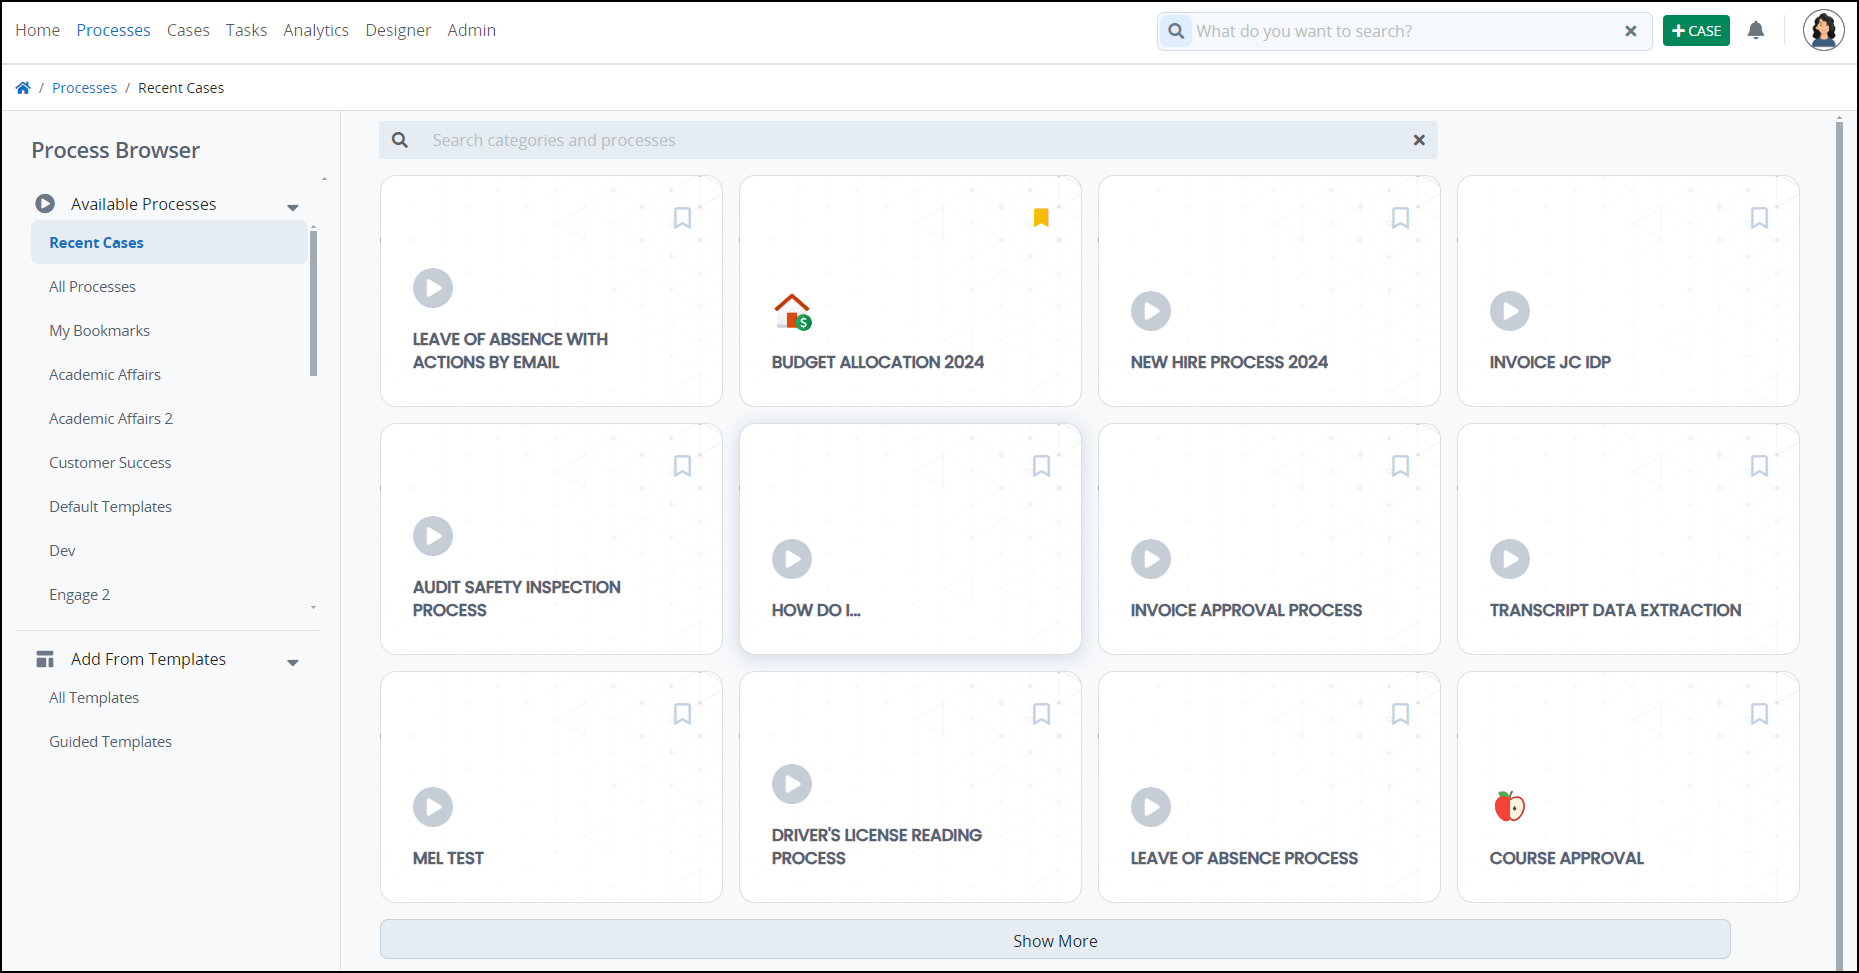
Click the Processes option from the top menu to view the Process Launchpad.
New in Spring 2025
This feature is available in the Spring 2025 release.
Click on the Open Launchpad icon from the Process modeler's menu.

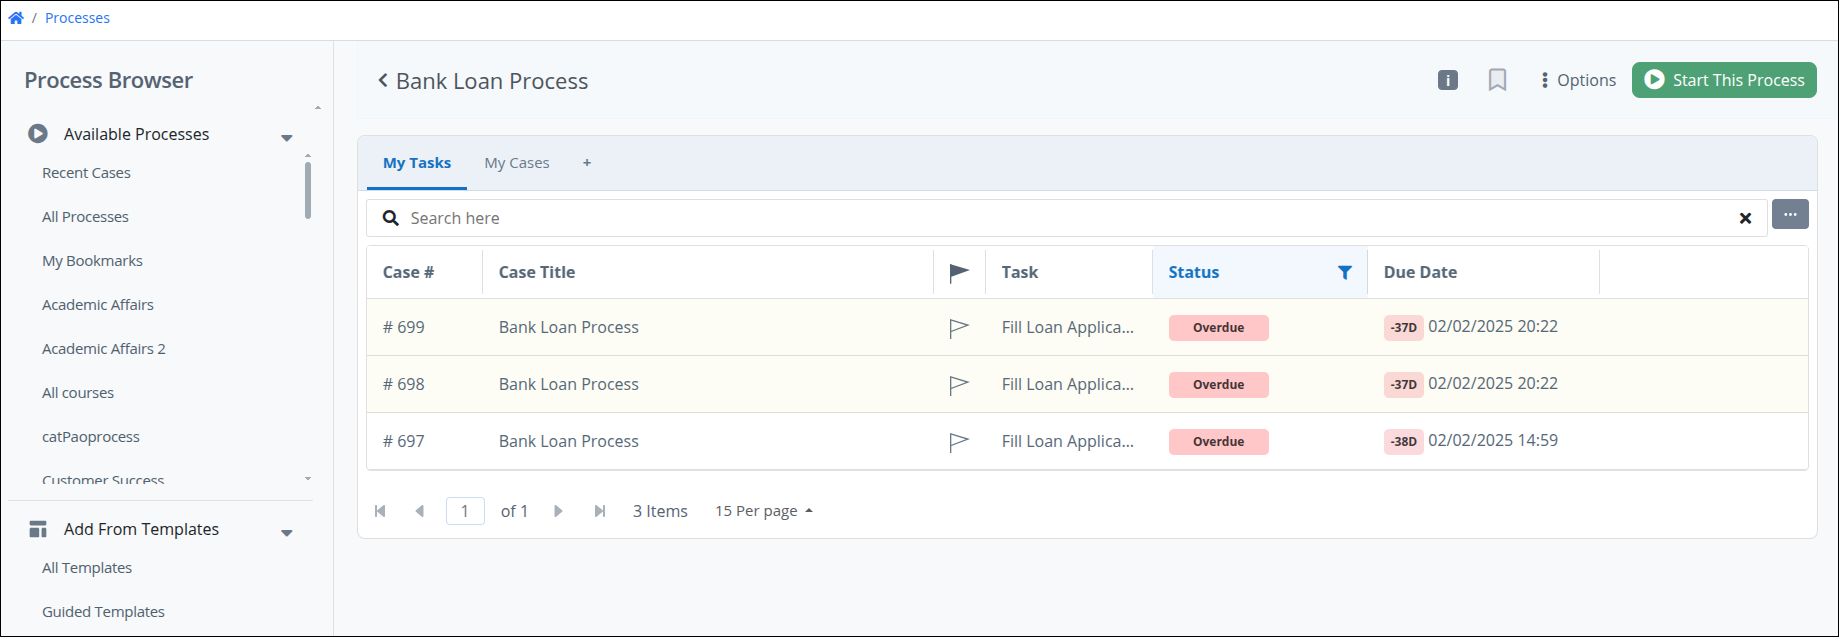
The Process Launchpad opens, displaying the selected process for tracking and execution.
If the process is not published, users receive the following message:
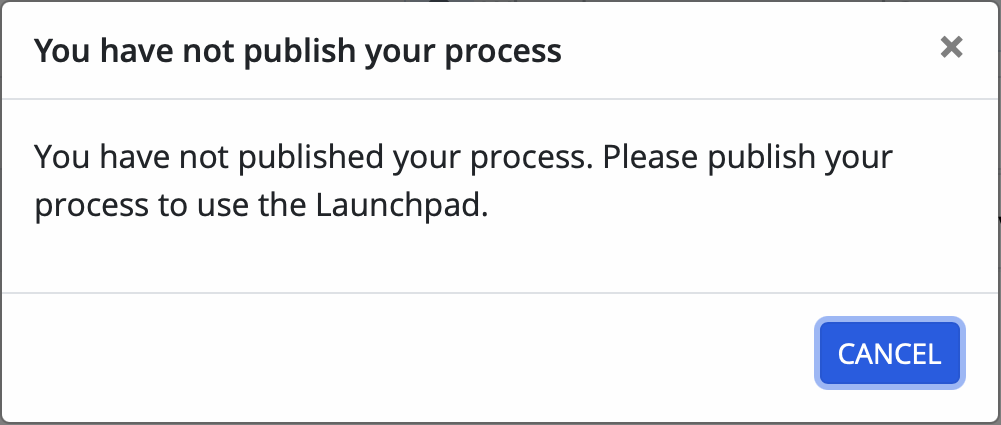
Click Cancel to finalize the publishing of your process model.
After publishing, the Open Launchpad option becomes available.
On the left is the Process Browser menu panel, which displays the following information:
You can collapse the Process Browser panel on the right using the
 icon, providing more space to view processes. This setting is saved for each user session.
The Available Processes section displays all the available process categories:
Recent Cases: Processes for which cases have been recently created, allowing you to quickly access and review recent activities.
All Processes: A list of all available processes.
My Bookmarks: Processes marked as favorites using the bookmark icon.
Process Categories: All defined process categories. Click on a category to view the processes assigned to it.
Uncategorized: Processes without a category assigned to them.
The Add From Templates section allows you to create new process using the following:
All Templates - A set of pre-built process templates.
Guided Templates - Process templates with a step-by-step wizard to assist in process creation.
On the right is the main panel, from where you can perform the following actions:
Search for categories and processes.
View a list of processes based on the selection in the Process Browser on the left. Click on a process to view more information about it.
Search and View a Process in the Launchpad
Follow these steps to search and view a process through the Process Launchpad:
From the Process Browser on left, select a category from the list of Available Processes.
After a category has been selected, the main panel displays all the processes in the selected category.
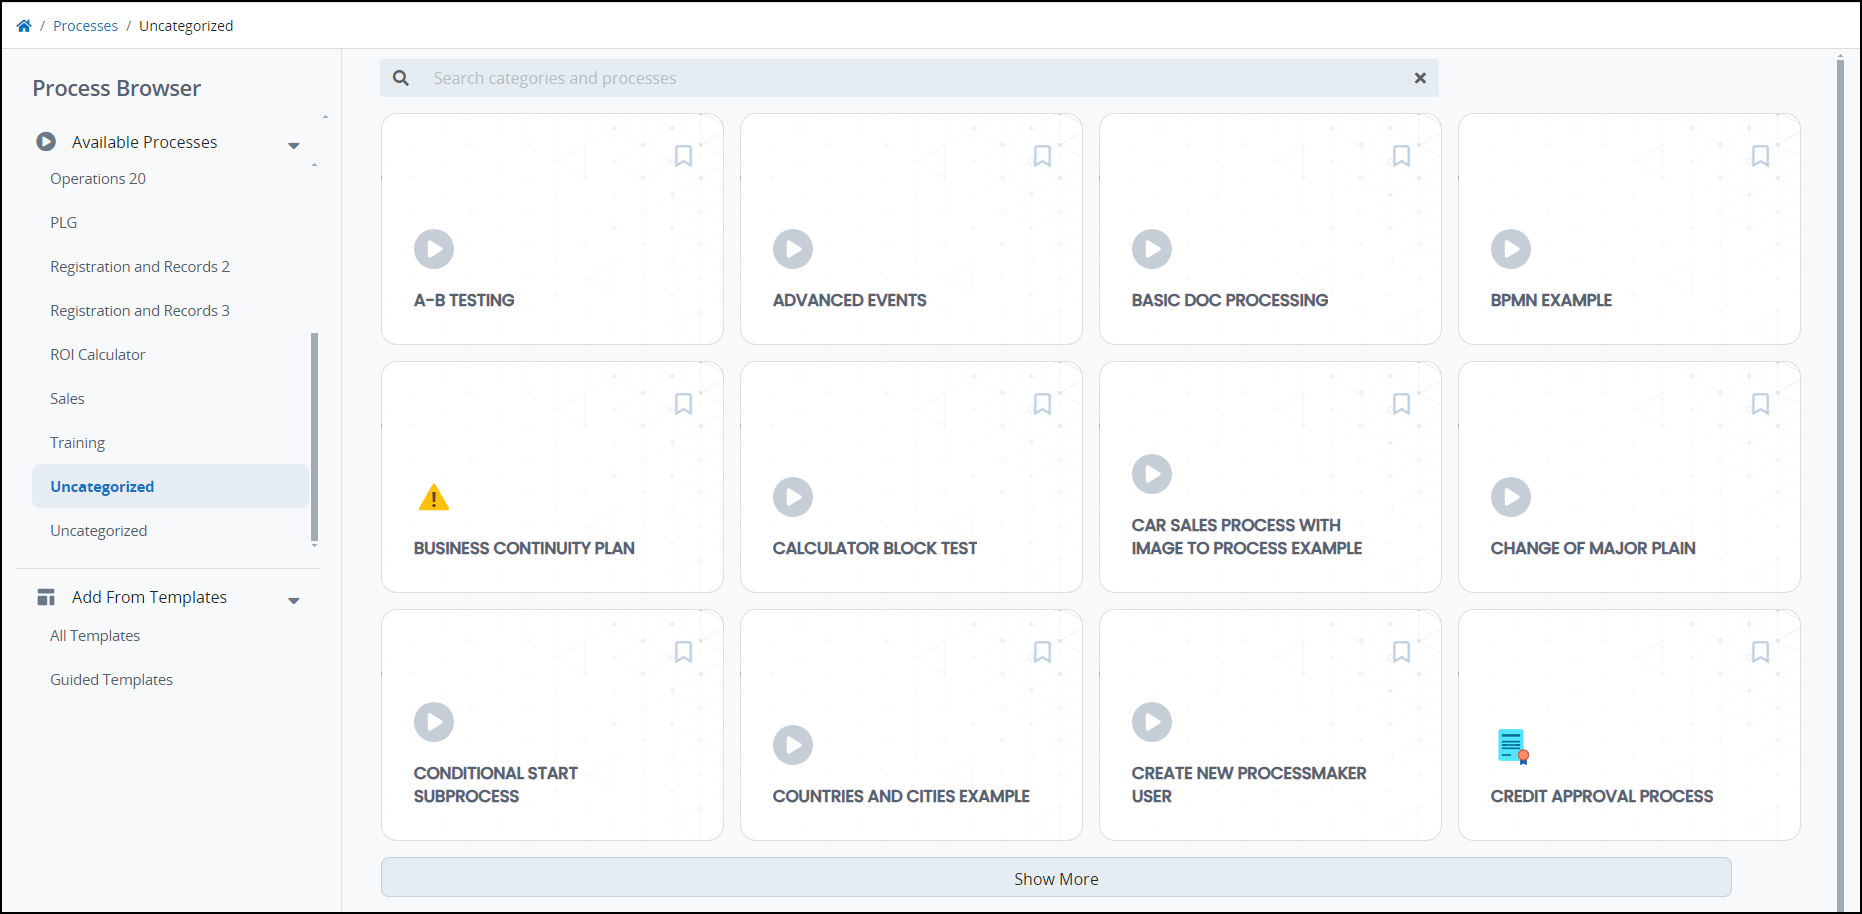
Optionally, in the top-right a card, click the Add To My Bookmarks icon
 to add this process to the My Bookmarks category on the left. The icon will change to yellow to indicate that the process has been bookmarked.
Click on a card to view details of that process in the Launchpad. The Launchpad displays information about processes in two sections:
Process Info
The collapsible Process Info section contains the following details:
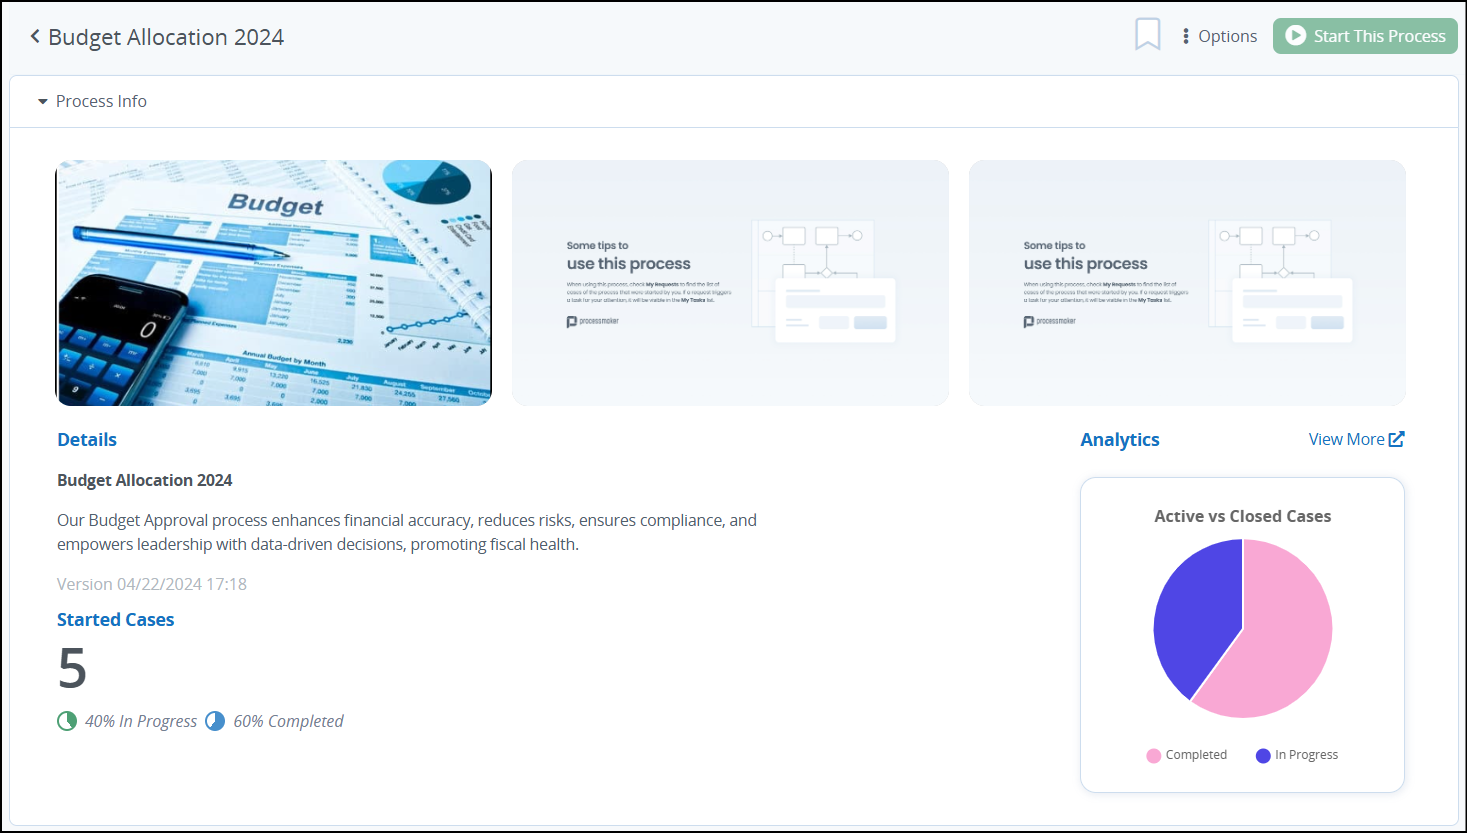
You can hide the Process Info section by clicking on the
menu located at top-left of the panel.
The process title.
The icon
 to add this process to the My Bookmarks category on the left. The icon will change to yellow to indicate that the process has been bookmarked.
The
 menu to manage the process.
The Start This Process button to start a case of the process.
A customizable image carousel, adjustable through the Launchpad configuration.
The Details section display the process name, description, and the date and time of the last process version.
The Started Cases section displays a case counter of the started cases showing in-progress and completed percentage.
The Analytics feature a case counter showing active and completed cases in a pie chart, and a View More link to see detailed Process Analytics.
LaunchPad Analytics vs. Detailed Process Analytics
Process analytics shown in the Launchpad might occasionally be different from those seen in the Analytics tab due to differences in how data is processed.
The Launchpad displays tasks in real-time based on current assignments.
The Analytics tab processes historical data and updates less frequently.
The Analytics tab also applies additional filters, considering tasks that were reassigned or completed, while the Launchpad only reflects current assignments. Since the Launchpad and Analytics tabs have different methodologies for collecting process data, they can sometimes show slightly different information in the short term. Over a longer period of time, the process analytics data in both locations will display the same information.
Cases and Tasks
The My Cases and My Tasks tabs display under the Process Info section and display cases and tasks for the process.
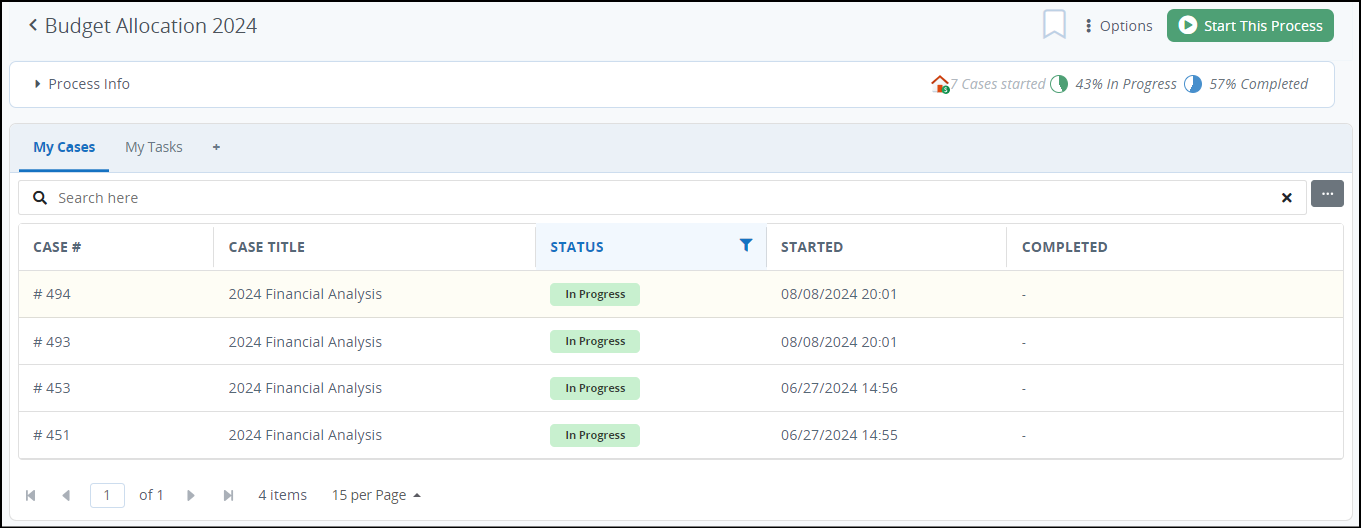
My Cases: My Cases tab shows cases started by you and their status. Click on a Case # to continue working on it.
My Tasks: My Tasks tab displays tasks assigned to you and their status. Click on a Task # to view and complete it.
See detailed information on how to filter information in Case and Task lists.
Add Saved Searches
Additional tabs can be added to Cases and Tasks section using existing Saved Searches . Follow these steps to add a saved search:
Next to the Cases and Tasks tabs, click the Plus icon.
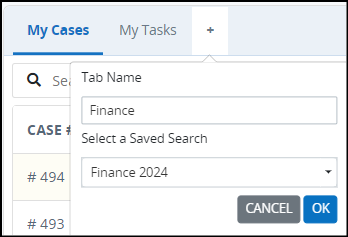
In the Tab Name field, enter a descriptive name for the tab.
In the Select a Saved Search dropdown field, select one of your saved searches.
Click OK to save changes and add the new tab.
