A Project is a way to organize assets and collaborate with others to fulfill the same goal. Projects assist in development of efficient business solutions by providing the following benefits.
Manage assets more easily by organizing them into one Project.
Facilitate the reuse of assets within the business solution for enhanced efficiency.
Projects save time, enhance design productivity and consistency, and make it east to maintain the final deliverable.
The following assets can be added to a Project:
You can add new assets to a project when they are created. For existing assets, you can choose to add either the original asset or a copy. If you add a copy, any changes made to it won’t affect the original asset.
View Projects
Permissions
Your user account or group membership must have the "Projects: View Projects" permission to view the list of Projects unless your user account has the Make this user a Super Admin setting selected.
This permission is enabled by default for all user accounts. Note that you can only view Projects in which you are a member or which you created. If you cannot view your Projects, see the Projects permissions or ask your Administrator for assistance.
Follow these steps to view all your Projects:
Log on to ProcessMaker Platform.
Click the Designer option from the top menu. The Designer Welcome Screen displays.
Do one of the following:
From the My Projects pane in the Designer Welcome Screen, click the open icon
 .
.Click the Projects icon
 from the left sidebar.
In the Projects page, the Projects tab displays projects where you are a member.
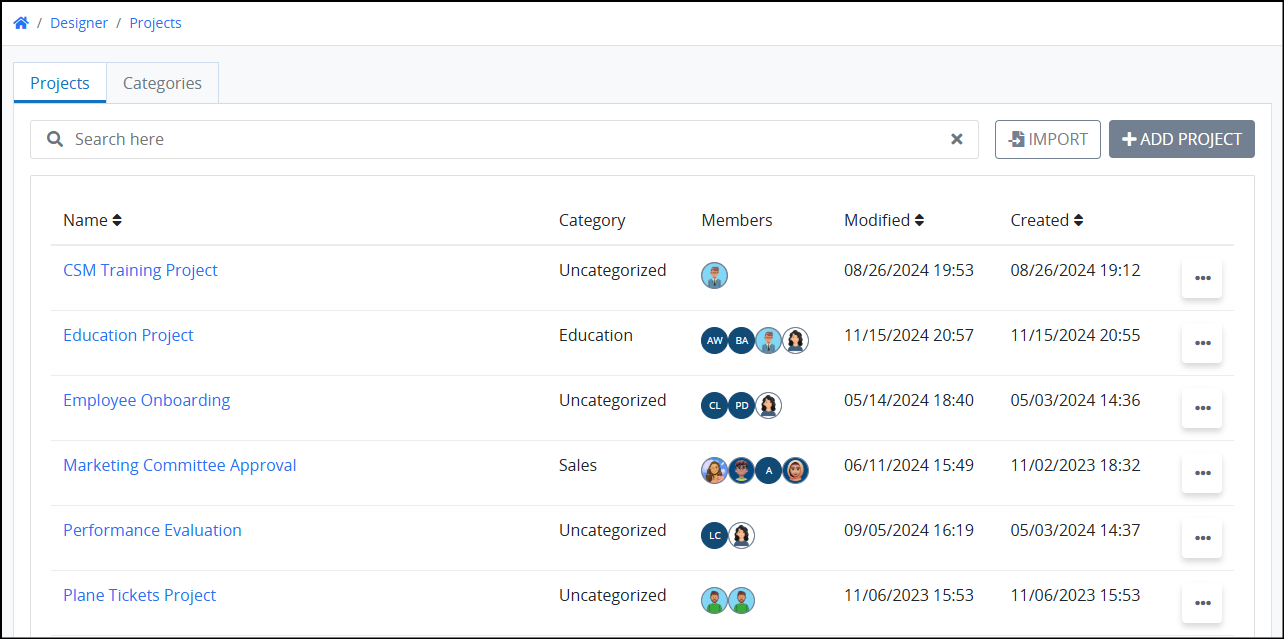
Click on a project to view all assets in it.
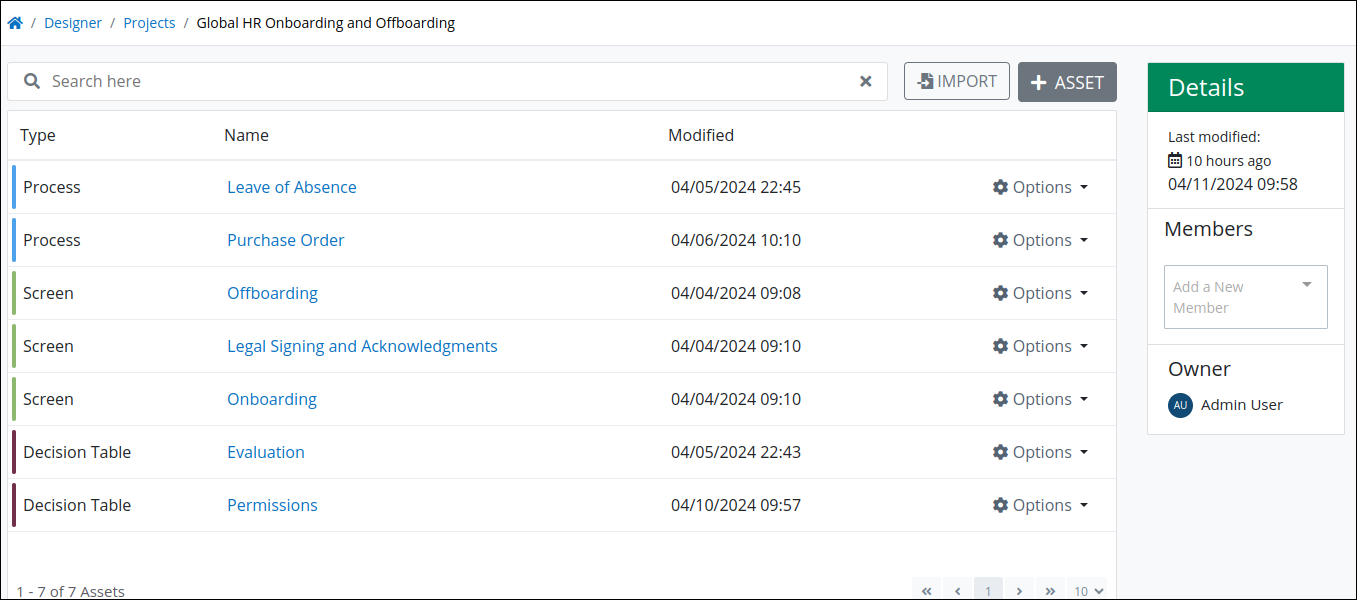
The Project Details section on the right shows the project owner and the current members. For more information on project ownership, see Project Ownership and Members.
Create a New Project
Permissions
Your user account or group membership must have the following permissions to create a new Project unless your user account has the Make this user a Super Admin setting selected:
Projects: View Projects
Projects: Create Projects
See the Projects permissions or ask your Administrator for assistance.
Follow these steps to create a new Project:
Click the +Add Project button. The Add New Project page displays.
In the Name setting, enter the unique name for the Project. Project names can only use apostrophe characters (
') and spaces. This is a required setting.In the Description setting, enter a description of the Project. This is a required setting.
From the Category drop-down menu, select one or more Project Categories to associate with this Project. To remove a Project Category currently selected, click the
 icon for that selection or press
 Enterwhen the drop-down is visible. This is a required setting.Click Add. Your new Project displays in the Projects page.
To delete a project, click the
 menu and select Delete
  .
.Click the
 menu, and then select the Configure option to change the project’s configuration.
Project Ownership
When a project is created, the creator is automatically assigned as the Project Owner.
Ownership can be transferred to other users. For more details, see Project Ownership and Members.
Only Project Owners have the authority to modify project configurations.
Manage Assets within a Project
As a Project member, a Designer can work with any asset within that Project without user permissions for any asset type. For example, a Project member does not need user permissions for Processes, Scripts, and Screens to work with those asset types while a member of that Project. A user with no asset-type permissions may use assets in the following circumstances:
That asset, or a copy of the original asset, has been added to that specific Project.
All Project members can view and edit the assets available in that Project. However, Project membership alone doesn’t allow viewing assets outside the Project unless the user has specific user or group permissions for those asset types.
If a user is not a member of a Project but has user or group permissions to access Processes, that user may work with any Process in that organization.
Watch the followig product tour to learn how to create a new asset in a project.
Watch the following product tour to learn how to add existing assets to a project.
Import an Asset into a Project
Any member of a project can import assets into the project. See the Projects permissions or ask your Administrator for assistance.
Follow these steps to import an asset to a Project:
Open the Project where you want to import an asset.
Click the Import button. The Import Asset page displays.
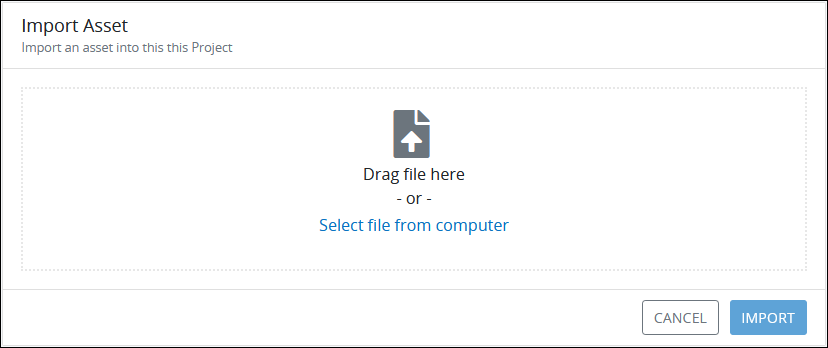
Import Asset page
Click the Select file from computer link to locate the asset to import. Assets have the
.jsonfile extension.ProcessMaker Platform evaluates the file to import. If the asset was not exported from the same ProcessMaker Platform version, that asset may not be imported properly.
The Import Asset screen displays. Only the Basic import option is available for assets.

Click the Import button to complete the import procedure. The asset appears in the Project.

Add an Asset to Add to a Project
Follow these steps to add or create an asset from within the current Project:
Open the Project in which to add or create an asset.
Click the +Asset button. The +Asset button expands to select which asset type to add to this Project.

Click on a asset icon. For example, click the Screens option. The +Asset button drop-down changes to add a Screen. The New Screen button displays to create a new Screen.

Do one of the following:
Search for and select the asset to add to the Project: Click in the search field and enter the partial or complete name of the asset in which to filter results. Filtered results display the name and description of each asset.
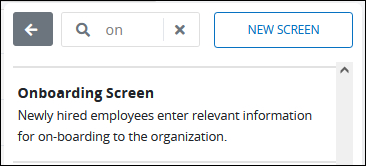
After selecting the asset, a message displays to confirm assigning this asset to the current Project. Click Confirm.
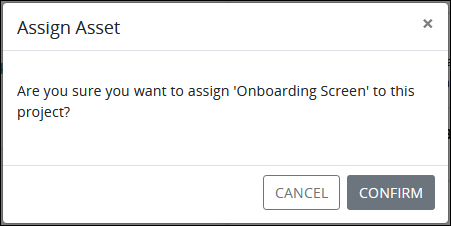
The asset displays in the list of assets for the current Project. Optionally continue searching for other assets of that type to add to this Project.

Create a new asset to add to the Project: Click the button labeled to create a new asset. The screen to create that asset type displays. See one of the following topics for the asset type you are creating:
Do the following:
While creating the asset, ensure to add this Project in the Project setting as amongst those to which you assign the new asset. This is not set automatically.
Create the asset. The design environment for that asset type displays.
Optionally, design the asset at this time. This is not required to add the asset to the Project.
Return to the Project for which you created this asset. It displays in the list of assets for the current Project.
Go back to add a different asset type to this Project: Click the Back icon
 .
.Collapse the +Asset button: Click the +Asset button. The +Asset button collapses.
Use an Asset in a Project
After an asset is added to a Project, any member in that Project may use it. Clicking on the asset's name opens that asset. Furthermore, clicking on the ![]() menu displays options that are intrinsic to that asset type.
menu displays options that are intrinsic to that asset type.
However, there are options available from the ellipses menu specific for use within a Project:
Use caution when deleting an asset from a Project. As is the case with each asset type, deleting an asset affects other Projects and/or Processes that use that asset. As a best practice, remove the asset from the Project when necessary to not affect other Process Designers.
Copy an Asset to a Project
Copy an asset to another Project to which you are a member. By copying an asset from the current Project to another that needs the copied asset saves you time from adding this asset from within the other Project or from the asset itself. You may only copy an asset to Projects of which you are a member.
Follow these steps to copy an asset to a Project:
Open the Project from which to copy one of it assets. The Project displays.

Click the
 menu, and then select the Copy to Project option. The Copy of Asset screen displays. The original name of the asset displays in the Name setting with the word
 Copyappended to it.
Copy of Asset screen to copy an asset to one or more other Projects
Revise the asset configuration as you would that asset type. See one of the following topics for the asset type you are copying:
Do the following:
While copying the asset, select to which Project(s) in the Project setting to assign this asset. Projects selected when saving the copy of this asset display there.
Save the copy of the asset. The design environment for that asset type displays.
Optionally, revise the design from the original asset at this time. This is not required to add the asset to the other Project(s).
Open each Project to which you copied the original asset. The copied asset with your revisions displays in the list of assets for the other Project(s).
Remove an Asset from a Project
Removing an asset from a Project makes that asset no longer available to that Project. Removing the asset does not delete it. You may only remove an asset in Projects of which you are a member.
Follow these steps to remove an asset to a Project:
Open the Project from which to copy one of it assets. The Project displays.

Click the
 menu, and then select the Remove from Project option. The Copy of Asset screen displays. A message displays confirmation to remove that asset from the Project.
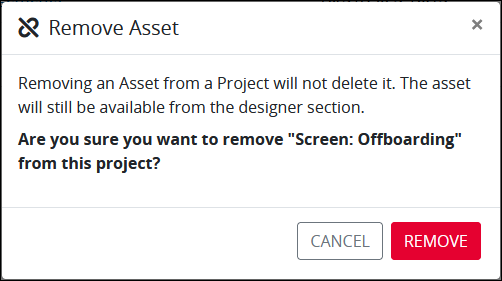
Click Remove.