Importing and exporting Projects, along with their related assets, allows users to easily share Projects within an organization. This feature simplifies collaboration by enabling users to transfer entire Projects, including processes, scripts, and screens.
Any user can import or export a Project, but certain permissions may be required. If you cannot import a Project, check your Project permissions or contact your Administrator.
The maximum allowed size for Project uploads is controlled by the internal variable
PROJECT_IMPORT_MAX_SIZE. To adjust this limit, request assistance from a ProcessMaker support agent.Importing or exporting groups together with users is not supported, as this functionality may negatively impact system performance. User and group assignments must be managed directly within the platform.
Import a Project
Follow these steps to import a Project:
Click the Import button.
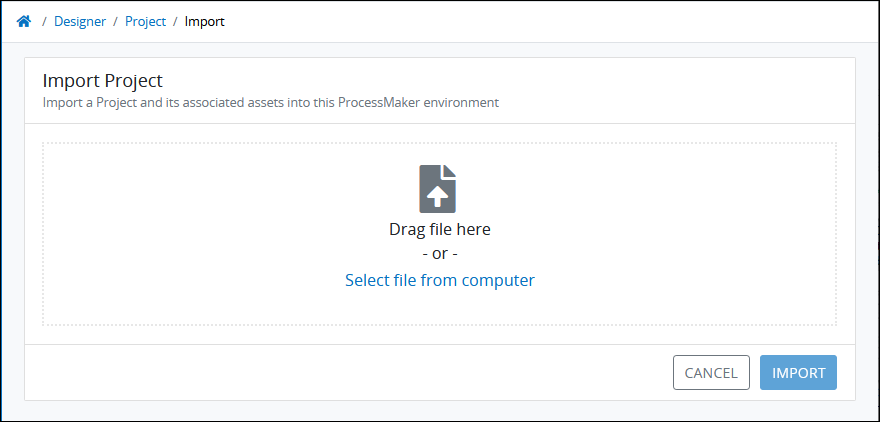
Click the Select file from computer link to locate the Project to import. Projects have the
.jsonfile extension. Only the Basic import option is available for Projects and all assets within the Project will be imported.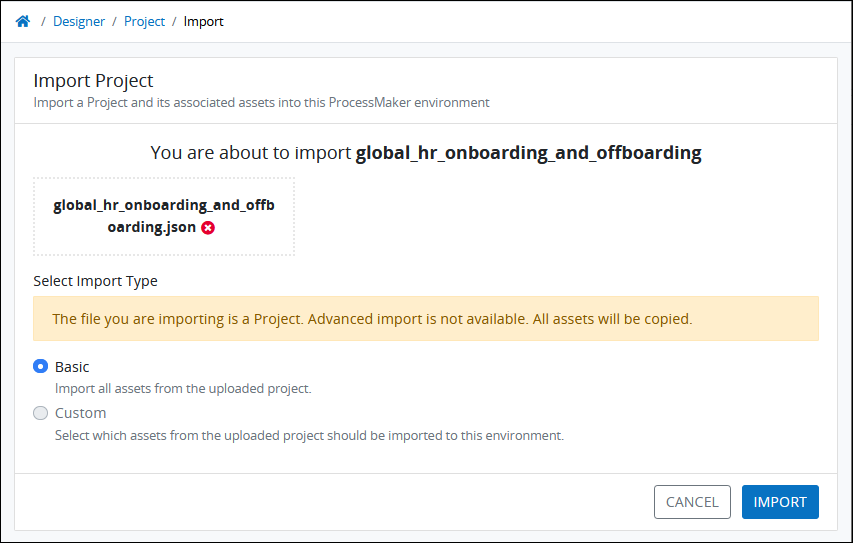
Click the Import button to complete the import procedure. The Project appears in the Projects tab.
Export a Project
Follow these steps to export one of your projects:
Click the
 menu for the Project to export, and then select the Export option. All projects are exported using the Basic option.
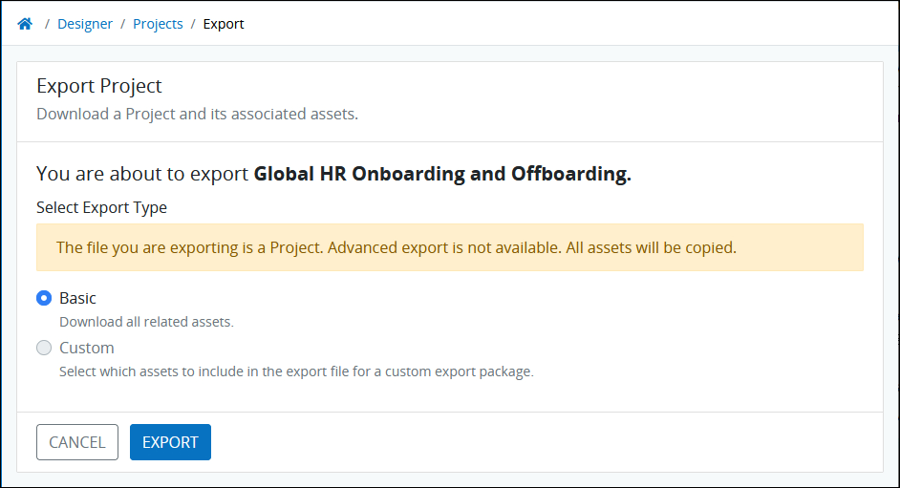
Click Export. The Project exports as a
.jsonfile to your local computer or network. The following message displays when the Project exports successfully: The project was exported.