Process Intelligence's (PI) integration with ProcessMaker introduces a powerful capability to streamline the transfer of discovered workflows into actionable processes within ProcessMaker Platform. By exporting identified workflows and repetitive tasks directly from Process Intelligence, users can seamlessly document and implement these processes without manual configuration. This integration not only enhances process visibility but also accelerates process deployment, enabling teams to improve efficiency and operational insights with minimal effort.
This feature is currently enabled by default only for non-private cloud users.
Watch the following product tour to learn how to export Process Intelligence workflows to ProcessMaker Platform.
Export a Workflow from Process Intelligence
This feature, available in both task discovery and structured process modes, allows users to seamlessly transfer identified workflows and repetitive processes from Process Intelligence into the ProcessMaker Platform. Follow these steps to convert a Process Intelligence workflow to a process in ProcessMaker:
Click on Processes and select a process variant.
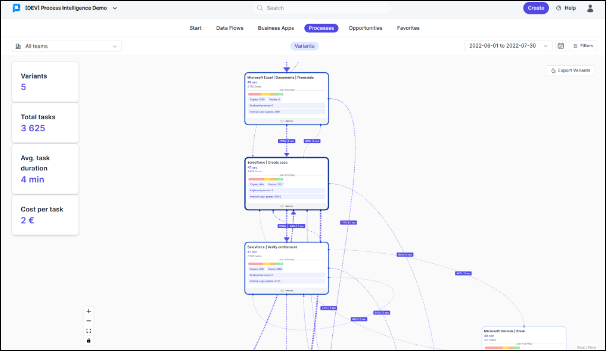
Click Export Variants to download the selected task and process flows to your computer.
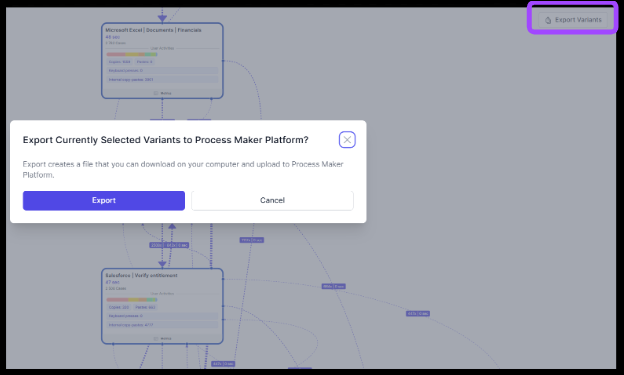
The exported process will be saved as a
.JSONfile.
Import a Workflow in ProcessMaker Platform
Follow these steps to import a workflow exported from Process Intelligence into ProcessMaker Platform:
Permissions
Your user account or group membership must have the following permissions to create a new Process unless your user account has the Make this user a Super Admin setting selected:
Processes: Create Processes
Processes: View Processes
See the Processes permissions or ask your Administrator for assistance.
Click the +Process button to view the New Process screen.
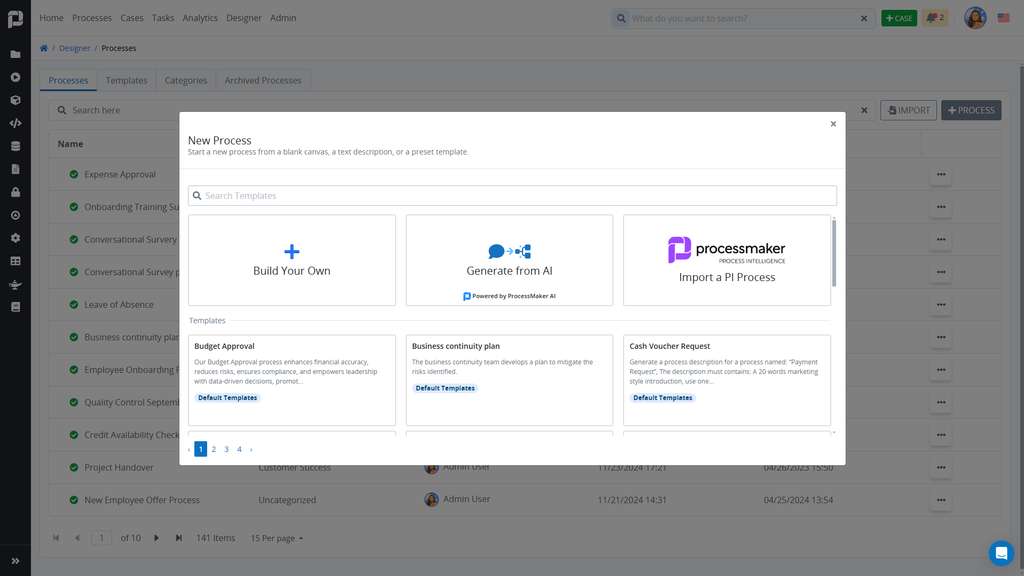
From the New Process screen, click Import a PI Process.
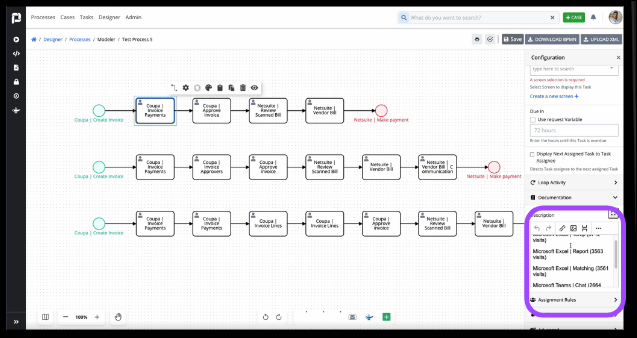
Select the workflow file exported from Process Intelligence. A new process model will be created in the Process Modeler with one or more variants.
You can choose to keep one or more variants of the imported process.
Documentation for each task will be added to the Documentation settings in the Properties Panel on the right providing easy reference for each task in the process.
Optionally, use the AI Asset Generator to automatically create assets for all the tasks in the process.
Generate Multiple Assets using AI Asset Generator
Follow these steps to automatically generate assets for all tasks in a process:
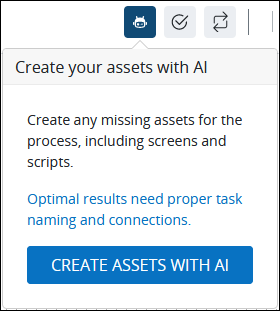
Click Create Now to generate assets for all tasks in the process using the AI Asset Generator.

The AI Asset Generator is also accessible through the
 icon from menu on top right of the Modeler and creates assets for all tasks in the process.
Best Practices
When the AI Generator creates multiple assets for your process, it produces a consistent JSON data model for all of them.
If your process already includes an asset, such as a screen for the first task, the AI Generator will not create a new one. Instead, it uses the JSON data model of the existing asset to build a consistent model for the remaining assets.
To optimize the AI Generator's performance, it is recommended to add a screen for the first task. This allows the AI Generator to train on the JSON data model and use it as a foundation for the rest of the process.
Ensure that each object in the process model is clearly named to accurately describe its function.
Additionally, Sequence Flow should be properly added to reflect the intended workflow routing.
Click Create Assets with AI to begin asset generation.
The AI Generator reviews existing assets from left to right in the Process Model, and then generates applicable Screens, Scripts, and Sub Processes. Each object is highlighted as follows:
Blue: An asset is being generated for this object.
Green: An asset has been generated for this object.
Gray: An asset already exists, therefore, the object will be skipped.
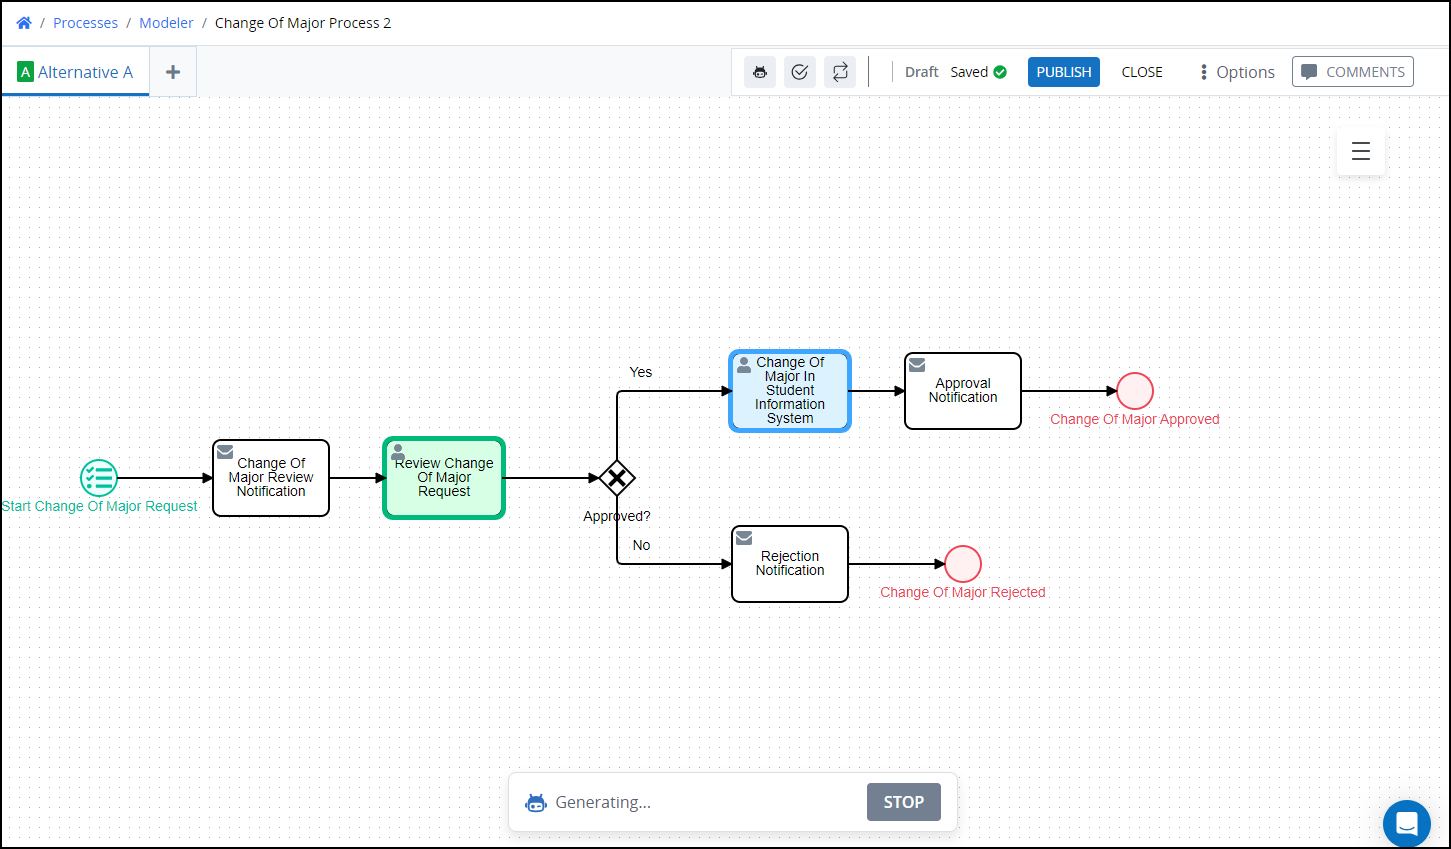
As a best practice, before further revising your Process or any of its generated assets, run a Process test.
To add individual assets using AI, see Add Assets using the AI Generator object section.
Generate Individual Assets
Use the AI Generated object to automatically create assets for your Process model. Place the AI Generated object onto your Process model like any other object, and then select to generate any of the following assets using natural language:
Screen: ProcessMaker AI creates a Screen using your natural language description and adds a Form Task to your process.
Script: ProcessMaker AI creates a Script using your natural language description and adds a Script Task to the process.
Sub Process: ProcessMaker AI creates a sub-process using your natural language description and adds a Sub Process to your process.
Add an AI Generated Object to the Process Model
Add an AI Generated object from one of the following locations in Process Modeler:
Object Panel: Located to the left of the Process Modeler canvas, the Object Panel contains various process model objects.
Object Bar: Located at the bottom of the Process Modeler canvas, the Object Bar contains pinned Process model objects for quick access.
Follow these steps to add an AI Generated object from the Object panel to the Process model:
Ensure that the Object panel is visible. If not, click the Add icon
 from the Object bar at the bottom.
Click the AI Generated object from one of the following sections:
Pinned Objects: The AI-generated object appears in the Pinned Objects section when it is pinned.
Object Category: The AI-generated object appears in the Object Category section when it is not pinned.

Click the location in the Process model to place this element. Follow these guidelines when placing this element:
Optionally place this element between two existing Process model objects already connected with a Sequence Flow element. See Place an object between two connected objects.
If a Pool element is in your Process model, the AI Generated element cannot be placed outside of the Pool element.

Follow these steps to add an AI Generated object from the Object bar to the Process model:
Ensure that the object is pinned to the Object bar. If not, pin it.
In the Object bar at the bottom center, click the object's icon. This object's icon displays adjacent to the mouse icon, indicating that this AI Generated object can be placed into the Process model
Click the location in the Process model to place this object. Follow these guidelines when placing this element:
Optionally place this element between two existing Process model objects already connected with a Sequence Flow element. See Place an object between two connected objects.
If a Pool element is in your Process model, the AI Generated element cannot be placed outside of the Pool element.

Select the Asset the AI Generated Object Creates
Follow these steps to select the asset the AI Generated object creates using your natural language description:
Show the Configuration settings. The AI Assistant panel displays.
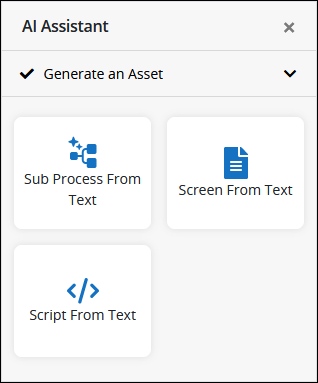
Select one of the following options:
Sub Process From Text: Select the Sub Process From Text option to use your natural language description for a Sub Process at this point in your current Process. After creating your AI-generated Process, the current AI Generated object becomes a Sub Process element that references the new Process you created using AI.
Screen From Text: Select the Screen From Text option to use your natural language description for a Screen at this point in your current Process. Use the AI Control in Screen Builder to describe the control(s) for your Screen. After using the AI Control to create your Screen, the current AI Generated object in this Process becomes a Form Task element that references the new Screen you created using AI.
Script From Text: Select the Script From Text option to use your natural language description for a Script at this point in your current Process. Use the AI Assistant in Script Editor to describe functionality for your Script. After using the AI Assistant, the current AI Generated object in this Process becomes a Script Task element that references the new Script you created using AI.