Use pre-built templates to accelerate process development. These templates provide a solid foundation, allowing you to quickly customize and implement workflows without starting from scratch.
Watch the following product tour to learn how to create a process from templates.
Permissions Required
Your user account or group membership must have the following permissions to create a new Process unless your user account has the Make this user a Super Admin setting selected:
Processes: Create Processes
Processes: View Processes
Process Templates: View Process Templates
See the Processes and Process Templates permissions or ask your Administrator for assistance.
Follow these steps to create a new Process from a Template:
Click the +Process button. The New Process screen displays.
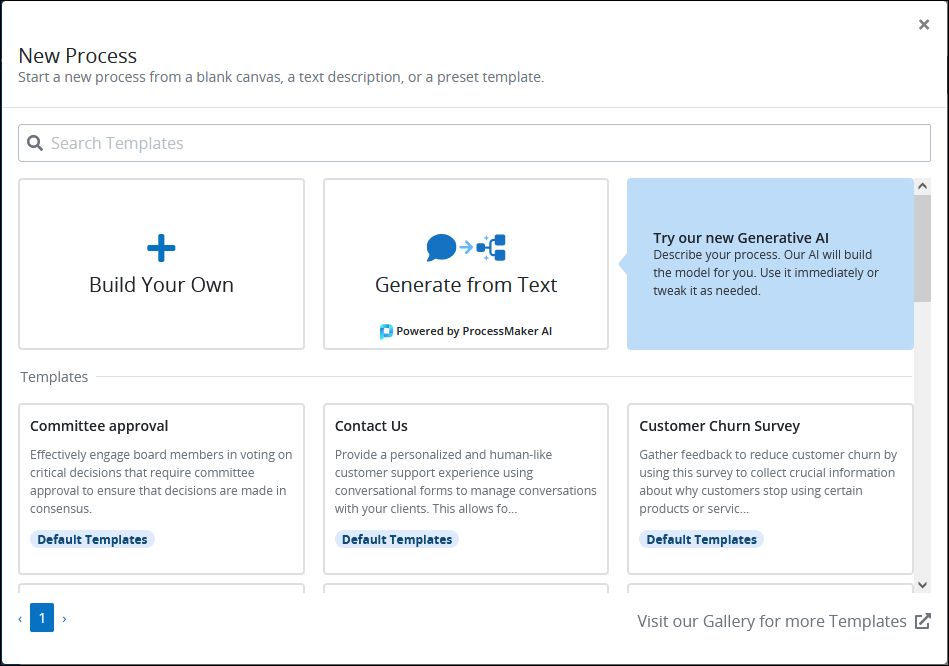
New Process screen to create a Process from a Template or natural language available on Enterprise edition
To create a new Process from a Template, select one of the Process Template cards at the bottom of the screen. A preview of the Template displays, as well as the name of the Template designer and the Template version.
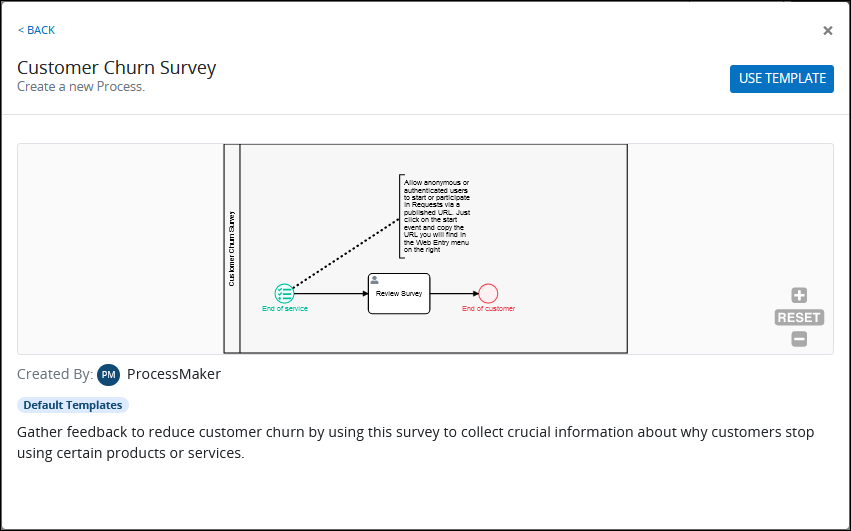
Preview of a selected Process Template
Optionally, use any of the following to inspect the thumbnail view of the Process model:
Zoom in to the thumbnail view: Click the
 icon.
icon.Zoom out from the thumbnail view: Click the
 icon.
icon.Pan around after zooming into the thumbnail view: Hold with the mouse, then pan around the thumbnail view.
Reset the thumbnail view: Click the Reset button.
Click the Use Template button to create a Process using that Template. The Create Process screen displays.

Create Process screen when creating from a Process Template
In the Name setting, enter the unique name for the Process. Process names must be unique in your organization regardless of whether the Process is active or archived, and can only use apostrophe characters (
') and spaces. This is a required setting.In the Description setting, enter a description of the Process. This is a required setting.
From the Category drop-down menu, select one or more Process Categories to associate with this Process. To remove a Process Category that is currently selected, click the
 icon for that selection. This is a required setting.
From the Project drop-down menu, optionally select the Project(s) that this Process becomes an asset. This setting only displays Projects of which you are a member. To remove a Project that is currently selected, click the
icon for that selection or press Enterwhen the drop-down is visible.From the Process Manager drop-down menu, select the Process Manager for this Process.
Click Save. The new Process displays in Process Modeler and shows the assets from the selected Template.
After clicking Save, if the Process you are importing has Screen assets from another Process Template that uses these Screen assets, the following page displays to indicate how to create your new Process using those assets:
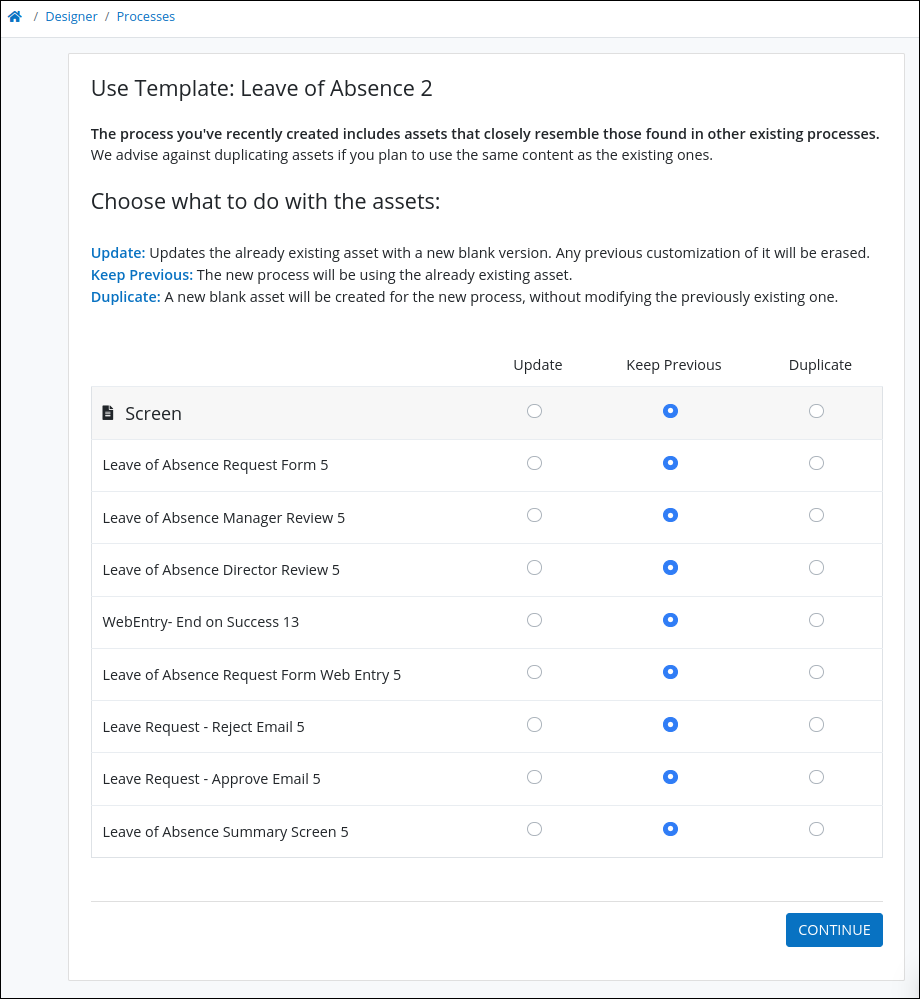
Do one of the following for Screens involved in the Process Template:
Update: For each Screen asset, click the Update option to update the already existing asset. Otherwise, click the Update option in the Screen header to update all assets at once.
Keep Previous: For each Screen asset, click the Keep Previous option to use the already existing asset. Otherwise, click the Keep Previous option in the Screen header to keep all previous assets at once.
Duplicate: For each Screen asset, click the Duplicate option to create a new asset without modifying the previous existing asset. Otherwise, click the Duplicate option in the Screen header to duplicate all assets at once.