The Create from Image feature streamlines the process of creating process models by allowing designers to upload images of process maps. The system then automatically converts these images into Process Models, eliminating the need for manual creation and reducing the potential for inaccuracies.
The feature significantly reduces the time required to recreate a process map manually, thus providing tangible evidence of its effectiveness.
Features & Benefits:
Upload an existing image: You can easily upload an existing image of a process map.
Take a new photo: Capture a photo of a process map directly from your device.
Scan a QR code from the screen: Use a QR code to streamline the process of uploading an image.
AI image analysis: The system employs AI image analysis to automatically recreate the map inside a new Process Model, ensuring accuracy and efficiency.
Create from Image simplifies process model creation, enhances the design experience, and empowers designers to excel in a dynamic business landscape.
Generate a Process from an Image
Permissions
Your user account or group membership must have the following permissions to create a new Process unless your user account has the Make this user a Super Admin setting selected:
Processes: Create Processes
Processes: View Processes
See the Processes permissions or ask your Administrator for assistance.
The image-to-process features supports a maximum file size of 15MB.
Create a Process from Images on Mobile Devices
Watch the following product tour to learn how scan a QR code from your phone, upload an image, and create a process from that image.
Create a Process from Images on your Computer
Watch the following product tour to learn how to use an image on your computer to create a process.
Step-by-Step Instructions
Follow these steps to generate a process from an image:
Ensure that you are logged on to ProcessMaker Platform.
Click the Designer option from the top menu to view the Designer Welcome Screen.
Hover over Processes, and then click the New Process button to create a new process.
From the New Process screen, select Generate from AI. The AI Assistance for Modeler will open.
Image to Process options are available in the bottom right of the screen. Choose one of the following options.
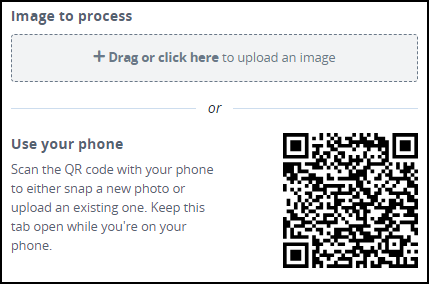
Drag an image of your process to the Image to Process section to upload it.
Alternatively, click the Upload an image button to upload your image.
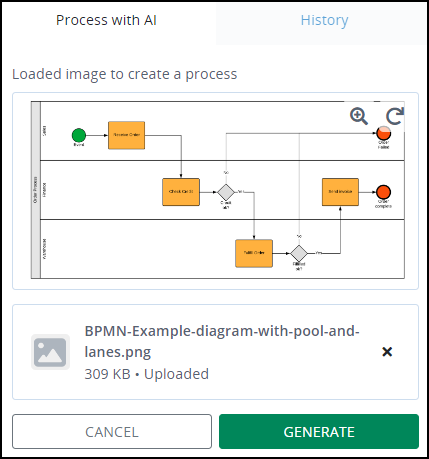
A preview of the process model will be shown.
Use your phone to scan the QR code displayed at the bottom right of the screen.
A ProcessMaker screen will provide options to take a new photo or upload one from the phone's photo gallery.
Confirm on-screen selection and follow the instructions.
ProcessMaker will send the image to your computer and a preview of the process model will be shown.
Note: If the photo is unreadable, no alternative will be generated, and the user is prompted to upload a new photo.
Click Generate to convert the image to a process model. The AI Assistant will present a few alternates to choose from.
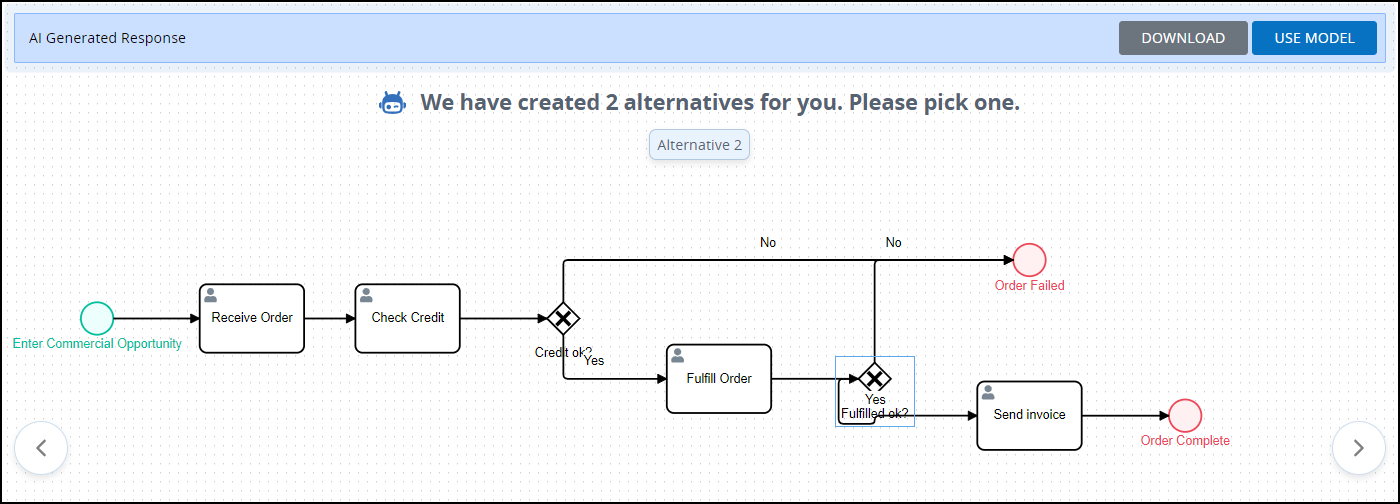
Navigate to the best alternative and click Use Model. The Create Process screen will display with a suggested name and description of the Process.
In the Name setting, edit the unique name for the Process if necessary. Process names must be unique, and can only use apostrophe characters (
') and spaces. This is a required setting.In the Description setting, edit a description of the Process if necessary. This is a required setting.
From the Category drop-down menu, select one or more Process Categories to associate with this Process. To remove a Process Category, click the
 icon for that selection. This is a required setting.
From the Project drop-down menu, select the Project(s) to which this Process will be associated.. "This setting shows Projects that you are a member of. To remove a Project that is currently selected, click the
icon for that selection.From the Process Manager drop-down menu, select the Process Manager for this Process.
Click Save. The new generated Process displays in Process Modeler.