A Start Event object starts a Request for a Process. Note that a Start Event object does not represent an assignee because a Request has not started until a Start Event object triggers. Each Start Event object can be configured who can start a Request or via our API. A Start Event object cannot have an incoming Sequence Flow object, though it may have an outgoing Message Flow object. A Process model can have multiple Start Event objects, each representing a different user or group (or via Web entry).
Use a Start Event object to represent how a Request for that Process starts in one of the following ways:
The Request can be started by an authenticated user (Jane Doe) or any member of a specified group (Accounting department).
The Request can be started by either an anonymous or authenticated user through a published URL. This allows a Screen to be available on a public-facing Web site that starts the Request when that Screen is submitted.
The Request can be started via our RESTful API.
Below is a Start Event object when it has been placed into a Process model.

Below is a Start Event object configured to use Web Entry.

Add a Start Event to a Process
Permissions
Processes: Edit Processes
Processes: View Processes
See the Process permissions or ask your Administrator for assistance.
Your user account or group membership must have the following permissions to configure a Start Event object in the Process model unless your user account has the Make this user a Super Admin setting selected:
Processes: Edit Processes
Processes: View Processes
See the Process permissions or ask your Administrator for assistance.
Add a Start Event object from one of the following locations in Process Modeler:
Object Panel: Located to the left of the Process Modeler, the Object Panel contains various process modeling objects.
Object Bar: Located at the bottom of the Process Modeler, the Object Bar contains pinned Process modeling objects for quick access.
Follow these steps to add a Start Event from the Object panel to the Process model:
Ensure that the Object panel is visible. If not, click the Add icon
 from the Object bar at the bottom.
Click the Start Event object
 from the Object panel to select it.
Click the location in the Process model to place this object. If your process has a Pool object, the object cannot be placed outside of the Pool.

Follow these steps to add a Start Event object from the Object bar to the Process model:
Ensure that the object is pinned to the Object bar. If not, see instructions to pin it.
In the Object bar at the bottom center, click the object's icon.
Click the location in the Process model to place this object. If your process has a Pool object, the object cannot be placed outside of the Pool.
Replace a Start Event Object with a Different Starting Request Event Object
After a Start Event object is added to a Process model, you may replace it with a different starting Request event object:
Start Timer Event object
Signal Start Event object
Message Start Event object
Conditional Start Event object
The selected Start Event object is replaced by the default settings and color of the replacing object.
Follow these steps to replace a Start Event object with a different Start-type event object:
Select the Start Event object to change to another Start-type event. Available options display above the selected object.
Click the Objects icon. The Objects drop-down menu displays Start-type event objects.
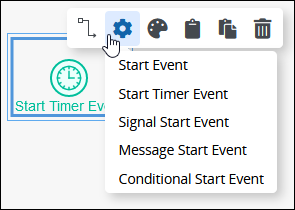
Select the object to replace the Start Event object. The Change Type screen displays to confirm replacing the currently selected object.
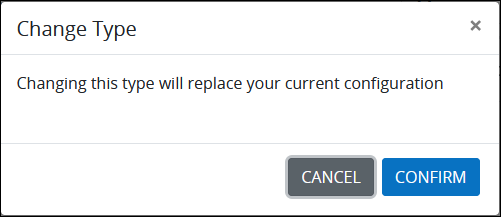
Click Confirm. The new object replaces the Start Event object with its default settings and color.
Settings
The Start Event object has the following panels that contain settings:
Properties panel
Documentation panel
Start Permissions panel
Web Entry panel
Advanced panel
Properties Panel Settings
The Start Event object has multiple settings in the Properties panel:
Edit the Object Name
An object name is a human-readable reference for a Process object. Process Modeler automatically assigns the name of a Process object with its object type. However, an object's name can be changed.
Follow these steps to edit the name for a Start Event object:
Select the Start Event object from the Process model in which to edit its name.
Ensure that the Configuration panel displays. If not, show it. The Name setting displays. This is a required setting.

In the Name setting, edit the selected object's name and then press Enter.
Display the Next Assigned Task to the Task Assignee
The Display the Next Assigned Task to the Task Assignee setting enables the Screen Interstitial setting that appears after a Task is completed and before the next Task is displayed. This setting helps maintain a seamless experience for the user while the Request continues routing and automated actions are executed in the background.
How It Works
When enabled, an interstitial screen appears to the user after the current Task is submitted. This Screen remains visible while the system performs routing and executes any automated (non-assigned) actions. The interstitial Screen will remain until one of the following occurs:
The Request assigns the next Task to the same Task assignee.
The Request completes, and the Request summary is displayed.
The user navigates away from the page (e.g., clicks a link to another location).
Where to Use This Setting
You can configure the Display the Next Assigned Task to the Task Assignee setting in the following scenarios:
When the Initial Task Uses a Conversational-Type Screen
Link multiple Conversational Screens together to simulate a seamless chat experience.
After the participant submits a response, use an interstitial Screen (e.g., a loading message or animated GIF) while the Request resumes routing.
This is especially useful when automated steps or intermediate actions occur before the next Conversational Task.
This setting is compatible with Web Entry. While Web Entry defines the initial Screen, the interstitial Screen displays after the initial Task is completed.
See: What is a Conversational Screen? for guidance on designing modern chat-style interactions.
When the Initial Task Uses a Form-Type Screen
Display a message such as "Loading your next Task..." after the initial form is submitted.
While this message is displayed, the system performs any intermediate routing and assigns the next Task.
This is useful when multiple Tasks are expected to be assigned to the same user within the same Request.
When a Script Task Follows the Start Event
If the process flow immediately continues with a Script Task after the Start Event, use this setting to ensure that the next Manual Task or Start Event Task displays to the same user seamlessly.
Follow these steps to configure a Start Event object to display an interstitial Screen after the initial Task in that Request completes:
Select the Start Event object from the Process model in which to configure it to display an interstitial Screen after the first Task completes.
Ensure that the Configuration panel displays. If not, show it. Panels to configure this object display.
Locate the Display Next Assigned Task to Task Assignee setting. It is selected by default when the Start Event object is added to the Process model.
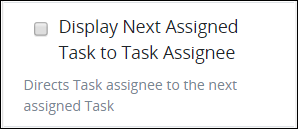
Select the Display Next Assigned Task to Task Assignee setting. The Screen Interstitial setting displays.
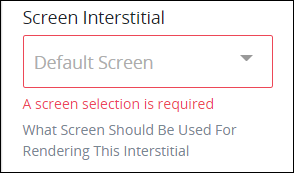
From the Screen Interstitial drop-down menu, select which Display-type Screen to display after the initial Task in that Request completes. This is a required setting.
Default Interstitial Behavior
To prevent issues caused by removing or modifying the default interstitial screen assigned to Start Events, system-level screens are restricted from access, editing, and listing in the Screen Builder. This restriction applies only to screens flagged as system resources, and attempting to open them directly may result in a 404 error. The behavior is intentional and designed to protect system resources and maintain process stability. Importantly, running a case that uses the default assigned interstitial screen functions correctly, and overall process execution is not affected by this restriction.
Add a Placeholder for the Slideshow Mode
The Slideshow Mode makes it easy for process designers to share the design of a process with all stakeholders, regardless of whether they have access to the ProcessMaker Platform. For more information on how to create slideshows for a process, see Slideshow Mode.
Follow these steps to add a placeholder image for the Slideshow Mode:
Select the Start Event object from the Process model.
Click the
.png) icon to view the Configuration panel.
icon to view the Configuration panel.From the Placeholder for Slideshow section, click on the +Drag or click here button to upload an image.
.png "image(295).png")
A preview of the image will display, and the configuration will be auto-saved.
.png "image(296).png")
The uploaded image will be shown for this task the next time the slideshow is viewed.
Notes:
Size of a placeholder image for slideshows must less than 2 MB.
Image files with PNG, JPG, JPEG, and GIF extensions are supported.
Documentation Panel Settings
Describe the object's purpose and how it functions in the Process. This description does not affect Requests for the Process, but may be useful for Process model maintenance such as how the object is configured. Edit information by using the What-You-See-Is-What-You-Get (WYSIWYG) rich text editor.
A Process's entered documentation displays by selecting the View Documentation icon for that Process.
Edit the Object's Description Displayed in Process Documentation
Follow these steps to edit the description for an object:
Select the object from the Process model in which to edit its description.
Ensure that the Configuration panel displays. If not, show it. Panels to configure this object display.
Expand the Documentation panel if it is not presently expanded. The Description setting displays.
In the Description setting, edit the information to display when viewing documentation for this object and then press Enter. Alternatively, use the What-You-See-Is-What-You-Get (WYSIWYG) rich text editor to stylize your text by clicking the More icon
 .
. 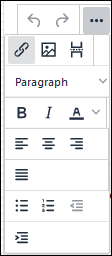
Follow these guidelines to use the WYSIWYG rich text editor to stylize your text:
Undo changes: Click on the
 icon to undo the last action.
Redo changes: Click on the
 icon to redo the last undone action.
Insert/Edit Link: Click on the
 icon to convert the selected text into a hyperlink. Follow these steps to create a hyperlink:
 Select the required text from the Rich Text control.
Click on the
icon. The Insert/Edit Link screen displays. 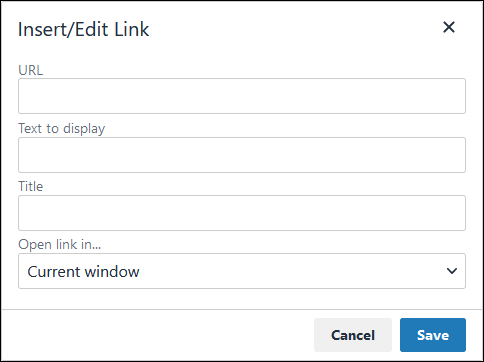
In the URL setting, enter the destination URL.
In the Text to display setting, edit or enter the text displayed in the Rich Text control.
In the Title setting, enter the text to display when a user hovers over the displayed text.
From Open link in… drop-down menu, select one of these options:
New window: Select this option to open the destination page in a new browser window.
Current window: Select this option to open the destination page in the current browser window.
Insert/Edit Image: Click on the Insert/Edit Image icon
 to insert an image. Follow these guidelines:
 Click on the Insert/Edit Image icon
. The Insert/Edit Image screen displays:
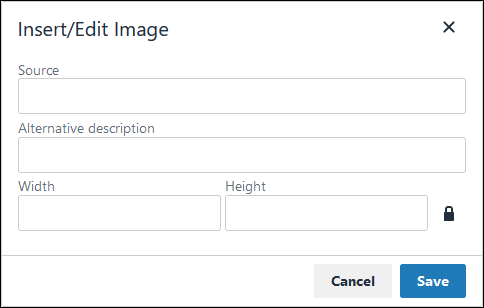
In the Source setting, enter a URL for the image.
In the Alternative Description setting, enter the text to display if the source URL of the image is not accessible.
In the Width setting, enter the maximum width for the image.
In the Height setting, enter the maximum height for the image.
Toggle the Constrain Proportions icon
 to maintain the width-height ratio of the image to its original proportion.
 Click Save.
Insert Page Break for PDF: Click on the Insert Page Break for PDF icon
 to insert a page break when a PDF document is created for this documentation if your browser supports this feature.
 Format text: Follow these guidelines to format text:
Headings: From the Paragraph/Formats menu, select Headings and then select a heading size.
Bold: Do one of the following:
From the editor toolbar, select the
 icon.
icon.From the Paragraph/Formats menu, select Inline and then Bold.
Italics: Do one of the following:
From the editor toolbar, select the
 icon.
icon.From the Paragraph/Formats menu, select Inline and then Italic.
Underline: From the Paragraph/Formats menu, select Inline and then Underline.
Strikethrough: From the Paragraph/Formats menu, select Inline and then Strikethrough.
Superscript: From the Paragraph/ Formats menu, select Inline and then Superscript.
Subscript: From the Paragraph/Formats menu, select Inline and then Subscript.
Code: From the Paragraph/Formats menu, select Inline and then Code.
Paragraph: From the Paragraph/Formats menu, select Blocks and then Paragraph.
Blockquote: From the Paragraph/Formats menu, select Blocks and then Blockquote.
Division: From the Paragraph/Formats menu, select Blocks and then Div.
Preformatted: From the Paragraph/Formats menu, select Blocks and then Pre.
Change text color: Use the Text Color drop-down to change text color. Click on the
 icon. The color palette displays. Do one of the following:
Select one of the color swatches from the color palette. The selected text changes to that color.
Click the
 icon to select a custom color from the Color Picker.
Click the
 icon to reset the text to its default color.
Align text: Follow these guidelines to align text:
Left align: Do one of the following:
From the editor toolbar, use the
 icon to left-align text.
From the Paragraph/Formats menu, select Align and then Left.
Center align: Do one of the following:
From the editor toolbar, use the
 icon to center-align text.
From the Paragraph/Formats menu, select Align and then Center.
Right align: Do one of the following:
From the editor toolbar, use the
 icon to right-align text.
From the Paragraph/Formats menu, select Align and then Right.
Justify: Do one of the following:
From the editor toolbar, use the
 icon to justify text.
 From the Paragraph/Formats menu, select Align and then Justify.
Insert a bullet list: Use the
 icon to format text as a bulleted list.
Insert a numbered list: Use the
 icon to format text as a numbered list.
Indent text: Click on the
 icon to increase text indenting.
Outdent text: Click on the
 icon to decrease text indenting.
Start Permissions Panel Settings
Select whether a user or any member of a group may start a Request:
Select the User That Can Start a Request
When a Start Event object is placed into a Process model, it is not configured to indicate how a Request can start via that Start Event object. Therefore, it must be configured.
If this Start Event object is configured to start Requests anonymously via Web Entry, the settings described below are disabled because these Start Event object settings only configure which authenticated user(s) may start a Request from this object. Therefore, to configure these settings, either disable Web Entry or select that authenticated users may start Requests from this object via Web Entry. See Web Entry Panel Settings.
To allow anonymous or authenticated users to start or participate in Requests via a published URL do not configure who may start Requests from the Start Permissions panel. Configure those persons from the Web Entry panel.
Follow these steps to select which user can start a Request via this Start Event object:
Select the Start Event object from the Process model in which to select the user that may start a Request.
Ensure that the Configuration panel displays. If not, show it. Panels to configure this object display.
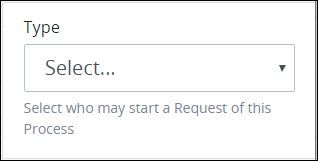
Expand the Start Permissions panel if it is not presently expanded. The Type setting displays.
From the Type drop-down menu, select the User option. The User drop-down menu displays below the Start Permission drop-down menu.
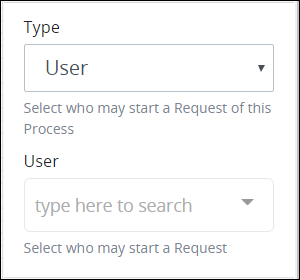
From the User drop-down menu, select which user can start a Request via the Start Event object. That user may start a Request.
Select the Group That Can Start a Request
When a Start Event object is placed into a Process model, it is not configured to indicate how a Request can start via that Start Event object. Therefore, it must be configured.
Follow these steps to select which group members can start a Request via this Start Event object:
Select the Start Event object from the Process model in which to select the group that may start a Request.
Ensure that the Configuration panel displays. If not, show it. Panels to configure this object display.
Expand the Start Permissions panel if it is not presently expanded. The Type setting displays.
From the Type drop-down menu, select the Group option. The Group drop-down menu displays below the Start Permission drop-down menu.
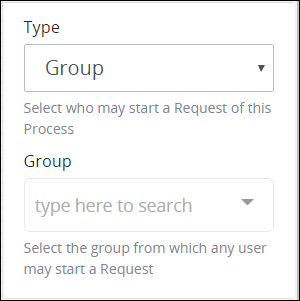
From the Group drop-down menu, select which group can start a Request via the Start Event object. Any member of that group may start a Request.
Web Entry Panel Settings
When a Start Event object is placed into a Process model, Web Entry settings for that object are disabled. Therefore, it must be configured for use.
The Web Entry configuration involves making the following decisions:
Who may start the Request: Decide to allow any person to start the Request via Web Entry anonymously or only the authenticated user(s) specified from the Start Permissions panel. In conjunction, decide the following based on who may start the Request:
Anonymously: Decide one or both of the following:
Password-protect access to the Web Entry.
Read query string parameters suffixed as JSON key name and value pairs to the Web Entry's base URL to be included in that Request's data. This setting is useful to suffix metadata for email campaigns. For example, if the Web Entry's base URL is
http://pm/webentry/7/node_24, add parameters to the URL that represent the JSON key name and value pairs to add to that Request such ashttp://pm/webentry/7/node_24?data1=123&data2=456. Parameters are interpreted as strings.
Authenticated user: Read query string parameters as described above.
Screen for the chat or Task: Select from which Screen the Request starter interacts with this Request. This may be one of the following types of Screens:
Conversational-type: The Request starter interacts in an automated chat-style correspondence by responding to questions and responses, and then either submits the chat or the Screen submits itself if it times out from interaction.
Form-type: The Request starter enters information into an interactive form, and then submits it to start the Request.
Completed action after Screen submission: Decide whether to display a separate Screen when the initial Screen submits or to route that person to a URL. If to display a Screen, select that Screen.
Embed the Web Entry into a third-party site: If embedding the Web Entry into a third-party site, decide one or both of the following:
Embed the Web Entry if using a Form-type Screen: Copy the JavaScript that contains the Web Entry URL, and then embed that JavaScript into your Web server's or blog's HTML header.
Embed the Web Entry if using a Conversational-type Screen: Copy the JavaScript that contains the Web Entry URL, configure options how the chat-style presentation displays in your site, and then embed that JavaScript into your Web server's or blog's HTML header.
Authenticated Web Entries in Iframes
Due to the default Laravel cookies, Web Entries cannot be embedded into a third-party site for authenticated users.
Select Who Can Start a Request via a Web Entry
Follow these steps to select who can start a Request via a Web Entry URL from this Start Event object:
Select the Start Event object from the Process model in which to select who may start a Request via a Web Entry URL.
Ensure that the Configuration panel displays. If not, show it. Panels to configure this object display.
Expand the Web Entry panel if it is not presently expanded. The Web Entry setting displays.
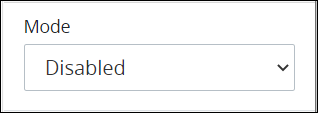
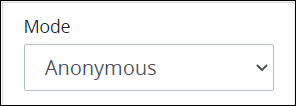
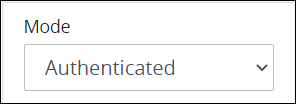
From the Mode drop-down menu, select one of the following options:
Disabled: Select the Disabled setting to disable Web Entry for this Start Event object when this object currently is configured to do so. This is the default setting.
Anonymous: Select the Anonymous option to allow any person who has access to the Web Entry's URL to start a Request. This person is not authenticated as a user. As a best practice, use Anonymous Web Entry URLs when an active session will not be used in the same Web browser. Note that if an anonymous person starts a Request and a later Start Event object or Manual Task object is assigned to the Request starter, ensure that the anonymous person enters an email address for that Task or chat-style interaction. Otherwise, that person cannot receive notifications for the subsequent Task. If this happens, the following Request error occurs: This process was started by an anonymous user so this task can not be assigned to the requester. Therefore, use this option cautiously.
If selecting the Anonymous option, consider selecting the Enable Password Protect setting below the Completed Action setting (described below) to require a password to access the Web Entry.
Authenticated: Select the Authenticated option to require an authenticated user or group member to start a Request via the Web Entry's URL. If an authenticated user or group member is already selected from the Start Permissions panel, then only those user(s) may start a Request via Web Entry from this Start Event object.
If selecting the Authenticated option, consider selecting the Allow query string data setting below the Completed Action setting (described below) to read JSON key name and value pairs from the Web Entry's base URL to be included in that Request's data.
From the Screen Associated drop-down menu, select the Screen that displays when the Web Entry URL is accessed. This drop-down menu displays only Conversational and Form types so the Request starter can interact with information in the Screen. This is a required setting.
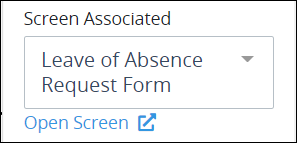
Optionally, click the Open Screen link to open the selected Screen in a separate Web browser window.
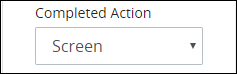
From the Completed Action drop-down menu, select one of the following options:
Screen: Select the Screen option to indicate that a Screen displays after the Requester submits the Screen selected from the Screen Associated drop-down menu described above. Screen is the default setting.
After the Screen option is selected, the Screen For Completed setting displays below the Completed Action option. From the Screen For Completed drop-down menu, select the Screen that displays after submitting the Screen selected from the Screen Associated drop-down menu. This drop-down menu displays only Display types to display a message to the request starter. This is a required setting.
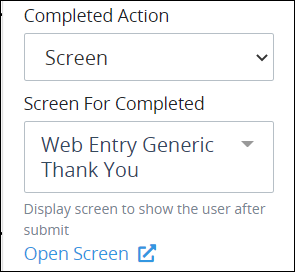
Optionally, click the Open Screen link to open the selected Screen in a separate Web browser window.
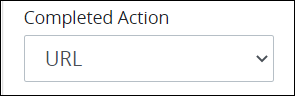
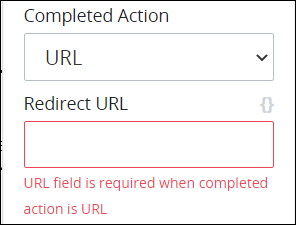
URL: Select the URL option to indicate that the Request starter is redirected to a URL after the Request starter submits the Screen selected from the Screen Associated drop-down menu.
After the URL option is selected, the Redirect URL setting display below the Completed Action option. From the Redirect URL setting, enter the URL to which the Request starter redirects after submitting the Screen selected from the Screen Associated drop-down menu, and then press Enter. The redirect URL supports mustache syntax to reference the value of a Request variable as the URL. This is a required setting.
If the Anonymous option is selected from the Mode setting, the Enable Password Protect setting displays.

Select the Enable Password Protect setting to require a password to access the Web Entry. If the Enable Password Project setting is selected, the Password Protect setting displays below it.

In the Password Protect setting, enter the password that the anonymous Request starter must enter to access the Web Entry.
Select the Allow query string data setting to read JSON key name and value pairs from the Web Entry's base URL to be included in that Request's data. This setting is useful to suffix metadata for email campaigns. For example, if the Web Entry's base URL is
http://pm/webentry/7/node_24, add parameters to the URL that represent the JSON key name and value pairs to add to that Request such ashttp://pm/webentry/7/node_24?data=123&data2=456. Parameters are interpreted as strings.The Web Entry URL displays the Web Entry URL from which the Request starter accesses the Web Entry. ProcessMaker Platform generates this URL using the following structure:
ProcessMaker Platform instance domain/webentry/Web Entry numerical instance/Identifier Value of this Start Event object. If necessary, click the Copy button below the Web Entry URL setting to copy the Web Entry URL so that it is available in your clipboard.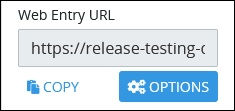
Optionally, customize the Web Entry URL using Request variable values as URL parameters. Reference these Request variable values using single curly brackets surrounding each Request variable name, such as
{variableName}, in the custom URL.Follow these steps to customize the Web Entry URL:
Click the Options button below the Web Entry URL setting. The URL Options screen displays. By default the Standard URL option is enabled, indicating that the automatically generated URL is used for this Web Entry.
Select the Custom URL setting. Settings enable below the Custom URL setting. The Web Entry URL Preview setting displays the currently customized Web Entry URL. If necessary, click the Copy button below the Web Entry URL Preview setting to copy this custom URL.
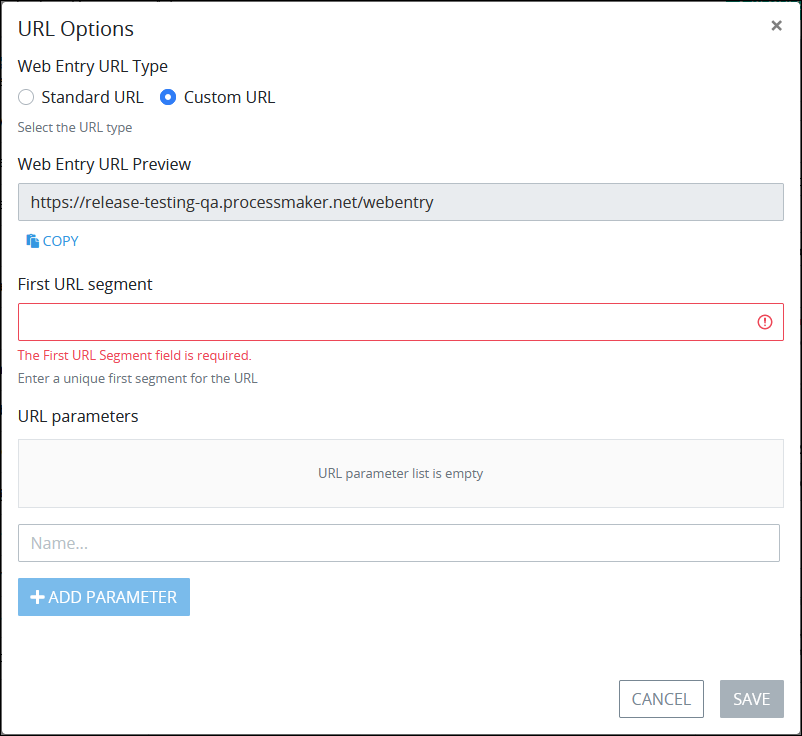
In the First URL segment setting, enter the base segment that displays after your base ProcessMaker Platform instance component of the Web Entry URL. A forward slash (
/) precedes the first URL segment. The first URL segment must be unique to other Web Entry URLs from other Start Event objects in this Process, and may only use alphanumeric characters. This setting is required. In the example below,baseurlis the first URL segment.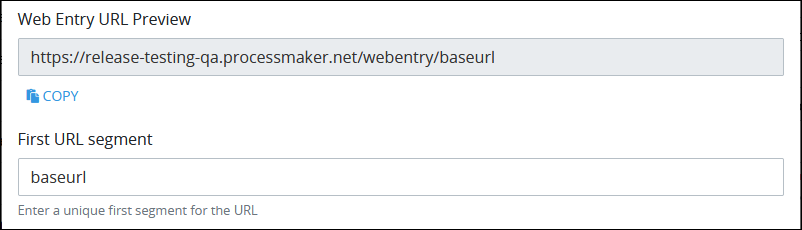
Use the URL parameters setting to enter custom parameters in the Web Entry URL based on Request variable name values. In the Name... setting, enter the Request variable name from which to reference its value for the Web Entry URL, and then click the Add Parameter button. That parameter displays within the URL parameters setting with single curly brackets (
{}) surrounding it. In the example below,cityis a Request variable name from which to reference its value for the custom Web Entry URL.
Enter as many parameters as necessary. Use the following icons to remove or sort the order of added URL parameters:
Delete: Click the Delete icon
 to delete the selected parameter from the Web Entry URL.
Sort order: Hold and drag the
 icon to sort the order of parameters in the Web Entry URL. Sort parameters in the URL parameters setting from top to bottom as they are to display left to right in the custom URL.
Click Save to exit the URL Options screen with the saved custom Web Entry URL settings.
The Embed Code setting displays the JavaScript that contains the Web Entry URL to embed into your Web server's or blog's HTML header. If necessary, click the Copy button below the Embed Code setting to copy the Web Entry URL so that it is available in your clipboard.
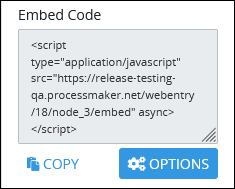
If this Start Event object's Web Entry uses a Conversational-type Screen to provide a chat-style interaction with the Request starter, optionally click the Options button below the Embed Code setting to configure how the chat box displays in the embedded container to which the Web Entry's JavaScript code is applied. When the Options button is clicked, the Embed Options screen displays.
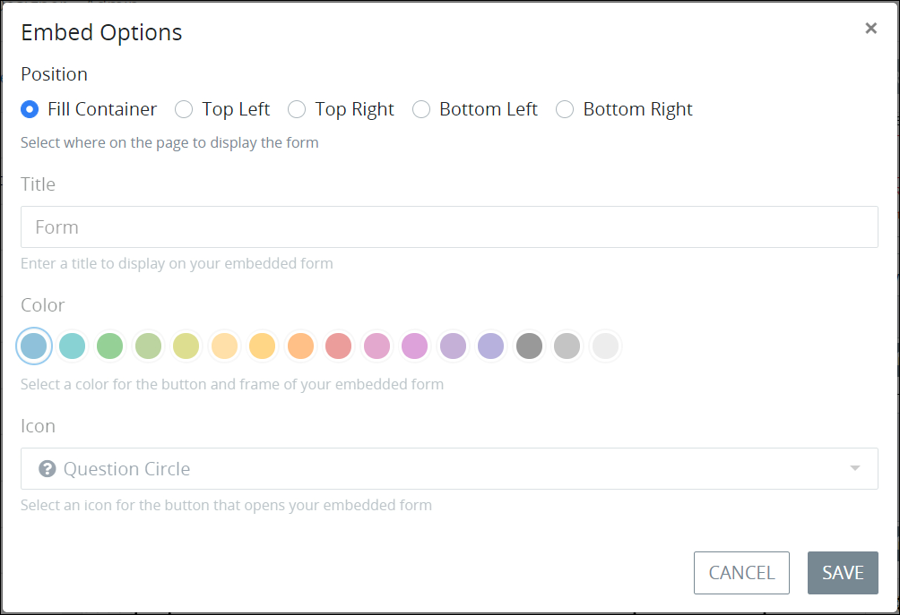
Configure how the chat box displays in the embedded container from the following options:
From the Position setting, select one of the following options:
Fill Container: The chat box displays the width of the container to which the Web Entry's JavaScript code is applied. This is the default setting. When the Fill Container setting is selected, all other settings in the Embed Options screen are disabled.
Top Left: The chat box displays in the top left corner of the container to which the Web Entry's JavaScript code was applied.
Top Right: The chat box displays in the top right corner of the container to which the Web Entry's JavaScript code was applied.
Bottom Left: The chat box displays in the bottom left corner of the container to which the Web Entry's JavaScript code was applied.
Bottom Right: The chat box displays in the bottom right corner of the container to which the Web Entry's JavaScript code was applied.
In the Title setting, enter the title that displays in the chat box. Form is the default setting. This setting does not apply when the Fill Container option is selected from the Position setting.
From the Color setting, select the color that displays for button to show the chat box and for the chat box frame itself. The left-most color option is the default. This setting does not apply when the Fill Container option is selected from the Position setting.
From the Icon setting, select an icon that displays to show the chat box. The Question Circle is the default option. This setting does not apply when the Fill Container option is selected from the Position setting.
Click Save.
The Start Event object's icon changes to indicate that this object uses Web Entry to trigger.

Start Event object configured to use Web Entry
Advanced Panel Settings
Edit the Node's Identifier Value
Process Modeler automatically assigns a unique value to each Process node added to a Process model. However, a node's identifier value can be changed if it is unique to all other nodes in the Process model, including the Process model's identifier value.
All identifier values for all nodes in the Process model must be unique.
Follow these steps to edit the identifier value for a Start Event object:
Select the Start Event object from the Process model in which to edit its identifier value.
Ensure that the Configuration panel displays. If not, show it. Panels to configure this object display.
Expand the Advanced panel if it is not presently expanded. The Node Identifier setting displays. This is a required setting.
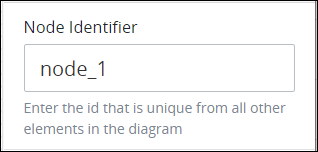
In the Node Identifier setting, edit the Start Event object's identifier to a unique value from all nodes in the Process model and then press Enter.