Add a Loop control that contains multiple controls that loop multiple times to allow entering multiple items, each of which requires multiple pieces of information.
Control Description
Use the Loop control to contain one or more Screen controls to duplicate the contained set of controls a specified number of times, thereby minimizing the design work to duplicate that set of controls in a Screen. Use the Loop control when the Request participant must enter multiple instances of the same set of information, each of which contain multiple components.
For example, use a Loop control when a university registrar's office must enter the following information for each new university student enrolling to the university:
Information | Screen Control |
|---|---|
First Name | Line Input control |
Last Name | Line Input control |
Age | Line Input control |
Sex | Select List control |
Housing Dormitory | Select List control |
During the in-progress Request, the Loop control displays the set of controls contained in the Loop control a specified number of times so that the university registrar's office may enter the same information for each new student from one Screen page. The Submit Button control to submit the Screen must be placed outside of the Loop control. Otherwise, a Submit Button control displays in each set of controls placed into the Loop control.
Do not place another Loop control inside the first Loop control.
Use the _parent JSON Key to Reference Request Data from Controls in a Loop Control
The Loop control uses a unique JSON key available to any control placed within the Loop control to reference Request data. Controls that are placed into a Loop control for duplication are within a container and may only access another control's data that is in the same Loop control. Use the _parent JSON key in a control's settings placed within a Loop control to reference Request data outside of that Loop control.
The
_parentJSON key only applies to controls placed into a Loop control or Record List control.
Consider the following examples:
A Line Input control placed within a Loop control requires a default value to display from another Line Input control used during that Request of which its Variable Name setting is
Line_Input_Data. From the Line Input control placed within the Loop control, enter the following into the Default Value setting:{{ _parent.Line_Input_Data }}.A Select List control placed within a Loop control requires its options to display from another Select List control's options used during that Request of which its Variable Name setting is
Select_List_Options. While configuring the Select List control placed within the Loop control to use Request data as its data source, enter the following into the Options Variable setting:_parent.Select_List_Options.
This control is only available for the following Screen types:
Display type
Form type
See Screen Types.
Watch the following product tour to learn how to use a Loop control.
For a documented example of using the Loop control, see Loop and File Upload Controls to Limit Uploaded Files.
Add the Control to a Screen
Permissions
Your user account or group membership must have the following permissions to design a Screen unless your user account has the Make this user a Super Admin setting selected:
Screens: Edit Screens
Screens: View Screens
See the Screens permissions or ask your Administrator for assistance.
Follow these steps to add this control to the Screen:
Create a new Form-type or Display-type Screen or edit an existing one.
From the Controls Menu on the left, expand the Content Fields category, and then locate the Loop icon
 .
.Drag and drop the control to the Screen Builder canvas. Existing controls in the Screen will adjust positioning based on where you drag the control.
Configure the Loop control. See Settings.
Drag and place the Screen control(s) into the Loop control that you intend the Request participant to enter information each time the Loop control repeats. As a best practice, do not do the following:
Do not place a Submit Button control inside the Loop control.
Do not place another Loop control inside the first Loop control.
See Control Description for an example.
Configure each control placed into the Loop control. If a control placed into the Loop control requires to use Request data, use the
parentJSON key. See Use theparentJSON Key to Reference Request Data from Controls in a Loop Control.Validate that the control is configured correctly. See Validate Your Screen.
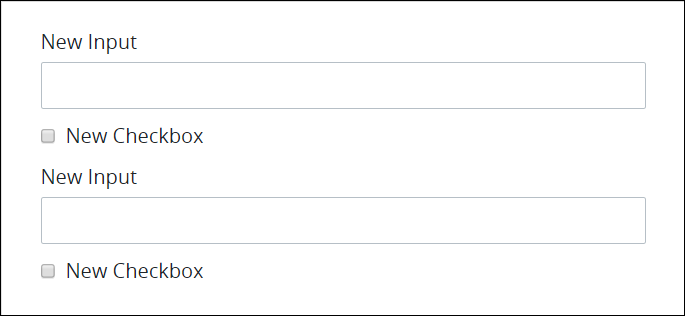
Below is a Loop control containing two controls, repeating twice.
Settings
The Loop control has the following configurable settings in the Properties Panel:
Configuration Panel Settings
Expand the Configuration panel from the Properties Panel on the right to configure the following properties:
Data Source
Make note of best practices when configuring a Loop control that contains a Select List control. If the Select List control references a JSON array from a data source, configure the Select List control to reference the JSON object containing the JSON array and not its values. Then duplicate the JSON array in the Loop control. See Duplicate the JSON Array in a Select List Control Used in a Loop Control.
This setting is not available in Display-type Screens since the content in these Screens is not editable.
Select whether to create a new array of JSON objects designed from Screen controls within the Loop control or to reference an existing JSON array of objects:
New array of JSON objects designed from Screen controls
Select the New Array of Objects option from the Data Source setting to place Screen controls into the Loop control while in Design mode.

When this option is selected, the Default Loop Count setting displays to indicate how many times to repeat the control(s) that the Loop control contains. See a design example.
Existing JSON array of objects
Select the Existing Array option from the Data Source setting to reference a JSON array from the Request data that the Loop control contains.
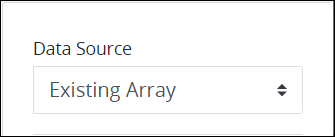
When this option is selected the Default Loop Count setting does not display since the JSON array specifies how many times to repeat the control(s) that the Loop control contains.
Variable Name
Edit the default Variable Name setting value for this control if necessary. The Variable Name setting value represents data in this control during Requests. Ensure that the Variable Name setting value is a unique name from other controls in this Screen and contains at least one letter. This is a required setting.
Use the Variable Name setting value in the following ways:
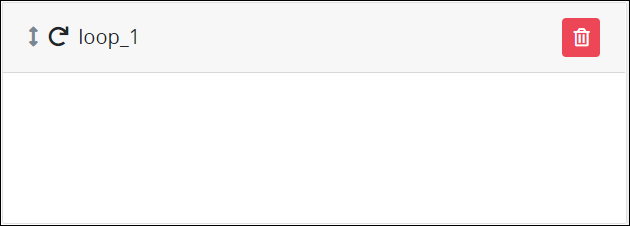
Reference this control by its Variable Name setting's value. The Data Preview panel in Preview mode corresponds with the Loop control's Variable Name value. In the example below,
LoopControlis the Variable Name setting's value.
Reference this control's value in a different Screen Builder control. To do so, use mustache syntax and reference this control's Variable Name value in the target control. Example:
{{ LoopControl }}.Reference this value in Visibility Rule setting expressions.
See best practices when editing a Request variable name.
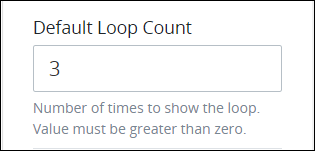
Default Loop Count
This setting is not available in Display-type Screens since the content in these Screens is not editable.
Enter the number of times to repeat the control(s) that the Loop control contains. 3 is the default value.
This setting is not available in Display-type Screens since the content in these Screens is not editable.
Select to allow additional loops during in-progress Requests if necessary.
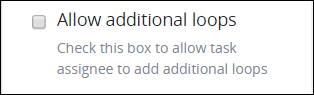
If this setting is selected, then the Add Loop icon![]() displays below the looped container of controls that allows the Request participant to add a new loop for the Task. See a design example.
displays below the looped container of controls that allows the Request participant to add a new loop for the Task. See a design example.
Advanced Panel Settings
Expand the Advanced panel from the Properties Panel on the right to configure the following properties:
Specify an expression that indicates the condition(s) under which this control displays. See Expression Syntax Components. If this setting does not have an expression, then this control displays by default.
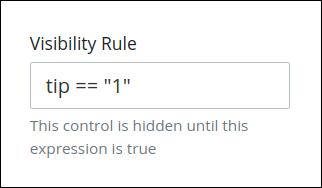
For example, this control displays if the variable value tip is 1. For a detailed example of the Visibility Rule setting, see Show or Hide Controls Based on Button Selection.
Note the following regarding how to use visibility rules:
To make this control hidden until another control contains a value, enter the Variable Name setting value of that control to this control's Visibility Rule setting.
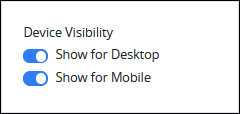
Select on which device types this control displays:
Desktop: The control displays only on desktop devices. Enable the Show for Desktop toggle key.
Mobile: The control displays only on mobile devices. Enable the Show for Mobile toggle key.
Both: The control displays on both desktop and mobile devices. Both toggle keys are enabled by default.
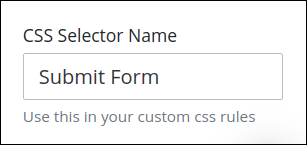
Enter the value to represent this control in custom CSS syntax when in Custom CSS mode. As a best practice, use the same CSS Selector Name value on different controls of the same type to apply the same custom CSS style to all those controls.
Then, use this name in the Custom CSS feature to apply CSS styling to this control as follows:
[selector='Submit Form'] {
    color: blueviolet;
}
See the following best practices regarding custom CSS in Screens: