Use Screen Builder to design Screens for your Processes. Screens are designed independent of Processes: any Screen can be used in any Process, even those that you did not design. Screens can be exported and then shared with other Process designers so they may import them for their Processes.
While Screen Builder has an easy-to-use drag-and-place design interface to edit and preview Screens, ProcessMaker Platform represents them as JSON data models. You can view the JSON data model while in Preview mode.
You can use four types of Screens: Form, Display, Email, and Conversational. For details on these types, see Screen Types.
Screens are composed of controls. Use controls to provide your Screen with specific functionality. See Control Descriptions and Inspector Settings.
Below are a few examples of these controls:
Display text.
Provide a group of radio buttons to allow the Request participant to select an option.
Provide a drop-down menu to allow the Request participant to approve or reject a Request.
Provide a text area where the Request participant can enter text.
Provide a date control where the Request participant can select a date.
Screen Builder Modes
The Screen Builder can be used in one of the following modes:
Design Mode
Use Design mode to design your Screen. Design mode is the default mode when a Screen is created or edited. While in Design mode, use the Design setting section to configure controls that you place into your Screen Builder canvas.
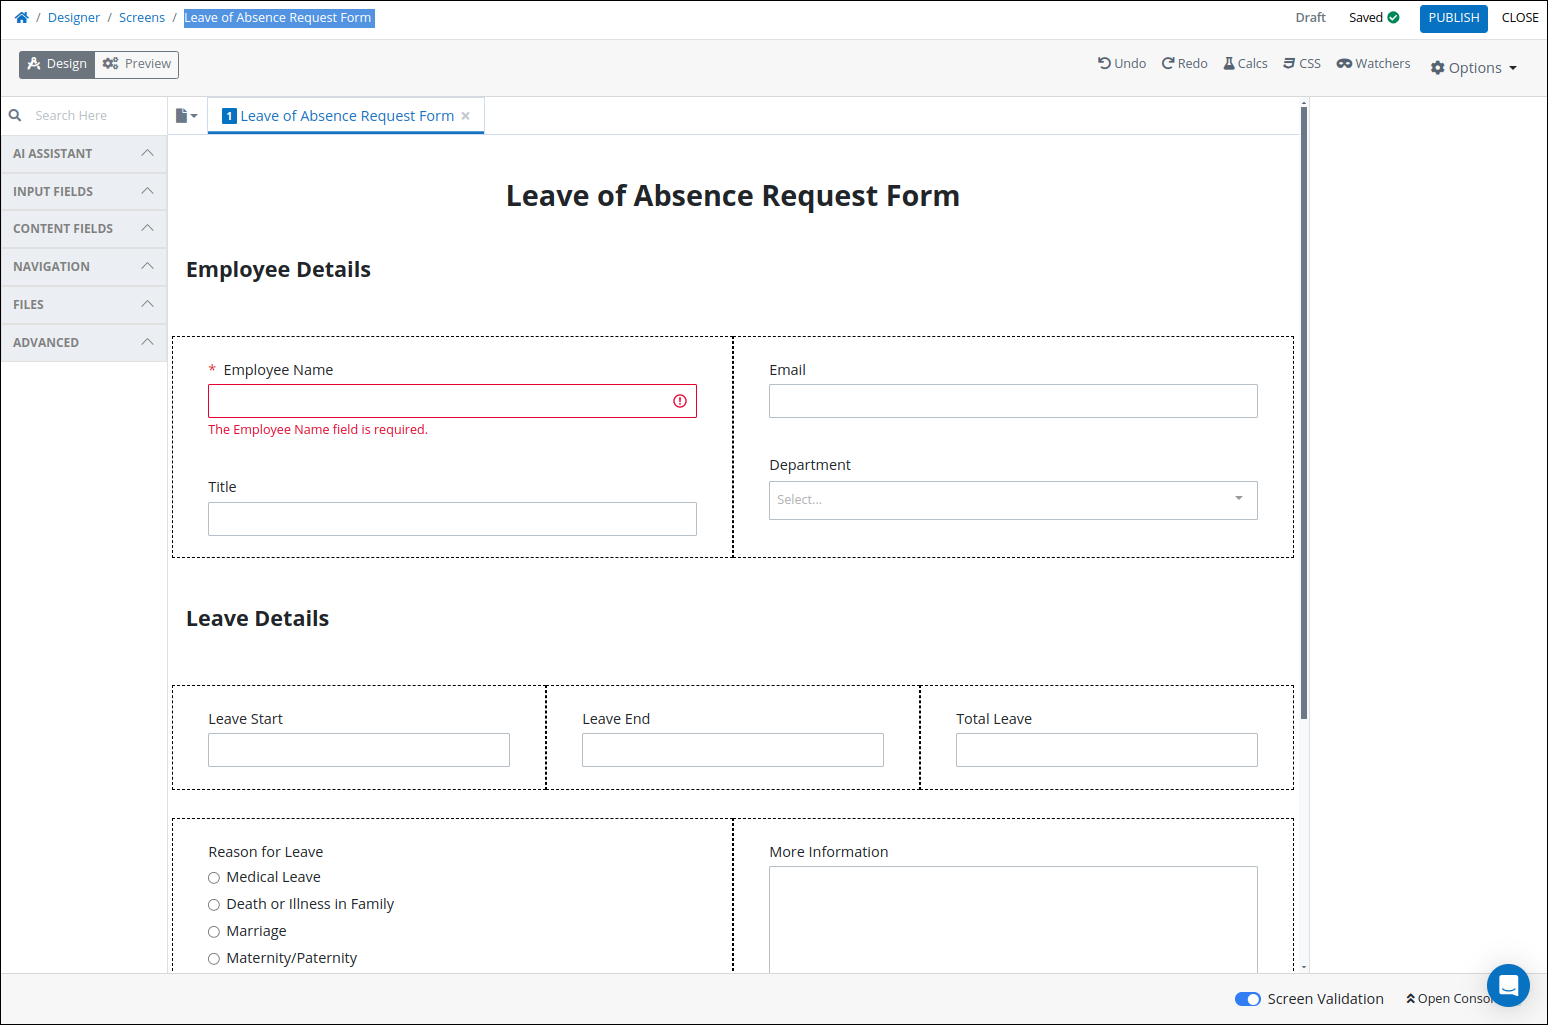
Screen Builder in Design mode
Learn How to Configure Controls
See Control Descriptions and Inspector Settings.
Learn How to Create a Multi-Page Screen
Preview Mode
Use Preview mode to view and test your Screen. Test how your controls function as a form user would experience your Screen during a Request.
Furthermore, test how the Screen's controls you configured in Design mode interact with JSON data models. ProcessMaker Platform represents Screens as JSON data models. You can view any JSON data model in Preview mode to test how a Process's JSON data model or another Screen's data model interacts with your Screen. Viewing the JSON data model can be helpful to see how values are entered into the Screen as well as to use that JSON data model in your Scripts.
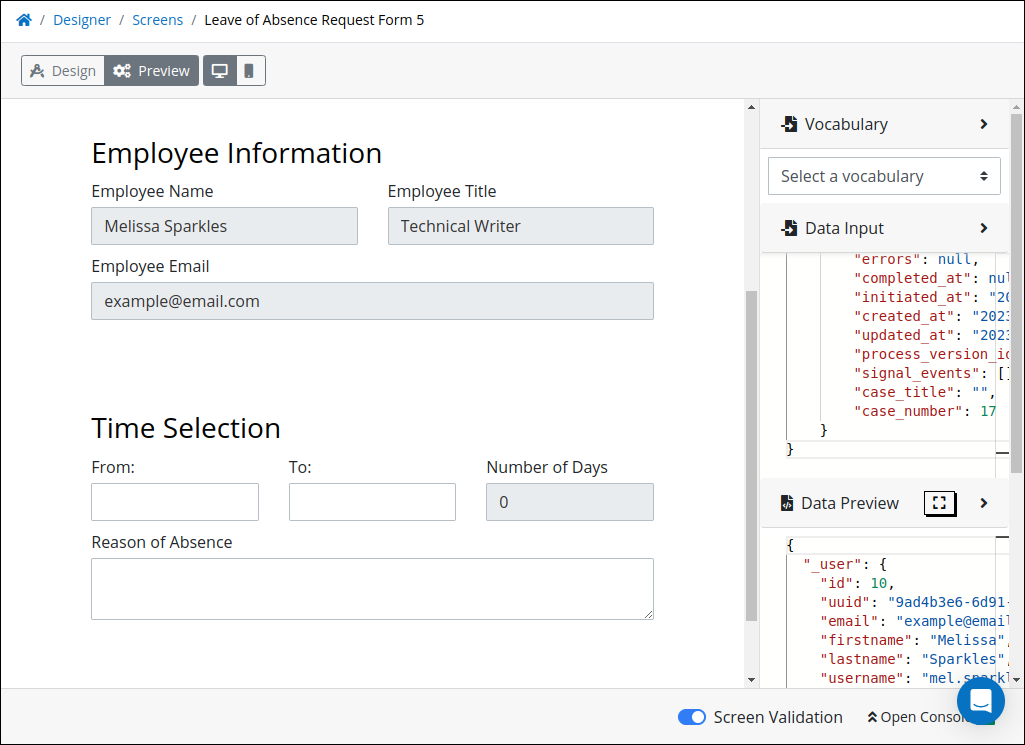
Screen Builder in Preview mode
Calculated Properties Mode
Use Calculated Properties mode to add Calculated Properties to that Screen. A Calculated Property is any value, mathematical calculation, or formula. A Calculated Property's determines its value either through a mathematical formula or valid JavaScript, and may include values from Screen control values and Magic Variables during that Request. Likewise, a Calculated Property's value can display in a Screen control during that Request. Calculated Properties can only be used within and only affect the Screen to which the Calculated Property is defined.

Configure the Calculated Properties for a Screen in Calculated Properties mode
Custom CSS
Use the Custom CSS mode to add custom CSS styles to a Screen
Watchers Mode
Use Watchers mode to add Watchers to that Screen. During a Request or while previewing the Screen, a Watcher monitors when the value of a control in that Screen changes or receives a value, acts upon a Data Connector or runs a Script using that control's value, and then outputs its result to another Screen control.
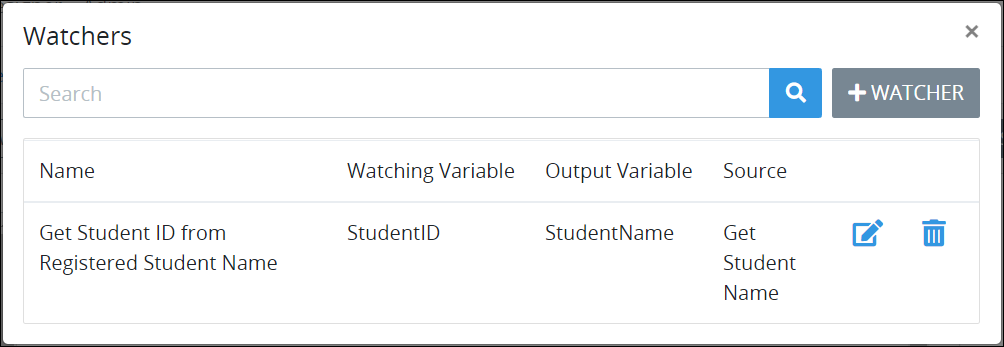
A Script runs when student ID is entered, then returns student name, in Watchers mode
See Manage Watchers.
Using the Screen Builder
Permissions
Your user account or group membership must have the following permissions to design a Screen unless your user account has the Make this user a Super Admin setting selected:
Screens: Edit Screens
Screens: View Screens
See the Screens permissions or ask your Administrator for assistance.
Add a Control to a Screen
Create a Screen or edit a Screen in which to add the control.
Expand a category in the Controls Menu on the left and locate a control to add.
Click-and-drag the control into the Screen Builder canvas. Existing controls on the Screen Builder canvas adjust positioning based on where you drag the control.
Drop the control into the Screen Builder canvas where you want the control to display.
View the Screen Controls section for detailed information on all available screen controls.
Move a Control on a Screen
After adding a control to a Screen page, you may move it to another location on that page such that it is above or below other controls placed on that page. A control cannot be moved to another Screen page.
Follow these steps to move a control to another location on that Screen page:
Place your cursor anywhere on the control not displaying the Duplicate Control
 or Delete Control
 buttons.
Hold your cursor, then drag the control above or below other controls on that Screen page. Screen Builder previews where the control would display on the page based on how you position the control above or below other controls. If the control cannot be placed in a location because your cursor is above an existing control or too far to the left or right of the page, the
 icon displays in the preview.
Place the control at the location on the page you want it. The other control(s) on the page automatically adjust position.
Copy a Control with its Settings
Copying a control also copies the current settings of that control. The copied control displays below other controls placed on that Screen page.
Follow these steps to copy a control:
Select the control to be copied.
Click the Duplicate Control button
. The control copies with its current settings, and then displays below other controls placed on that page.
Delete a Control from a Screen
Deleting a control also deletes configuration for that control. If you add another control, it will have default settings.
Follow these steps to delete a control from a Screen page:
Select the control to be deleted.
Click the Delete button
. The control deletes. Other controls on that Screen page adjust their locations automatically.
Undo and Redo Changes in Your Screen
Screen Builder displays the Undo![]() and Redo
and Redo![]() buttons in the upper right corner of the Screen Builder canvas. The buttons are disabled when a Screen is initially created or opened until a change in the Screen is made.
buttons in the upper right corner of the Screen Builder canvas. The buttons are disabled when a Screen is initially created or opened until a change in the Screen is made.
Follow these steps to use the Undo button in Screen Builder:
Create a new Screen or click the Edit Screen icon
 to edit the selected Screen. Screen Builder displays.
Make a change in the Screen or any of its controls' settings. The Undo/Redo buttons are enabled.
Click the Undo button to undo the most recent change if necessary. Continue using the Undo button as many times as necessary or until the Screen's state when the Screen was created/opened.
Click the Redo button to redo any revision undone by the Undo button up to the current state.
Discard Changes to Your Screen
Screen Builder automatically saves your Screen every five (5) seconds when changes are made to any of the configuration panels. Regardless of whether you publish your Screen prior to leaving Screen Builder, the next time you edit that Screen, the changes since its last publication remain intact.
If necessary, discard the changes to your Screen since its last publication.
Follow these steps to discard changes to your Screen since its last publication:
While in Screen Builder, click the ellipses menu, and then select Discard Draft.

Click the Discard button. Screen Builder discards the changes since last starting to edit that Screen, and then closes. The Scripts page displays.
Close Screen Builder with Your Saved Changes
Since Screen Builder saves changes to your Screen automatically when changes are made to any of the configuration panels, it is not necessary to manually save your changes. However, you may close Screen Builder without publishing your changes, but keep all your changes intact.
While in Screen Builder, click the Close button. Screen Builder closes with your saved changes. The Screens page displays.