Create a New Screen
Permissions
Your user account or group membership must have the following permissions to create a Screen unless your user account has the Make this user a Super Admin setting selected:
Screens: View Screens
Screens: Create Screens
See the Screens permissions or ask your Administrator for assistance.
Best Practices
See Screen Design Best Practices before creating a Screen.
Follow these steps to create a new Screen:
View your Screens. The Screens page displays.
Click the +Screen button. The New Screen screen displays.
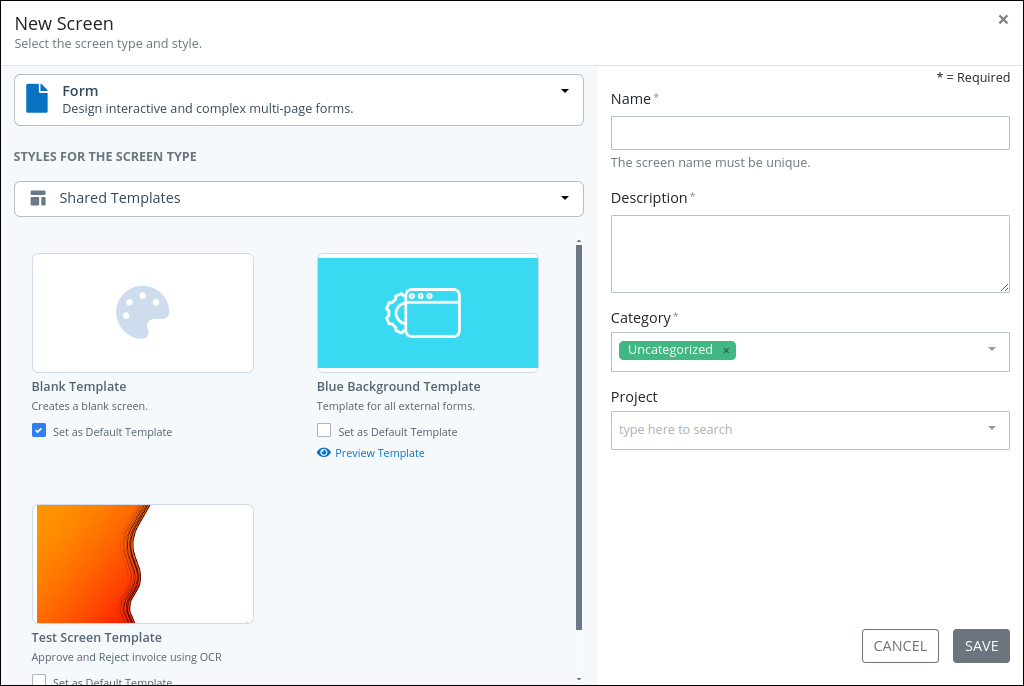
Choose one of the following options to create a blank screen or create a screen using a template.
From the Screen Type drop-down menu in the first section, select one of the following Screen types:
Conversational: Use the Conversational type to design functional rule-based modern chat style experiences. For more information, see Conversational Screen-type.
Display: Use the Display type to display information or allow Request participants to download files. The Display type has limited functionality compared the Form type. For more information, see Display Screen-type.
Email: Use the Email type to compose the email body for email messages to be used with the Send Email connector. Note that the Send Email connector must be installed for this option to display. For more information, see Send Email Connector and Email Screen-type.
Form: Use the Form type to design interactive and complex forms. For more information, see Form Screen-type. This is the default value.
From the Styles For The Screen Type setting, select to use:
Shared Templates: Templates globally shared in your organization.
My Templates: Templates accessible and created by you.
Optionally, you can select the Set as Default Template option to designate a template as the default for the selected screen type.
In the Name setting, enter a unique name for the Screen. Screen names can only consist of alphanumeric characters, apostrophes ('), and spaces. This is a required setting.
Enter in the Description setting a description for the Screen. This is a required setting.
From the Category drop-down menu, select one or more Screen Categories to associate with this Screen. To remove a currently selected Screen Category, click the
 icon next to the selection. This is a required setting.
From the Project drop-down menu, optionally select the Project(s) for this screen. This setting only displays Projects in which you are a member. To remove a Project that is currently selected, click the
icon next to that selection..Click Save. Screens Builder displays the new Screen in Design mode.
To continue building your screen, see Screen Builder.
From the Screen Type drop-down menu in the first section, select one of the following Screen types:
Conversational: Use the Conversational type to design functional rule-based modern chat style experiences. For more information, see Conversational Screen-type.
Display: Use the Display type to display information or allow Request participants to download files. The Display type has limited functionality compared the Form type. For more information, see Display Screen-type.
Email: Use the Email type to compose the email body for email messages to be used with the Send Email connector. Note that the Send Email connector must be installed for this option to display. For more information, see Send Email Connector and Email Screen-type.
Form: Use the Form type to design interactive and complex forms. For more information, see Form Screen-type. This is the default value.
In the Styles For The Screen Type section, select the Blank Template tile. By default, this option is selected.
In the Name setting, enter a unique name for the Screen. Screen names can only consist of alphanumeric characters, apostrophes ('), and spaces. This is a required setting.
Enter in the Description setting a description for the Screen. This is a required setting.
From the Category drop-down menu, select one or more Screen Categories to associate with this Screen. To remove a currently selected Screen Category, click the
icon next to the selection. This is a required setting.From the Project drop-down menu, optionally select the Project(s) for this screen. This setting only displays Projects in which you are a member. To remove a Project that is currently selected, click the
icon next to that selection.Click Save. Screens Builder displays the new Screen in Design mode.
To continue building your screen, see Screen Builder.