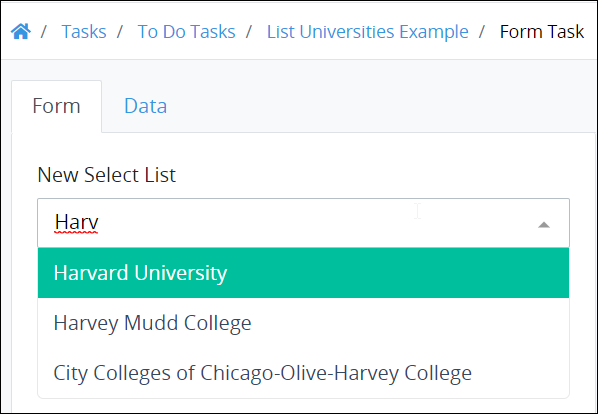
Follow an example that uses a Data Connector to get a list of worldwide universities that become the options in a Select List control within a Screen.
Overview
Intended audience: Process designers, Web designers, graphic designers, software developers, coding engineers
Tags: Data Connector; Select List control; higher education; Screen design
This example demonstrates how a Select List control in a Screen can display the names of major universities around the world as its options in a drop-down menu. The options in this Select List control come from a Data Connector that calls a third-party Application Program Interface (API) when the Screen containing the Select List control opens. Click in the Select List control's drop-down menu to select an option or start typing into the control to filter those university names that match the text entered into the control.
Note that after creating this Data Connector, it may be used for any ProcessMaker Platform asset that can use a Data Connector. It is not limited to being used with a Select List control.
Click the video below to watch a demonstration of this example.
Intended audience: Process designers, Web designers, graphic designers, software developers, coding engineers
Viewing time: 9 minutes; contains narration
Note: The video demonstrates how to configure the Data Connector using obsolete settings. The written form of this example documents how to configure the Data Connector using current settings.
This example contains the following procedures in this order:
Create the Data Connector: Create the Data Connector that calls the API containing the list of universities. This is a public API that has been made available for demonstration purposes, so it does not require host authentication. The list of universities is in a JSON object. Though the host provides the domains, names, and countries of origin for each university in its list, this example references only the university name. The host provides public information about this API. See Create the Data Connector.
Configure the Select List control: After the Data Connector is created, create a Screen that contains a Select List control. Configure the Select List control to use this Data Connector as its data source to get the list of universities as the Select List control's options. See Configure the Select List Control.
Create the Process model: Create the Process model to include a Form Task element that references the Screen containing the Select List control. See Create the Process Model.
Start a Request: Start a Request for the Process as designed in the Process model for this example. See Start a Request for the Example Process.
Create the Data Connector
Permissions
Your user account or group membership must have the following permissions to create a new Data Connector unless your user account has the Make this user a Super Admin setting selected:
Data Connectors: Create Data Connectors
Data Connectors: View Data Connectors
See the Data Connectors permissions or ask your Administrator for assistance.
Follow these steps to create the Data Connector as described in this example:
Log on to ProcessMaker Platform.
Click the Designer option from the top menu. The Processes page displays.
Click the Data Connectors icon
 from the left sidebar. The Data Connectors tab displays all Data Connectors in the Data Connectors page.
Verify the Data Connector Category exists in which to assign this Data Connector. If this Category does not exist, see Create a New Data Connector Category.
Click the +Data Connector button. The Create Data Connector screen displays.
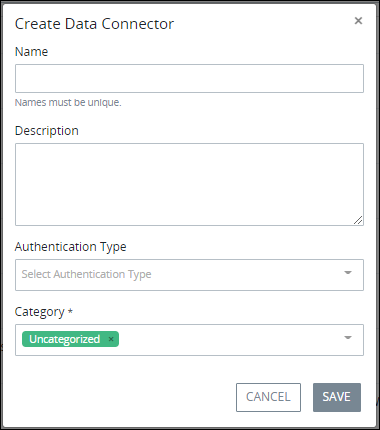
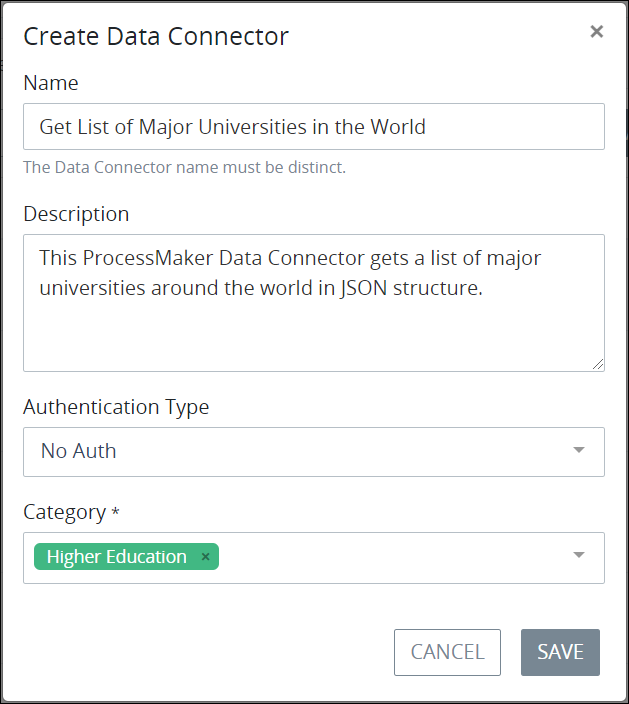
In the Name setting, enter the name of the Data Connector. This example uses the name
Get List of Major Universities in the World.In the Description setting, enter a description of this Data Connector. This example uses the description:
This ProcessMaker Platform Data Connector gets a list of major universities around the world in JSON structure.From the Authentication Type drop-down menu, select the No Auth option. This example uses this option because the host does not require authentication from its publicly accessible API. Note that the video of this example uses Basic Auth, which is not necessary for this example since the data source is publicly accessible.
From the Category drop-down menu, select the Data Connector Category to assign this Data Connector. This example uses the following settings.
Click Save. The Data Connector is created and the Resources tab displays.
Click the +Resources button. The Create Resource screen displays.
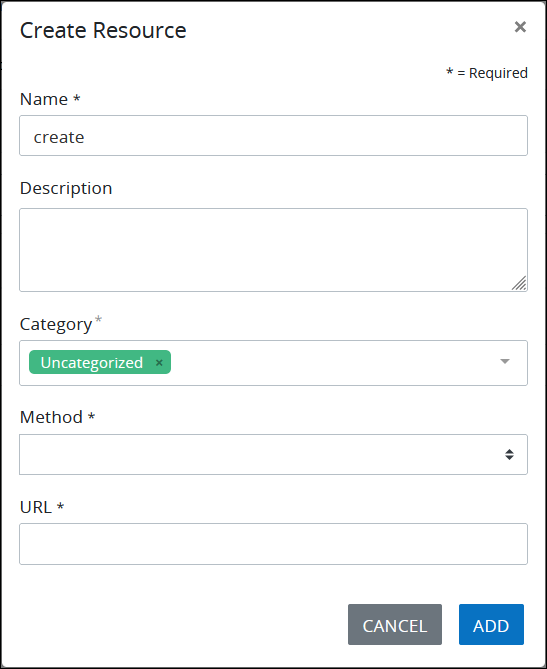
In the Name setting, optionally edit the purpose for this Resource. The value the Name setting displays from the ProcessMaker Platform asset when configuring the data source from that asset. In this example, this setting value displays from the Select List control to select this Resource to get the list of universities. Therefore, provide a concise but relevant purpose for this Resource so other Process designers understand its function. This example uses
list universitiesfor this setting.In the Description setting, enter a description of this Resource. This example uses the following description:
This Resource gets a JSON list of worldwide universities.From the Method drop-down menu, select the GET option. The GET method reads data.
In the URL setting, enter the following URL for this example:
http://universities.hipolabs.com/search?. This URL is truncated from the host's documented example how to search its public API.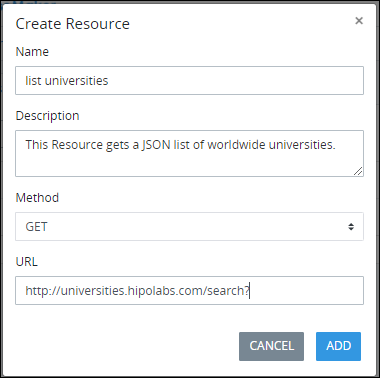
Click Add. The new Resource displays in the Configuration tab.

Click the Send button. If configured correctly, the Response Body tab displays the Resource response.
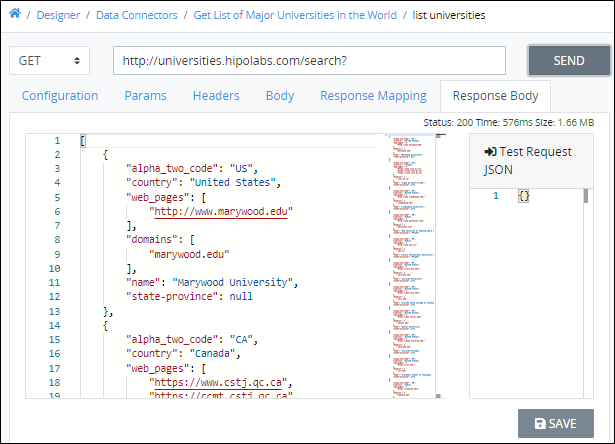
Notice which element in each JSON object within the API endpoint response contains the name of the university. Look at the first JSON object that is the list of universities:
{"domains": ["marywood.edu"],"country": "United States","web_pages": ["http://www.marywood.edu"],"name": "Marywood University","state-province": null,"alpha_two_code": "PA"},The
nameelement contains the name of each university in this JSON object. Make note of the element's name that contains relevant data from a data source, as the ProcessMaker Platform asset requires this element name when configuring which data that asset requires from the Data Connector's Resource response. In this example, the Screen containing the Select List control is the ProcessMaker Platform asset.Click Save to save the Resource. The Data Connector is configured for this example.
Configure the Select List Control
Permissions Required
Your user account or group membership must have the following permissions to configure a Select List control unless your user account has the Make this user a Super Admin setting selected:
Screens: Edit Screens
Screens: View Screens
See the Screens permissions or ask your Administrator for assistance.
Follow these steps to configure the Select List control as described in this example:
Create a Screen for this example. This example uses the Form type and the name
Data Connector Example Using a Select List Controlfor the Screen.Most settings for the Select List control are outside the scope of this example. The default settings can be used for required settings, and optional settings do not need to be configured.
Expand the Data Source panel.
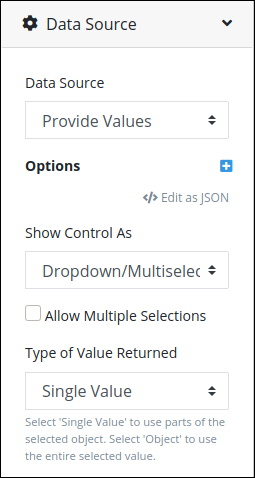
From the Data Source drop-down menu, select the Data Connector option. Settings in the Data Source panel display to configure which Data Connector and Resource this control uses as its data source.
In the Options Variable setting, keep the default
responsevalue. This setting represents the name of the JSON object that contains the response from the Data Connector's Resource. In this example,responsewill contain the JSON array of universities.From the Type of Value Returned drop-down menu, select the Single Value option because this example requires only one element value from the JSON response.
In the Value setting, enter the JSON element name that contains the value to use as the Select List option in each JSON object of the Resource response. In this example, enter
namebecause thenameJSON element contains the name of each university in each JSON object.In the Content setting enter
namefor the same reason as above.From the Data Connector drop-down menu, select the Data Connector the Select List control uses to access the data source. For this example, select Get List of Major Universities in the World.
From the End Point drop-down menu, select which Resource in the selected Data Connector to access the data source. For this example, select list universities.
Add a Submit Button control to the Screen page so that the Screen can be submitted.
In the Submit Button control, enter a value for the Variable Name setting. This example uses
submitfor the Variable Name setting value.Save your Screen. The Select List control is configured for this example.
Create the Process Model
Permissions
Your user account or group membership must have the following permissions to create a new Process unless your user account has the Make this user a Super Admin setting selected:
Processes: Create Processes
Processes: View Processes
See the Processes permissions or ask your Administrator for assistance.
Follow these steps to create the Process model as described in this example:
Create a new Process. This example uses the Process name
List Universities Example.Add the following BPMN elements to the Process model in that order, and then connect them with Sequence Flow elements:
From the Form Task element, select the Screen for this example. This example uses the Screen named
Data Connector Example Using a Select List Control.Save your Process model. None of the other Process model settings are in the scope of this example. The Process is configured for this example.
Start a Request for the Example Process
The example is ready to demonstrate. To demonstrate this example, start a Request of this Process.
Follow these steps to start a Request of this Process as described in this example:
Start a Request of this Process. Remember that the Process name is
List Universities Example.Open the Form Task from your To Do Tasks. The Process model is configured by default that the Request starter is the Task assignee. After opening the Form Task, the Screen with the Select List control in the example displays.
Click the Select List control. The list of universities displays in the same order as they are listed in the host's JSON array. When the Screen opens for the Form Task, the Select List control uses the Data Connector to call the host's Application Program Interface (API) and get the complete JSON array, but only display the
nameelement value for each JSON object in that array.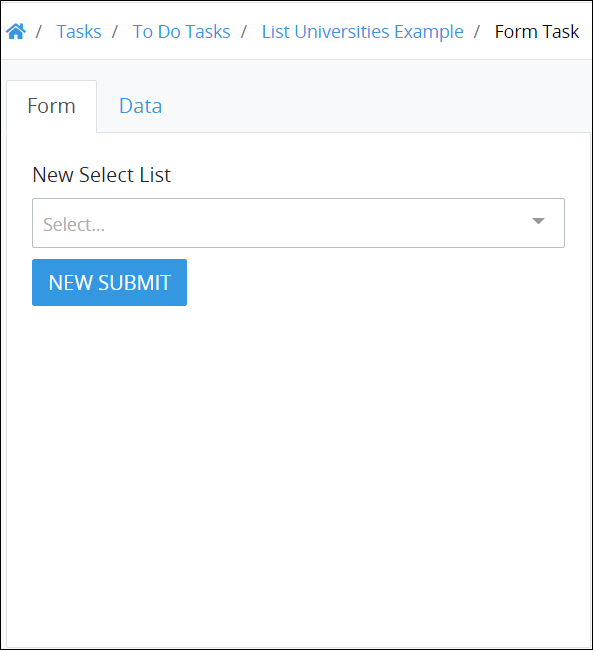
Type in the Select List control to filter the list of universities that display for selection in the control. For example, start to type
Harvardto select Harvard University.
