The Details tab for a task displays general information about the task and enables participants to perform the following actions:
Use Smart Inbox features. For more information see Smart Inbox.
View status of a task.
Reassign a task.
Add comments to a task.
View Task Details
Use the open menu icon ![]() to open the collapsible panel on the right of an open task and view the Details tab.
to open the collapsible panel on the right of an open task and view the Details tab.

The following details are displayed for an in-progress Task:
Auto-Save Notification: As participants fill out a form, a draft is automatically saved every five seconds to prevent data loss. The Details tab displays the date and time each draft is saved.
Smart Inbox actions (available in Pro and Enterprise versions).
Status: The current status of the task is displayed as either Open, or Overdue for tasks that are past their due date.
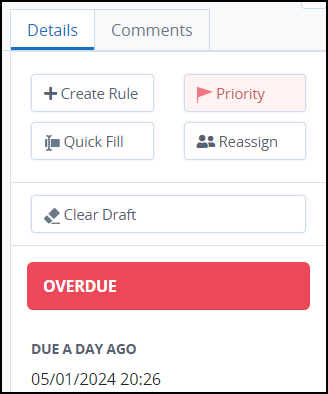
Due: The Due field displays the date and time the assigned Task is due.
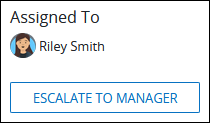
Assigned To: The Assigned To field displays the avatar and full name of the assignee.
The Escalate to Manager button may display below the Task assignee in the Assigned To field. The Task assignee may click the Escalate to Manager button to assign this Task to the manager.
The Escalate to Manager button is available for a Task assignee if:
The Assignee Manager Escalation setting is enabled for the Form Task element or Manual Task element associated with that Task. The Process Designer can configure this when designing the Process.
The Task assignee's user account must be configured with either a direct manager or a group manager. If that Task assignee has both, the Task escalates to the direct manager. The Administrator can configure managers for all users and groups.
Assigned: The date and time the Task was assigned.
The Reassign button displays if the Task can be reassigned.
Request: The Request field displays the request number and Process name. Click the Process name to view the Request details.
Requested By: The Requested By field displays the avatar and full name of the person who started the Request. Hover your cursor over a user's avatar to view that person's full name.
If the assigned Task is completed, the Details tab displays the status as Completed.
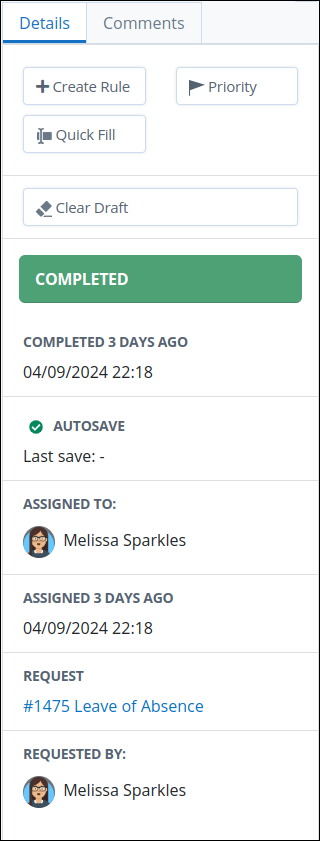
The following details are shown for a completed Task:
Completed on: The Completed on field displays the date and time the Task was completed.
Assigned To: The Assigned To field displays the avatar and full name of the person assigned the Task.
Assigned: The date and time the Task was assigned displays below the Assigned To field. The time zone setting to display the time is according to the ProcessMaker Platform instance unless your user profile's Time zone setting is specified.
Request: The Request field displays the Process name associated with the Request preceded by its numerical iteration. Click the Process name to view the Request summary.
Requested By: The Requested By field displays the avatar and full name of the Request starter. Hover your cursor over a user's avatar to view that person's full name.
Reassign a Task
If the Task has been configured to allow the Task assignee to reassign the Task to another user, the Reassign button displays in the Task summary. For more information, see Configuring Assignment Rules.
Note that to reassign a Task, a user must have View Users and View Groups permissions to view the available users and groups. Contact your ProcessMaker Administrator to provide your user account with these permissions if necessary.
Follow these steps to reassign a Task to another user:
Click the Reassign button. The Reassign to screen displays.
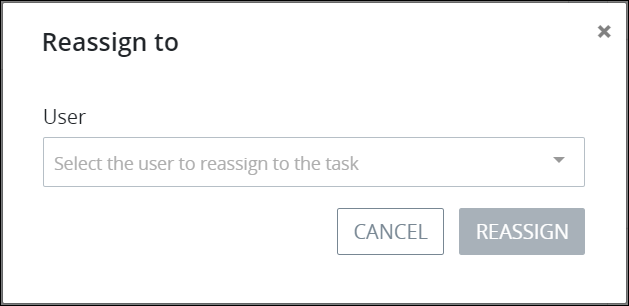
Select the user to whom the task will be reassigned.
Click Reassign.
If the Task is not configured to allow reassignment, the Reassign button will not be displayed. Consequently, the Task assignee will not have the option to reassign the Task to another user. For more information, see Configuring Assignment Rules.
View Comments in a Task
The Comments tab allows Task participants to solicit and provide feedback on business decisions:
Post Task comments: Post comments to the currently displayed Task. All participants who view that Task can see the comments. Write and preview comments using rich text features including but not limited to text styles, images, hyperlinks, and lists. The commenting editor uses Markdown syntax.
Tag users in a Task comment: Precede a user's username with the
@symbol to invite that user into the comment thread.

After sending the comment with tagged users, those users receive a notification of the comment, and then may select that notification to view the comment. Selecting a notification for a tagged comment opens the Task that contains the tagged comment. If the tagged user is not a Task participant prior to being tagged, that user becomes a Task participant only for that Task.
Follow these steps to view comments posted on a Task:
Hover over your task list to view the
 dropdown menu.
Click Open Task to view the form for this task.
Use the open menu icon
 on the right to open the collapsible Details panel.
 Click the Comments tab. Task comments display in chronological order. If necessary, click Refresh at the bottom menu to update new comments.
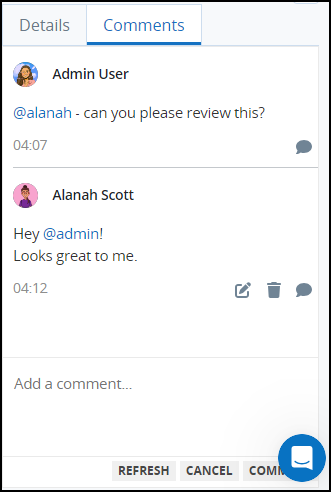
Each posted comment contains the following information:
Avatar and Name: The user's avatar identifies the sender of each comment. Next to the user's avatar is the person's full name. Click the user's avatar to go to the User Information window.
Comment: The posted comment displays below the preceding information. The comment may contain tagged users. If a comment is a reply, the source comment displays blue highlighted above the comment.
Datetime: The datetime displays when the comment was posted. The time zone setting to display the time is according to the ProcessMaker Platform instance unless your user profile's Time zone setting is specified.
Edit: If you are the owner of the comment, click the Edit icon
 to edit the comment.
 Delete: If you are the owner of the comment, click the Delete icon
 to delete the comment.
 Reply: Click the Reply icon
 to reply the comment. See Post or Reply to a Comment in a Task.
Post or Reply to a Task Comment
Follow these steps to post or reply to a Task comment:
Do one of the following:
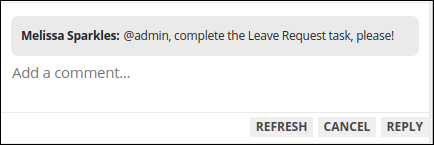
Post a new Task comment: View the end of the Comments section to locate the Add a comment... field to write and post a new comment to that Task.
Reply to an existing Task comment: Browse through that Task's comment to locate the existing comment, and then click the Reply icon
. The Add a comment... field displays below that Task comment.
From the Add a comment... field, write your Task comment. In the commenting editor, optionally you can use Markdown syntax. Use a Markdown syntax quick guide for the most commonly used Markdown syntax. Follow these guidelines:
Text styles, including bold, italics, strikethrough, and code styles: Follow Markdown syntax in the commenting editor. Place your cursor between the Markdown syntax, and then write your text to display in that text style. For example, enter four asterisks in the commenting editor: two asterisks to precede your text and two to follow your text since bold-style text in Markdown syntax requires two asterisks both preceding and following text for that style.
Tag users in a Task comment: Precede a user's username with the
@symbol to invite that user into the comment thread so that user can participate in the discussion. After sending the comment with tagged users, those users receive a notification of the comment they were tagged within, and then may select that notification to view that Task comment. Selecting a notification for a tagged comment opens that Task summary that contains the tagged comment. If the tagged user is not a Task participant prior to being tagged in a Task comment, that user becomes a Task participant only for that Task.
Do one of the following to post the comment, otherwise, click Cancel to cancel the comment:
Click the Comment button if you are posting a new comment.
Click the Reply button if you are replying to a comment.
Refresh Comments
Follow these steps to refresh Task comments if any user made a new comment while using the Comments feature:
On the bottom right of the Comments section, click the Refresh button. New comments or replies from other users display in the Comments panel.