Use a Sequence Flow object to indicate workflow routing between the connected objects. The direction in which the Sequence Flow points implies how Request data is conveyed and utilized in the Process model. As a best practice, indicate a consistent direction of Sequence Flow objects: either left to right or top to bottom, to make Process models easier to understand.
Sequence Flow objects are not to be confused with Message Flow objects.
Sequence Flow objects have the following attributes in regards to specific Process model objects:
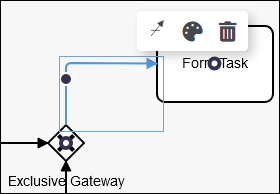
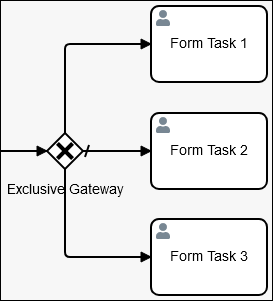
From the context of a Process model object associated with a Sequence Flow object, that Sequence Flow object can be "incoming" or "outgoing." Consider the following Process model example to demonstrate their differences.
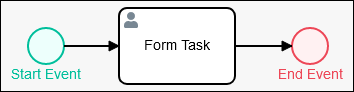
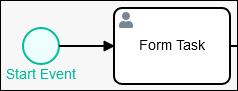
Incoming: An incoming Sequence Flow object comes from its connecting object. In the example, the Sequence Flow object is incoming to the Form Task object.
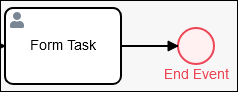
Outgoing: An outgoing Sequence Flow goes to the connecting object. In the example, the Sequence Flow object is outgoing from the Form Task object.
Text annotation objects and Pool objects do not participate in sequence flow.
Sequence Flow objects cannot connect workflow between Process model objects within different Pool objects. Use Message Flow objects to indicate messaging between objects in different Pool objects.
Start Event type objects begin the flow of a Request for that Process. Therefore, the following objects cannot have an incoming Sequence Flow object:
Start Event object
Start Timer Event object
Signal Start Event object
Message Start Event object
Conditional Start Event object
End Event type objects terminate the flow of a Request for that Process. Therefore, the following objects cannot have an outgoing Sequence Flow object:
End Event object
Message End Event object
Error End Event object
Signal End Event object
Terminate End Event object
Sequence Flow objects from Exclusive Gateway and Inclusive Gateway objects can be configured to specify under which condition a Request routes through that Sequence Flow object. See Configure an Outgoing Sequence Flow Object from an Exclusive Gateway or Inclusive Gateway Object.
Connectors, and PM Blocks function as Process model objects that are not Start Event or End Event type objects. Therefore, they can use incoming and outgoing Sequence Flow objects.
The Flow indicator displays when you click an object or connector in the Process model. ProcessMaker knows whether to use an outgoing Sequence Flow or Message Flow object depending on the selected object or connector selected and its context within the Process model.
Permissions
Your user account or group membership must have the following permissions to configure a Data Association Flow object in the Process model unless your user account has the Make this user a Super Admin setting selected:
Processes: Edit Processes
Processes: View Processes
See the Process permissions or ask your Administrator for assistance.
Connect Two Process Model Objects with a Sequence Flow Object
Connect two Process model objects with a Sequence Flow object to indicate workflow routing between the connected objects. Ensure that the two objects to connect use Sequence Flow objects as described in the Overview.
Follow these steps to connect two Process model objects with a Sequence Flow object:
Select the Process model object from which you want to set the workflow routing. Available options display above the selected object.
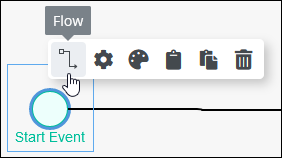
Click the Flow icon
 .
.Click the target Process model object to set workflow routing.
Reconnect a Sequence Flow Object from One Process Model Object to Another
Optionally, reconnect a Sequence Flow object from one Process model object to another. In doing so, select to which Process model object workflow routes for that Sequence Flow object. A Sequence Flow object cannot be reconnected from the outgoing Process model object. Ensure that the two objects to connect use Sequence Flow objects as described in the Overview.
Follow these steps to reconnect a Sequence Flow object from one Process model object to another:
Select the Sequence Flow object to reconnect to another Process model object.
Click the Sequence Flow object's arrow.
Click the other Process model object to which to set the workflow routing. The target Process model object may already have at least one other Sequence Flow object incoming to it.
Place an Object Between Two Process Model Objects Already Connected with a Sequence Flow Object
Quickly connect Sequence Flow objects with any of the following objects:
Place the object between two existing Process model objects already connected with a Sequence Flow object. Process Modeler automatically places that object between the existing objects and adds a new Sequence Flow object following the new object. The existing Sequence Flow object precedes the new object. If necessary, configure the Sequence Flow object following the newly placed object.
Adjust How a Sequence Flow Object Bends Using Anchors
Use anchors in a Sequence Flow object to adjust how that Sequence Flow object bends between its connecting Process model objects.
Follow these steps to adjust where a Sequence Flow object bends:
Connect a Sequence Flow object from one object/connector to another.
Select the Sequence Flow object so that available options display above the selected object. Sequence Flow objects that have immediately been connected require two clicks of the Sequence Flow object for anchors to display.
Do one of the following:
Drag an existing round anchor
 to place where to bend that Sequence Flow object.
Click, and then drag, on a straight line of the Sequence Flow object to add a round anchor, then place where to add a bend in that Sequence Flow object.
Double-click an existing round anchor to delete it, thereby removing that bend in that Sequence Flow object.

Settings
The Sequence Flow object has the following panels that contain settings:
Configuration panel
Documentation panel
Advanced panel
Configuration Panel Settings
The Sequence Flow object has multiple settings in the Properties panel:
Edit the Object Name
An object name is a human-readable reference for a Process object.
Follow these steps to enter or edit the name for a Sequence Flow object:
Select the Sequence Flow object from the Process model in which to edit its name.
Ensure that the Configuration panel displays. If not, show it. The Name setting displays.
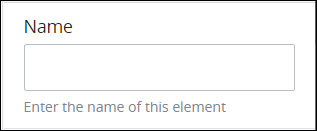
In the Name setting, enter or edit the selected object's name and then press Enter.
Edit the Expression to Indicate Workflow Routing
This Sequence Flow object setting is available only for Exclusive Gateway and Inclusive Gateway objects. See Configure an Outgoing Sequence Flow Object from an Exclusive Gateway or Inclusive Gateway Object for information how this setting affects workflow routing.
Outgoing Sequence Flow objects from Exclusive Gateway and Inclusive Gateway objects have an additional setting from which to configure under which Request condition(s) that Sequence Flow object triggers to route that Request's workflow to its connecting object or connector.
Follow these steps to edit the expression that indicates under which Request condition(s) that Sequence Flow object triggers to route that Request's workflow to its connecting object or connector:
Select the outgoing Sequence Flow object from the Exclusive Gateway or Inclusive Gateway object from which dictate conditions under which workflow routes through that Sequence Flow object.
Ensure that the Configuration panel displays. If not, show it. Panels to configure this object display.
Expand the Configuration panel if it is not presently expanded and then locate the Expression setting.
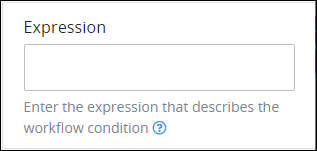
In the Expression setting, enter the expression that dictates under which condition(s) that Sequence Flow object triggers to route a Request's workflow to its connecting object, and then press Enter. Consider the following dynamic methods to affect workflow routing for that Request when this Sequence Flow object triggers:
Sequence Flow objects support Request variables. Do not use mustache syntax to reference the Request variable to get its value.
Sequence Flow objects support counter functionality by adding
1to an existing Request variable value. Example:VariableName + 1, whereVariableNameis the name of the Request variable to reference its value in the Request data, then add1.
See the following sections for more information:
Configure an Outgoing Sequence Flow Object from an Exclusive Gateway or Inclusive Gateway Object
Expression Syntax Components to Specify Request Conditions That Trigger an Outgoing Sequence Flow Object
An outgoing Sequence Flow object from an Exclusive Gateway object may set the value for a Request variable when that Sequence Flow object triggers. See Set the Value for a Request Variable.
Set the Value for a Request Variable
This Sequence Flow object setting is available only for Exclusive Gateway objects. See Set the Value for a Request Variable in the Configure an Outgoing Sequence Flow Object from an Exclusive Gateway or Inclusive Gateway Object section for information how this setting affects workflow routing.
Outgoing Sequence Flow objects from Exclusive Gateway objects have a unique setting. Optionally configure such a Sequence Flow object to set the value of a Request variable when that Sequence Flow object triggers. This setting supports mustache syntax to set the value for the specified Request variable. Regardless of whether Request conditions evaluate as true for that Sequence Flow object or it is the default Sequence Flow object to trigger when no configured Request conditions evaluate as true, the configured Request variable changes to the specified value.
Follow these steps to set the value for a Request variable when the outgoing Sequence Flow object triggers:
Select the outgoing Sequence Flow object from the Exclusive Gateway or Inclusive Gateway object from which dictate conditions under which workflow routes through that Sequence Flow object.
Ensure that the Configuration panel displays. If not, show it. Panels to configure this object display.
Expand the Configuration panel if it is not presently expanded and then locate the Flow Variable group of settings.
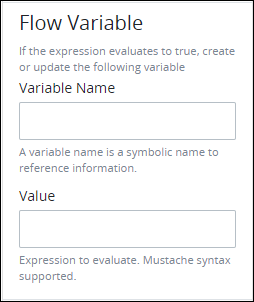
In the Variable Name setting, enter the name of the Request variable to set its setting when this Sequence Flow object triggers.
In the Value setting, enter the value to set the Request variable. This setting supports mustache syntax.
Documentation Panel Settings
Describe the object's purpose and how it functions in the Process. This description does not affect Requests for the Process, but may be useful for Process model maintenance such as how the object is configured. Edit information by using the What-You-See-Is-What-You-Get (WYSIWYG) rich text editor.
A Process's entered documentation displays by selecting the View Documentation icon for that Process.
Edit the Object's Description Displayed in Process Documentation
Follow these steps to edit the description for an object:
Select the object from the Process model in which to edit its description.
Ensure that the Configuration panel displays. If not, show it. Panels to configure this object display.
Expand the Documentation panel if it is not presently expanded. The Description setting displays.
In the Description setting, edit the information to display when viewing documentation for this object and then press Enter. Alternatively, use the What-You-See-Is-What-You-Get (WYSIWYG) rich text editor to stylize your text by clicking the More icon
 .
.
Follow these guidelines to use the WYSIWYG rich text editor to stylize your text:
Undo changes: Click on the
 icon to undo the last action.
Redo changes: Click on the
 icon to redo the last undone action.
Insert/Edit Link: Click on the
 icon to convert the selected text into a hyperlink. Follow these steps to create a hyperlink:
 Select the required text from the Rich Text control.
Click on the
icon. The Insert/Edit Link screen displays.
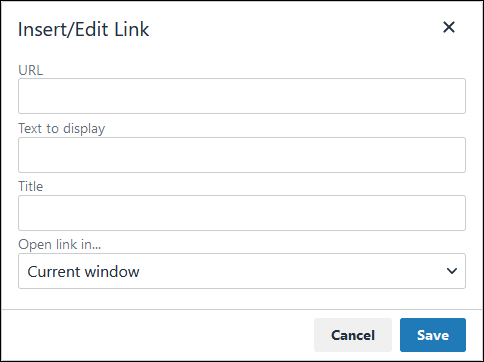
In the URL setting, enter the destination URL.
In the Text to display setting, edit or enter the text displayed in the Rich Text control.
In the Title setting, enter the text to display when a user hovers over the displayed text.
From Open link in… drop-down menu, select one of these options:
New window: Select this option to open the destination page in a new browser window.
Current window: Select this option to open the destination page in the current browser window.
Insert/Edit Image: Click on the Insert/Edit Image icon
 to insert an image. Follow these guidelines:
 Click on the Insert/Edit Image icon
. The Insert/Edit Image screen displays:
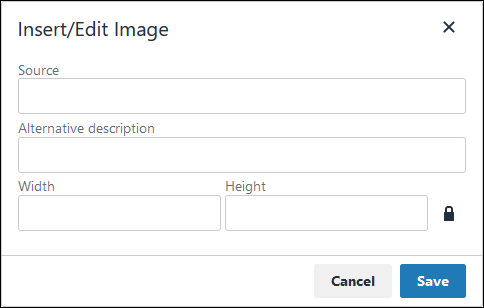
In the Source setting, enter a URL for the image.
In the Alternative Description setting, enter the text to display if the source URL of the image is not accessible.
In the Width setting, enter the maximum width for the image.
In the Height setting, enter the maximum height for the image.
Toggle the Constrain Proportions icon
 to maintain the width-height ratio of the image to its original proportion.
 Click Save.
Insert Page Break for PDF: Click on the Insert Page Break for PDF icon
 to insert a page break when a PDF document is created for this documentation if your browser supports this feature.
 Format text: Follow these guidelines to format text:
Headings: From the Paragraph/Formats menu, select Headings and then select a heading size.
Bold: Do one of the following:
From the editor toolbar, select the
 icon.
icon.From the Paragraph/Formats menu, select Inline and then Bold.
Italics: Do one of the following:
From the editor toolbar, select the
 icon.
icon.From the Paragraph/Formats menu, select Inline and then Italic.
Underline: From the Paragraph/Formats menu, select Inline and then Underline.
Strikethrough: From the Paragraph/Formats menu, select Inline and then Strikethrough.
Superscript: From the Paragraph/ Formats menu, select Inline and then Superscript.
Subscript: From the Paragraph/Formats menu, select Inline and then Subscript.
Code: From the Paragraph/Formats menu, select Inline and then Code.
Paragraph: From the Paragraph/Formats menu, select Blocks and then Paragraph.
Blockquote: From the Paragraph/Formats menu, select Blocks and then Blockquote.
Division: From the Paragraph/Formats menu, select Blocks and then Div.
Preformatted: From the Paragraph/Formats menu, select Blocks and then Pre.
Change text color: Use the Text Color drop-down to change text color. Click on the
 icon. The color palette displays. Do one of the following:
Select one of the color swatches from the color palette. The selected text changes to that color.
Click the
 icon to select a custom color from the Color Picker.
Click the
 icon to reset the text to its default color.
Align text: Follow these guidelines to align text:
Left align: Do one of the following:
From the editor toolbar, use the
 icon to left-align text.
From the Paragraph/Formats menu, select Align and then Left.
Center align: Do one of the following:
From the editor toolbar, use the
 icon to center-align text.
From the Paragraph/Formats menu, select Align and then Center.
Right align: Do one of the following:
From the editor toolbar, use the
 icon to right-align text.
From the Paragraph/Formats menu, select Align and then Right.
Justify: Do one of the following:
From the editor toolbar, use the
 icon to justify text.
 From the Paragraph/Formats menu, select Align and then Justify.
Insert a bullet list: Use the
 icon to format text as a bulleted list.
Insert a numbered list: Use the
 icon to format text as a numbered list.
Indent text: Click on the
 icon to increase text indenting.
Outdent text: Click on the
 icon to decrease text indenting.
Advanced Panel Settings
Edit the Node's Identifier Value
Process Modeler automatically assigns a unique value to each Process node added to a Process model. However, a node's identifier value can be changed if it is unique to all other nodes in the Process model, including the Process model's identifier value.
All identifier values for all nodes in the Process model must be unique.
Follow these steps to edit the identifier value for a Sequence Flow object:
Select the Sequence Flow object from the Process model in which to edit its name.
Ensure that the Configuration panel displays. If not, show it. Panels to configure this object display.
Expand the Advanced panel if it is not presently expanded. The Node Identifier setting displays.
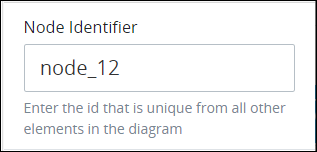
In the Node Identifier setting, edit the Sequence Flow object's identifier to a unique value from all nodes in the Process model and then press Enter.
Configure an Outgoing Sequence Flow Object from an Exclusive Gateway or Inclusive Gateway Object
Outgoing Sequence Flow objects from Exclusive Gateway and Inclusive Gateway objects have the following settings as do other Sequence Flow objects:
Set Request Conditions When a Sequence Flow Object Triggers
Outgoing Sequence Flow objects from Exclusive Gateway and Inclusive Gateway objects have additional settings to indicate under which condition(s) an outgoing Sequence Flow object triggers to route a Request's workflow to its connecting object or connector:
Specify the condition(s) to trigger each Sequence Flow object: Specify the condition(s) that must occur in a Request to trigger that Sequence Flow object, thereby triggering its connecting object. By setting different conditions on all outgoing Sequence Flow objects from an Exclusive Gateway or Inclusive Gateway object, you determine the business requirements for each Request of that Process model. ProcessMaker Platform evaluates a Sequence Flow object's condition(s) to trigger by reviewing the Request's data to an expression that describes the condition(s). Specify this condition using an expression syntax described in Expression Syntax Components. Each Sequence Flow object can only have one expression, but by using logical operators multiple conditions can be specified in that expression. You may use Magic Variables in your expression syntax. See Edit the Expression to Indicate Workflow Routing.
Select which Sequence Flow object triggers if Request conditions cannot trigger any of them: Select which outgoing Sequence Flow object triggers by default when none of the Request conditions can trigger any of the outgoing Sequence flows from an Exclusive Gateway or Inclusive Gateway object. If none of the conditions specified in any of the outgoing Sequence Flow objects meet the Request conditions to trigger, the default outgoing Sequence Flow triggers, thereby preventing the Request from pausing indefinitely. If a Sequence Flow object is set as the default, then its evaluation is ignored and it triggers by default. Only one outgoing Sequence Flow object from an outgoing Exclusive Gateway or Inclusive Gateway object may be set as the default. See Select a Default Outgoing Sequence Flow Object.
See Edit the Expression to Indicate Workflow Routing for information how to edit an expression in an outgoing Sequence Flow object from an Exclusive Gateway or Inclusive Gateway object.
Exclusive Gateway Objects Allow One Outgoing Sequence Flow Object to Trigger
An Exclusive Gateway object allows only one outgoing Sequence Flow object to trigger. If any of the following scenarios occur during a Request, that Request pauses and remains in-progress indefinitely without that Request being canceled:
All outgoing Sequence Flow objects from an Exclusive Gateway object do not have expressions from which to evaluate conditions during a Request. Furthermore, there is no default outgoing Sequence Flow object to trigger.
None of the expressions configured for all outgoing Sequence Flow objects from an Exclusive Gateway object evaluate as true for that Request. Furthermore, there is no default outgoing Sequence Flow object to trigger.
Therefore, ensure to do the following when configuring outgoing Sequence Flow objects from an Exclusive Gateway object:
Specify the condition(s) on each outgoing Sequence Flow object to indicate workflow routing.
Select one outgoing Sequence Flow object as the default outgoing Sequence Flow object if none of the Request conditions can trigger any of the Sequence Flow objects, thereby preventing any in-progress Request from pausing indefinitely.
Inclusive Gateway Objects Allow Potentially Multiple Outgoing Sequence Flow Objects to Trigger
An Inclusive Gateway object potentially allows all its outgoing Sequence Flow objects to trigger if the Request condition(s) for each Sequence Flow object are met. For example, if no outgoing Sequence Flow objects from an Inclusive Gateway object have expressions from which to evaluate Request conditions, then all Sequence Flow objects always trigger, thereby causing the Inclusive Gateway object to function as a Parallel Gateway object set to diverge workflow. Even if one Sequence Flow object is selected as the default Sequence Flow object to trigger, workflow routing is not affected when no outgoing Sequence Flow objects have expressions from which to evaluate Request conditions.
Therefore, ensure to do the following when configuring outgoing Sequence Flow objects from an Inclusive Gateway object:
Specify the condition(s) on each outgoing Sequence Flow object to indicate workflow routing.
Select one outgoing Sequence Flow object as the default outgoing Sequence Flow object to ensure that this Sequence Flow object always triggers regardless of Request conditions. Selecting one outgoing Sequence Flow object as the default workflow prevents any in-progress Request from pausing indefinitely.
Set the Value for a Request Variable
Outgoing Sequence Flow objects from Exclusive Gateway objects have a unique setting that does not apply to Sequence Flow objects outgoing from Inclusive Gateway objects. Optionally configure such a Sequence Flow object to set the value of one of the following when that Sequence Flow object triggers:
Update the value of an existing Request variable.
Create a new Request variable if that variable does not currently exist in that Request, then set its value.
This setting supports mustache syntax to set the value for the specified Request variable. If the value to set the Request variable is a string, place quotation marks (") preceding and after the string value.
Regardless of whether Request conditions evaluate as true for that Sequence Flow object or it is the default Sequence Flow object to trigger when no configured Request conditions evaluate as true, the configured Request variable changes to the specified value. See Set the Value for a Request Variable.
Follow these steps to set the value for a Request variable from an Exclusive Gateway object when that Sequence Flow object triggers:
Select the outgoing Sequence Flow object from the Exclusive Gateway object from which to set the value for a Request variable.
Ensure that the Configuration panel displays. If not, show it. Panels to configure this object display.
Expand the Configuration panel if it is not presently expanded and then locate the Flow Variable setting.

In the Variable Name setting, enter the name of the Request variable in which to set its value.
In the Value setting, enter the value to set that Request variable.
Select a Default Outgoing Sequence Flow Object
Select which outgoing Sequence Flow object triggers by default when none of the Request conditions can trigger any of the outgoing Sequence flows from an Exclusive Gateway or Inclusive Gateway object. If none of the conditions specified in any of the outgoing Sequence Flow objects meet the Request conditions to trigger, the default outgoing Sequence Flow triggers, thereby preventing the in-progress Request from pausing indefinitely. If a Sequence Flow object is set as the default, then its evaluation is ignored and it triggers by default. Only one outgoing Sequence Flow object from an outgoing Exclusive Gateway or Inclusive Gateway object may be set as the default.
Setting a default Sequence Flow to trigger is only available for outgoing Sequence Flow objects from Exclusive Gateway or Inclusive Gateway objects.
Follow these steps to select an outgoing Sequence Flow object as the default to trigger from either an Exclusive Gateway or Inclusive Gateway object:
Select the outgoing Sequence Flow object from either an Exclusive Gateway object or Inclusive Gateway object to set as default to trigger.
Click the Set as Default Flow icon
 for that outgoing Sequence Flow object. The default workflow indicator displays for that Sequence Flow object. The default workflow indicator removes from any other Sequence Flow object previously configured to be the default to trigger since only one outgoing Sequence Flow object can be the default.
The center outgoing Sequence Flow object is the default Sequence Flow object from the Exclusive Gateway object below.
Center outgoing Sequence Flow object is the default workflow