Use Screen Templates to quickly create a new screen and ensure design consistency across all your processes. Screen templates not only save time, but also ensure that a design standard is maintained in your organization. Key features of these templates include:
Use one of the pre-built templates or save one of your current screens as a template.
Maintain a repository of commonly used screen designs.
Share templates with your team.
Apply templates to existing screens.
Watch the following product tour to learn how to use Screen Templates.
View all Screen Templates
Permissions
Your user account or group membership must have the "Screens: View Screens" permission to view the list of Screen Templates unless your user account has the Make this user a Super Admin setting selected.
See the Screens permissions or ask your Administrator for assistance.
Ensure that you are logged on to ProcessMaker Platform.
Select the Designer option from the top menu.
From the Assets pane, hover over the Screens icon
 , and then select View all Screens.
Screen Templates are displayed in the two tabs My Templates and Shared Templates.
My Templates: This tab displays screen templates that you have created.

Shared Templates: This tab displays pre-built screen templates provided by ProcessMaker, as well as templates created and shared by users within your organization.

Create a Screen using Templates
Your user account or group membership must have the following permissions to create a Screen through Templates unless your user account has the Make this user a Super Admin setting selected:
Screens: View Screens
Screens: Create Screens
See the Screens permissions or ask your Administrator for assistance.
Follow these steps to create a new screen using a screen template.
View your Screens. A list of screens is displayed.
Click the +Screen button to create a new screen.

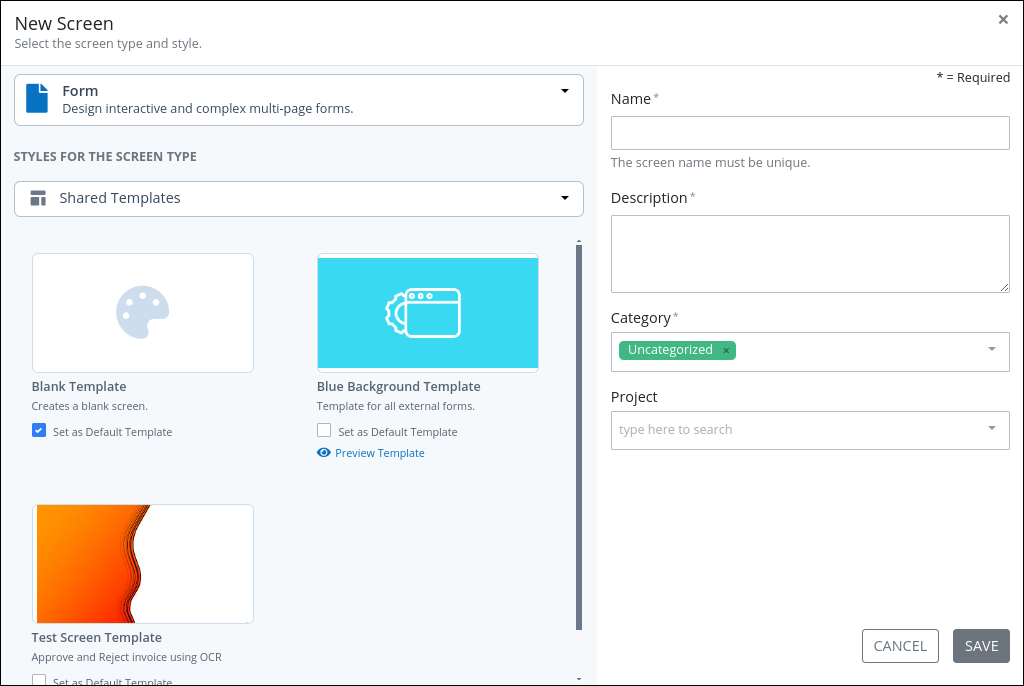
Choose a screen type from the first dropdown. Templates are available for Form, Display, and Email Screens.
From Styles For The Screen Type, select either My Templates or Public Templates to view a list of templates available in the category.
Optionally, you can select the Set as Default Template option to designate a template as the default for the selected screen type.
In the Name setting, enter a name for the new Screen. This is a required setting.
In the Description setting, enter a short description for the Screen. This is a required setting.
From the Category dropdown menu, select a category for the Screen. To remove a category, click the remove category icon
 .
.Optional, choose a project from the Project dropdown menu to assign this Screen to a Project.
Click Save to create the new Screen. The Screen displays in the Screen Builder.
To continue building your screen, see Screen Builder.