Edit how to authenticate and interact with a SOAP data source for a Data Connector.
Permissions
Your user account or group membership must have the following permissions to edit Resources for a Data Connector unless your user account has the Make this user a Super Admin setting selected:
Data Connectors: Edit Data Connectors
Data Connectors: View Data Connectors
See the Data Connectors permissions or ask your Administrator for assistance.
Edit Configuration for a Data Connector's SOAP Data Source
Follow these steps to edit the configuration settings how a Data Connector authenticates with a SOAP data source:
Verify that this SOAP-type Data Connector uses a WSDL file to authenticate with the data source.
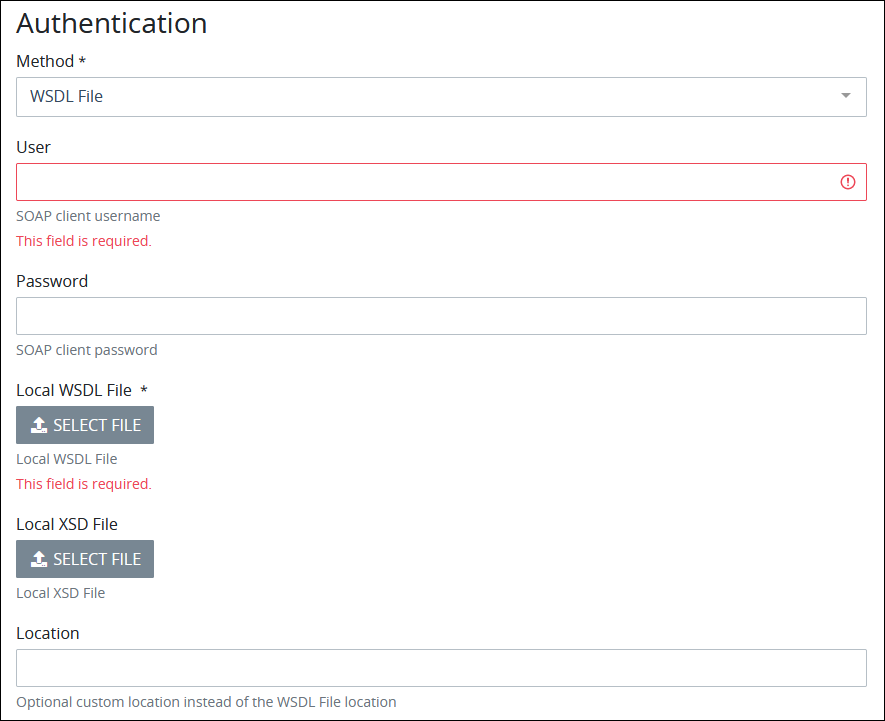
In the User setting, enter the client username that authenticates with the connecting SOAP service. This is a required setting.
In the Password setting, enter the client password that authenticates with the connecting SOAP service. This is a required setting.
From the Local WSDL File setting, click the Select File button, and then select the WSDL file from which to authenticate with the connecting SOAP service. A new WSDL file replaces a previously configured PEM file. This is a required setting.
From the Local XSD File setting, click the Select File button, and then select the XSD file(s) that correspond with the WSDL file. After adding a local XSD file, optionally use any of the following buttons for that XSD file:
Click the Download XSD File button
 to download the selected XSD file to your computer or local network.
Click the Delete XSD File button
 to delete the selected XSD file.
Click the View XSD File button
 to view the selected XSD file in a separate browser window.
From the Location setting, optionally enter a custom URL to the connecting SOAP service different than that configured in the local WSDL file. If the Location setting contains a value, this value supersedes the URL configured in the WSDL file.
If no other changes are necessary, click Save. The following message displays: The Data Connector was saved.
Provide WSDL and XSD Files
Follow these steps to provide a Web Service Description Language (WSDL) file for SOAP authentication after selecting the WSDL File option from the Authentication section:
Verify that this SOAP-type Data Connector uses a local certificate file to authenticate with the data source.
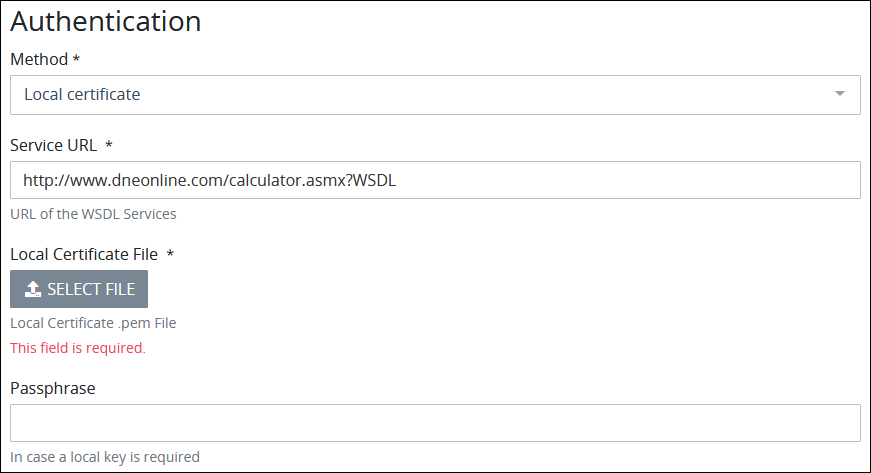
In the Service URL setting, enter the SOAP service HTTP URL from which the SOAP service monitors for incoming requests. Ensure that the service URL references the Web Service Description Language (WSDL) file that describes the SOAP service, such as
http://www.URL.asmx?WSDL. This is a required setting.From the Local Certificate File setting, click the Select File button, and then select the Privacy Enhanced Mail (PEM) file type from which to authenticate with the connecting SOAP service. A new PEM file replaces a previously configured PEM file. This is a required setting.
From the Passphrase setting, optionally enter the password to access the selected local certificate file.
If no other changes are necessary, click Save. The following message displays: The Data Connector was saved.
Provide a Local Certificate File
Follow these steps to provide a local certificate file for SOAP authentication after selecting the Local Certificate option from the Authentication section:
Verify that this SOAP-type Data Connector uses password authentication to authenticate with the data source.
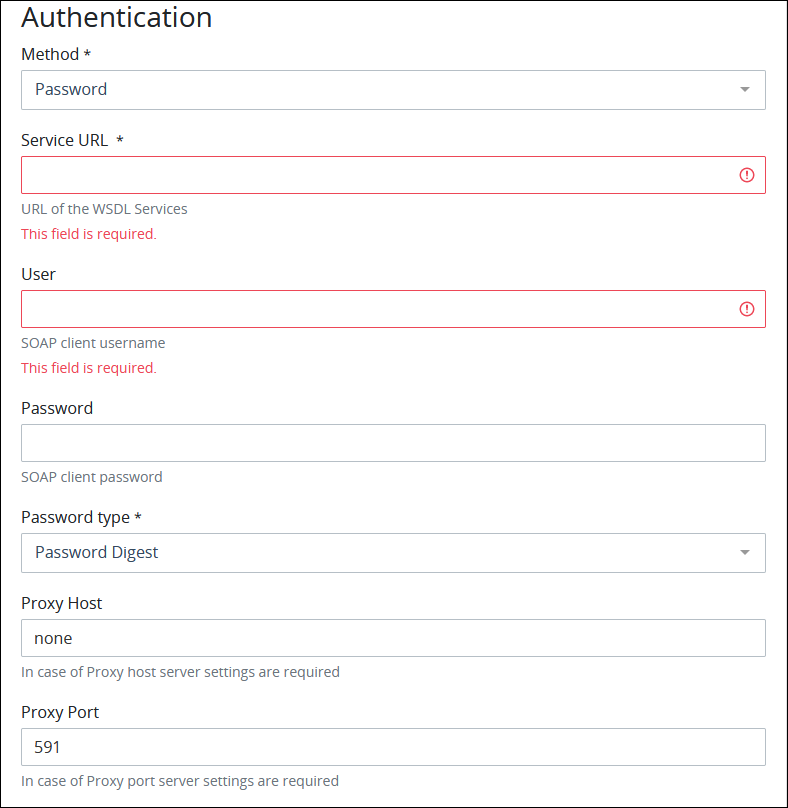
In the Service URL setting, enter the SOAP service HTTP URL from which the SOAP service monitors for incoming requests. Ensure that the service URL references the Web Service Description Language (WSDL) file that describes the SOAP service, such as
http://www.URL.asmx?WSDL. This is a required setting.In the User setting, enter or edit the username that authenticates with the SOAP service. This setting is required.
In the Password setting, enter or edit the password that authenticates with the SOAP service. This setting is required.
From the Password Type setting, select with which type of password the SOAP service authenticates:
None: Select the None option to not send the password to the SOAP service. ProcessMaker does not recommend this practice since there is no security with the SOAP service.
Password Text: Select the Password Text option to send a plain-text password to the SOAP service.
Password Digest: Select the Password Digest option when the password is a MD5 (Message Digest) value to be transmitted to the SOAP service. Digest authentication has an advantage over basic authentication in that it does not send a plain-text password over the network. The server then uses this digest value for password comparisons.
In the Proxy Host setting, enter or edit the proxy host that the SOAP service uses.
In the Proxy Port setting, enter or edit the port that the proxy host monitors for connections.
If no other changes are necessary, click Save. The following message displays: The Data Connector was saved.
Edit Password Authentication Settings
Follow these steps to configure basic authentication settings after selecting the Password option from the Authentication section:
View your Data Connectors. The Data Connectors tab displays.
Click the
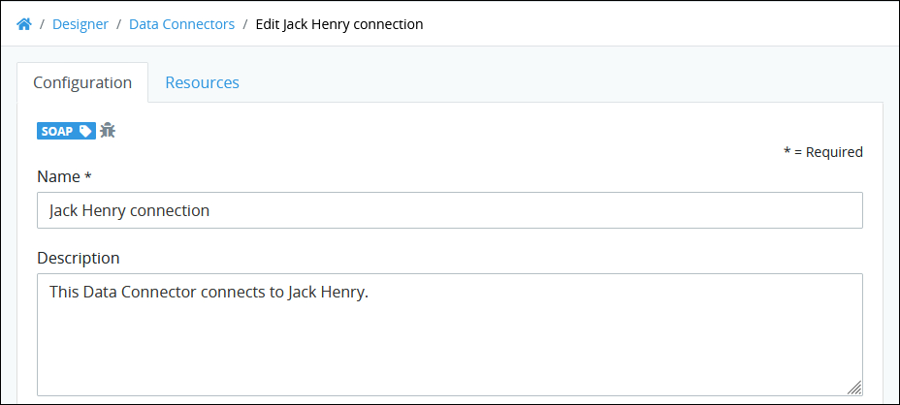
 menu, and then select the Edit option for the Data Connector to edit. The Configuration tab displays with the following indicators:
The SOAP tag displays to indicate the Data Connector authenticates with a SOAP data source.
The Debug Mode icon displays to indicate whether debug mode is enabled.
Edit the following information about the SOAP-type Data Connector as necessary:
In the Name setting, edit the name of the Data Connector. Data Connector names must be unique in your organization and can only use apostrophe characters (
') and spaces. This is a required setting.In the Description setting, edit the description of the Data Connector.
From the Category drop-down menu, select one or more Data Connector Categories to associate with this Data Connector. In doing so, Data Connector Categories may be sorted from the Data Connectors page. To remove a Data Connector Category that is currently selected, click the
 icon for that selection or press
 Enterwhen the drop-down is visible. This is a required setting.From the Project drop-down menu, optionally select the Project(s) that this Data Connector becomes an asset. This setting only displays Projects of which you are a member. To remove a Project that is currently selected, click the
 icon for that selection or press
 Enterwhen the drop-down is visible.In the Authentication section, from the Method drop-down menu, select how the REST-type Data Connector authenticates with the data source:
Password: Select the Password option to send only username and password credentials as authentication when connecting to the data source. See Edit Password Authentication Settings.
Local Certificate: Select the Local Certificate option to upload a Privacy Enhanced Mail (PEM) file type from which to authenticate with the connecting SOAP service. See Provide a Local Certificate File.
WSDL File: Select the WSDL File option to upload a Web Service Description Language (WSDL) file with its corresponding XSD file(s) that define authentication for the connecting SOAP service. See Provide WSDL and XSD Files.
If no other changes are necessary, click Save. The following message displays: The Data Connector was saved.
Add Resources to a SOAP Data Connection
Availability of a SOAP Web Service's Operations
A SOAP Web service's operations from which to specify a Resource to run are not available until after the SOAP-type Data Connector is created and saved. The Data Connector must first authenticate with the Web service via its WSDL file before that service's operations become available.
Follow these steps to add a Resource to a SOAP-type Data Connector:
View your Data Connectors. The Data Connectors page displays.
Click the
 menu, and then select the Edit option for the SOAP-type Data Connector to edit. The Configuration tab displays.
Click the Resources tab. Resources configured for this Data Connector display.
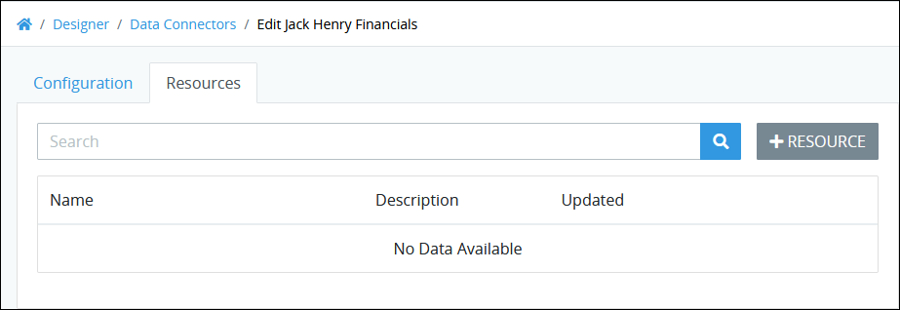
Click the +Resource button. The Create Resource screen displays.
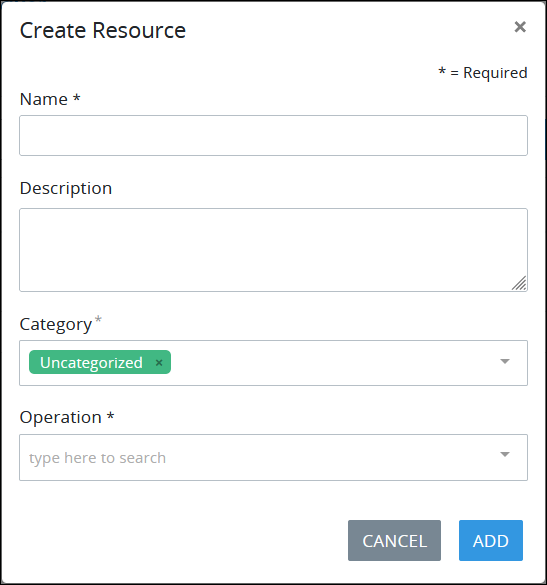
In the Name setting, enter the name of this Resource. The ProcessMaker Platform asset that references this Resource displays the Name setting value. For example, a Resource with the name
Get Valuesdisplays that name when configuring a Select List control to use this Data Connector to indicate the Resource's operation. Therefore, provide a concise but relevant name for this Resource so other Process designers understand its function. This is a required setting.In the Description setting, enter a description of this Resource. Descriptions do not display from ProcessMaker Platform assets when configuring them with a Data Connector.
From the Category drop-down menu, select one or more Data Connector Categories to associate with this Resource. In doing so, Data Connector Categories may be sorted from the Data Connectors page. To remove a Data Connector Category that is currently selected, click the
 icon for that selection or press
 Enterwhen the drop-down is visible. This is a required setting.From the Operation drop-down menu, select which Web service operation this Resource performs. The WSDL file or Web service configured for this Data Connector specifies which operations are available from this drop-down menu.
Click Add. A new Resource is created.
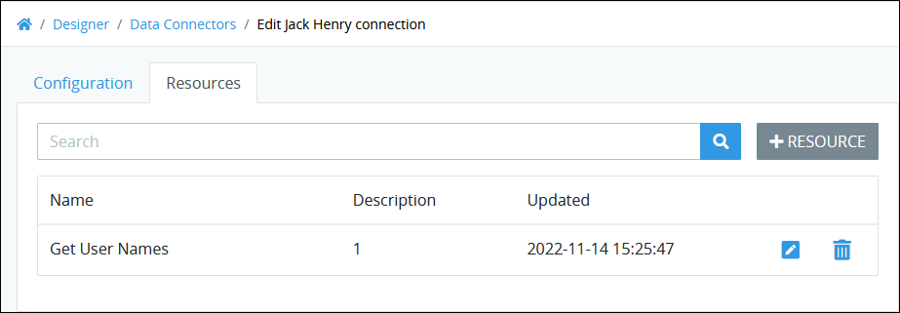
Do one of the following:
Optionally, view the parameters to this Resource's configured operation. The parameter(s) are sent to the Web service when this Resource performs its operation. See View Web Service Operation Parameters.
Optionally, test the Resource to determine if its configured operation successfully performs. See Test a Resource in a Data Connector.
View Web Service Operation Parameters
Optionally, view the parameter(s) for the operation configured for a Resource. Understanding the following for each parameter helps inform how to correspond Request data with a Web service operation's parameter(s):
Understand what the operation's parameters are to map them to Request data in the Data Connector connector.
Understand which parameter(s) are required or optional, and therefore plan how to map parameter response data to Request data.
Understand what each parameter's data type is.
Follow these guidelines to view the Web service operation parameter(s) for a SOAP-type Data Connector's Resource:
Click the Resources tab. Resources for that Data Connector display. If the Resources tab is not enabled, this SOAP-type Data Connector is not properly configured with a Web Service Description Language (WSDL) file. See Edit Configuration for a Data Connector's SOAP Data Source.
Click the
 menu, and then select the Edit option for the Resource to view the parameter(s) for its Web service operation. The Configuration tab for that Resource displays with the name of the Web service operation selected for this Resource.
Click the Params tab. The Params tab displays the following for informational purposes only:
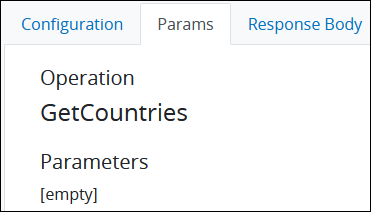
Operation: Below the Operation label displays the name of the Web service operation configured for this Resource.
Parameters: Below the Web service operation name are the parameter(s) for that operation. If the operation has no parameters, [empty] displays below the operation name. Parameters indicate whether they are required are optional using the following icons:
Required: The
 icon displays to indicate the parameter is required.
Optional: The
 icon displays to indicate the parameter is optional.
No parameters: Below the Web service operation displays Parameters [empty] if that operation does not have any parameters. Below is an example.
WSDL XML: To the right-side of the Web service operation name and parameter(s) is the WSDL's XML schema. Highlighted in the XML schema is the name of the operation where its XML specification begins. Below is an example.
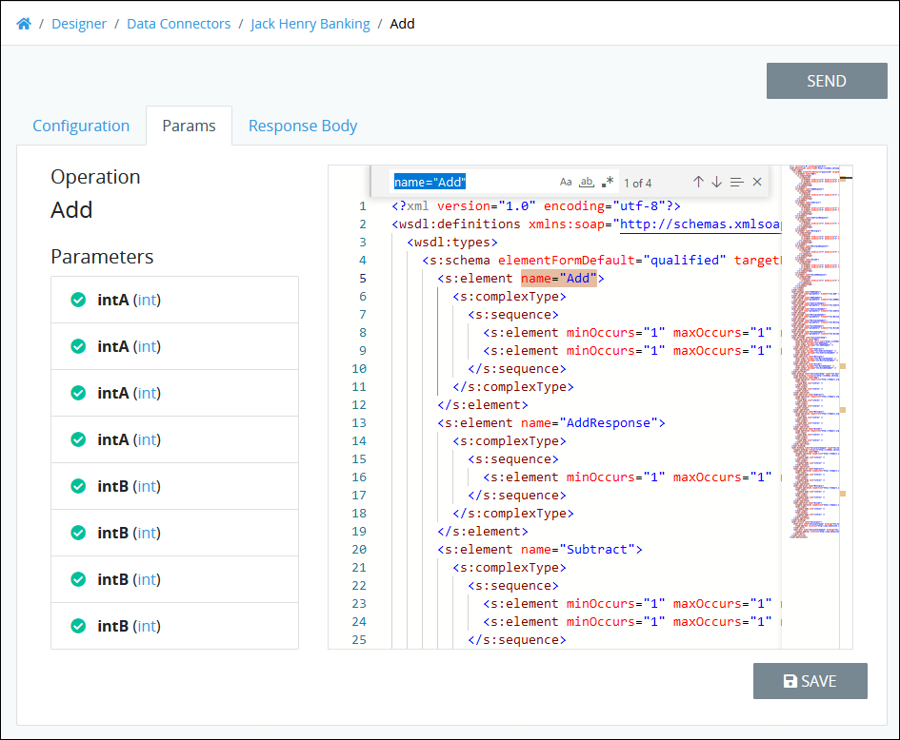
Optionally, browse the WSDL's XML schema. Click the Web service operation name to display a search field with browsing functions. Follow these guidelines:
In the search field, enter the name of the service operation to locate in the WSDL's XML schema. Use the following syntax to search for an operations name:
name="OperationName"whereOperationNameis the operation name to find. Search by using the Match Case, Match Whole Word, or Use Regular Expression options.Use the Previous Match option to browse for the previous instance of the search results.
Use the Next Match option to browse for the next instance of the search results.
Use the Find in Selection option to locate the search result in the current selection.
Test a Resource in a Data Connector
After adding a Resource to a Data Connector, test it to determine if the Resource successfully performs its configured Web service operation successfully.
Testing a Resource only verifies that Resource's availability, but does not validate the Data Connector's proper authentication to the SOAP Web service. SOAP Web services can have diverse authentication responses and only by using that service's operations this can responses be identified. SOAP Web services do not follow a standard error responses or authentication settings. Therefore, unless the service provider documented responses or expected errors in the WSDL file, only by using that service's operations can responses be determined.
Follow these steps to test a SOAP-type Data Connector's Resource:
Click the Response Body tab.
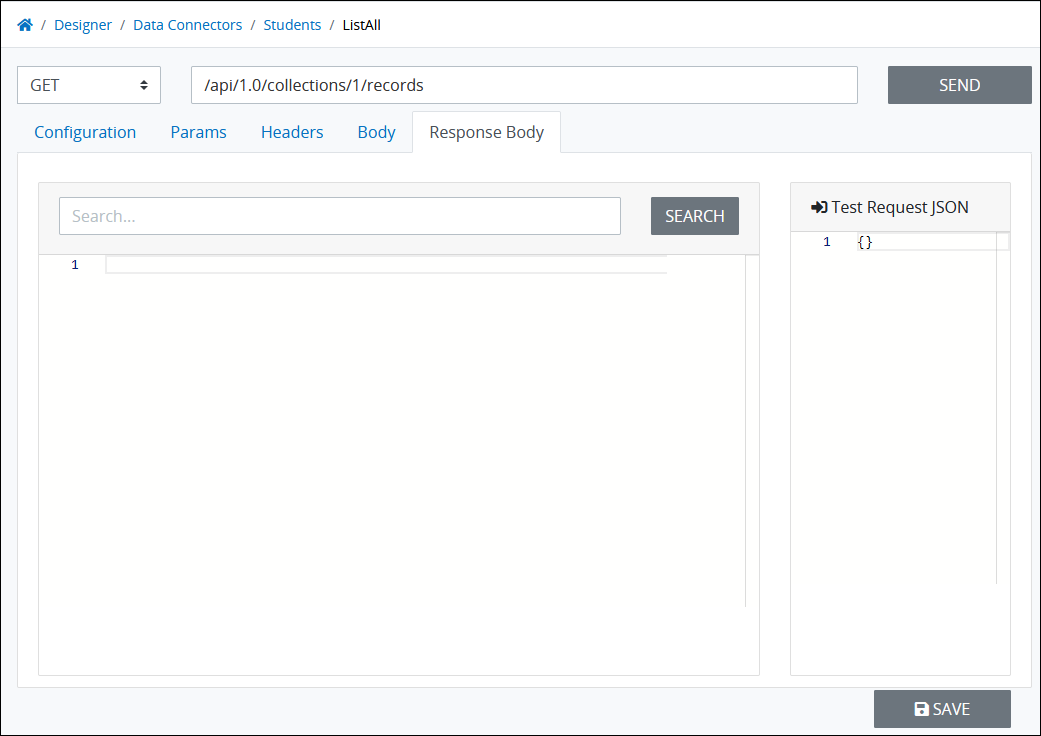
Do one of the following:
Perform the Web service operation to receive its response: Click the Send button.
Send sample Request data with the call to the Web service operation: In the Test Request JSON panel, enter the sample Request data to be added to the body of the request to the Web service operation, and then click the Send button.
Enable the tree toggle
 to see the tree representation of JSON as a data model to understand the different structural elements within it. To navigate in the Data Browser canvas, see Data Browser.
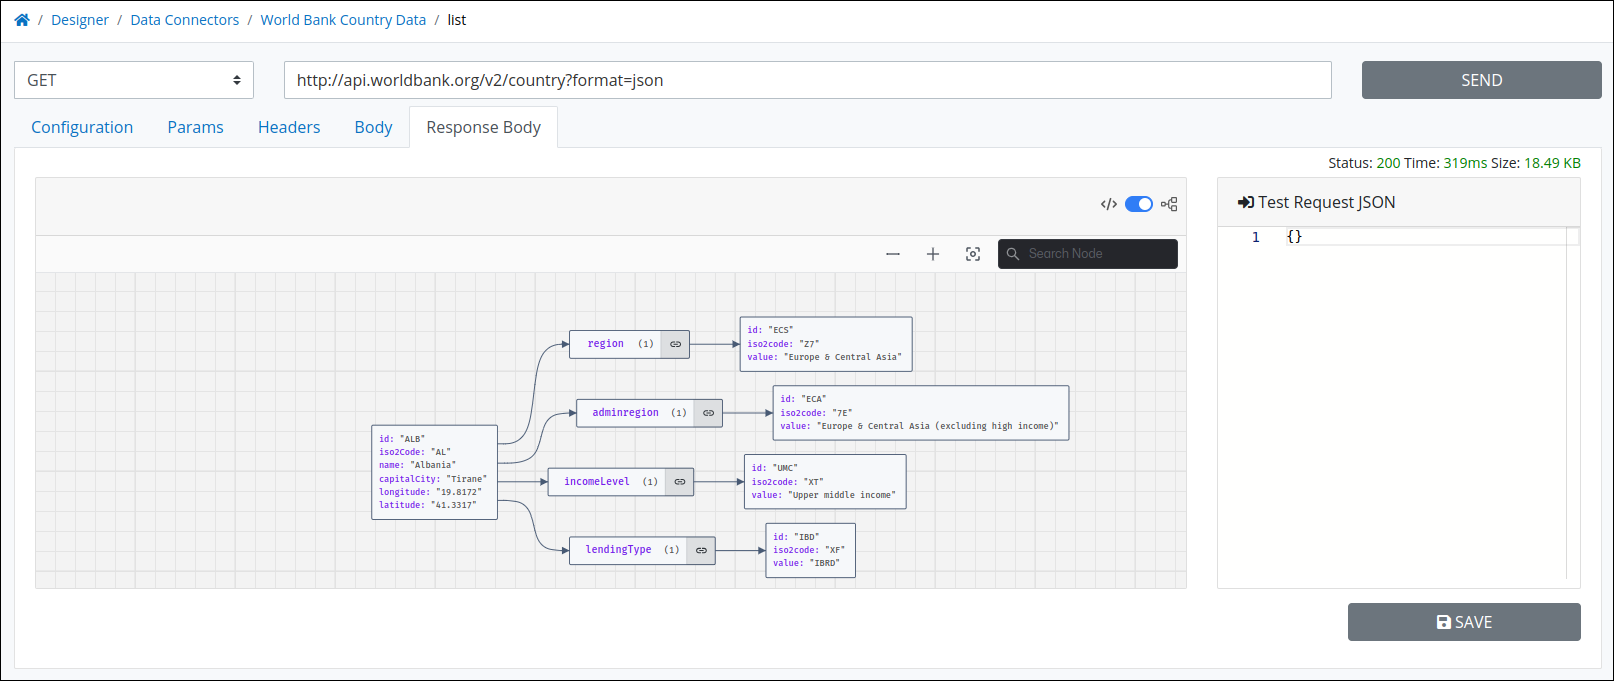
Web service operation's response in the Data Browser canvas
If the Resource successfully performs the Web service operation, the operation's response displays in the Response Body tab. Above the Test Request JSON panel displays the data source response status, response time, and size display.
To search the response body, enter into the search field that is above the response body the text to locate, and then click Search.
View or Edit a Resource in a SOAP Data Connector
Follow these steps to view or edit a SOAP-type Data Connector's Resource:
View your Data Connectors. The Data Connectors page displays.
Click the
 menu, and then select the Edit option for the SOAP-type Data Connector to view or edit. The Configuration tab displays.
Click the Resources tab. Resources configured for this Data Connector display.
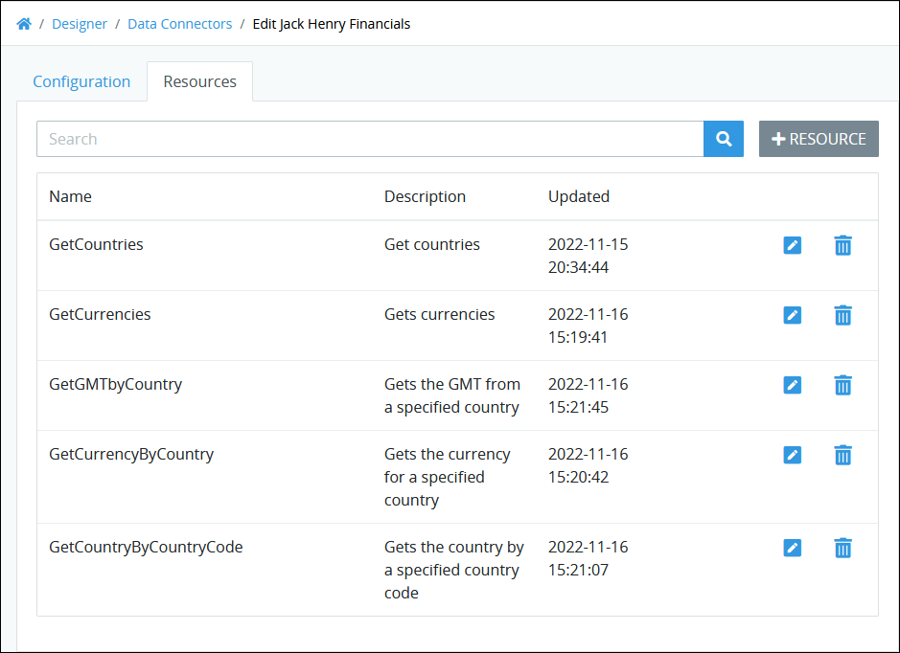
Click the Edit icon
 for the Resource to view or edit. Settings for the Resource display.
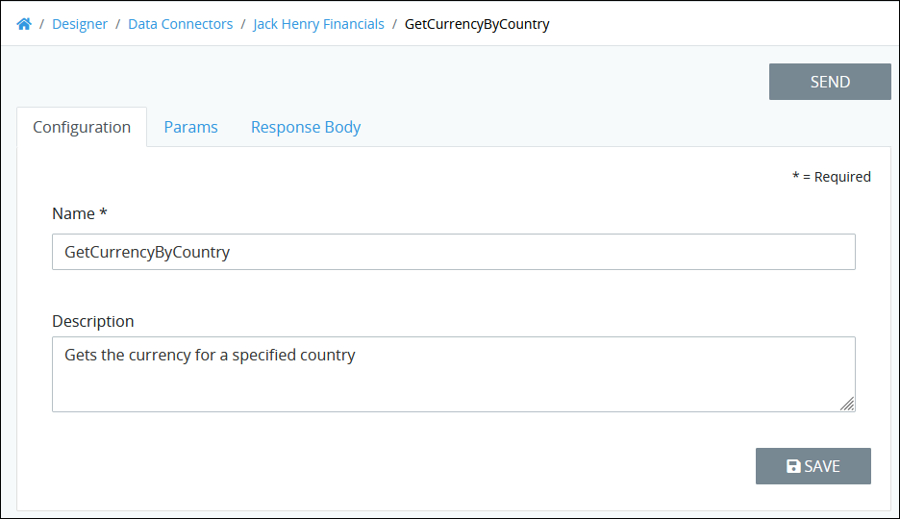
Edit the following settings as necessary:
In the Name setting, edit the name of this Resource. The ProcessMaker Platform asset that references this Resource displays the Name setting value. For example, a Resource with the name
Get Valuesdisplays that name when configuring a Select List control to use this Data Connector to indicate the Resource's operation. Therefore, provide a concise but relevant name for this Resource so other Process designers understand its function. This is a required setting.In the Description setting, edit the description of this Resource. Descriptions do not display from ProcessMaker Platform assets when configuring them with a Data Connector.
Do one of the following:
Optionally, view the parameters to this Resource's configured operation. The parameter(s) are sent to the Web service when this Resource performs its operation. See View Web Service Operation Parameters.
Optionally, test the Resource to determine if its configured operation successfully performs. See Test a Resource in a Data Connector.
After editing a Resource, test it to determine if the Resource successfully makes a request to the data source endpoint successfully.
Delete a Resource from a Data Connector
Follow these steps to delete a Data Connector's Resource:
View your Data Connectors. The Data Connectors page displays.
Click the
 menu, and then select the Edit option for the Data Connector to delete a Resource. The Configuration tab displays.
Click the Resources tab. Resources configured for this Data Connector display.

Click the Delete icon
 for the Resource to delete. A message displays to confirm deletion of the Resource.
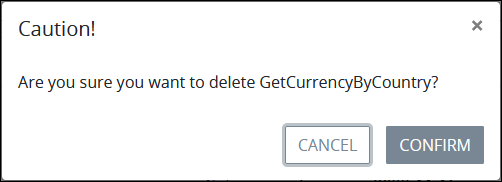
Click Confirm.