Configuring a PM Block involves building the configuration settings that Process Designers use to implement how each instance of that PM Block functions. Follow these steps to configure a PM Block
Permissions
Your user account or group membership must have the following permissions to configure a PM Block unless your user account has the Make this user a Super Admin setting selected:
PM Blocks: Edit PM Blocks
PM Blocks: View PM Blocks
See the PM Blocks permissions or ask your Administrator for assistance.
Specify General Configuration Settings for a PM Block
Follow these steps to configure general settings for a PM Block:
View your PM Blocks. The PM Blocks page displays.
Click the
 icon, and then select the Configure PM Block option to view the PM Block configuration.
.png)
Edit the following information about the PM Block as necessary:
In the Name setting, edit the name for the PM Block. This name must be unique and is required.
In the Description setting, edit the description of the PM Block. This is a required setting.
From the Icon setting, select an icon for the PM Block. This is a required setting.
From the Author setting, edit the name of the user who created the PM Block. This is a required setting.
From the Version setting, enter the version of the PM Block. This is a required setting.
From the Category drop-down menu, select one or more PM Block Categories. To remove a PM Block Category that is currently selected, click the
 icon for that selection or press
 Enterwhen the drop-down is visible. In the absence of any categories, the PM Block is marked as uncategorized. This is a required setting.From the Status drop-down menu, select the status for this PM Block:
Active: Select the Active status to make this PM Block available for Process Designers to use in their Process models.
Inactive: Select the Inactive status to make this PM Block unavailable for Process Designers to use in their Process models.
From the PM Block Start Event setting, select the event in the underlying process from where the PM Block functionality begins.
From the Setup Process Start Event setting, select the event in the underlying process from where the PM Block instance begins when clicking the Run Setup option.
Click Save to save the configuration.
Build the PM Block Configuration Panel
From the Panel tab, add controls to build the configuration panel for the PM Block. This panel is displayed when the PM Block is used while designing a process in the Modeler. Process designers will enter values into these controls when configuring each instance of the PM Block.
PM Block configuration may be composed of any of the following controls:
These control are designed similarly to those in Screen Builder. Validation rules can apply to each of these control to verify that the entered value for a PM Block is valid.
Follow these steps to build the Configuration panel for a PM Block:
Click the
 icon, and then select the Configure PM Block option.
 Click the Panel tab. The left pane displays available control that can be added to the configuration.
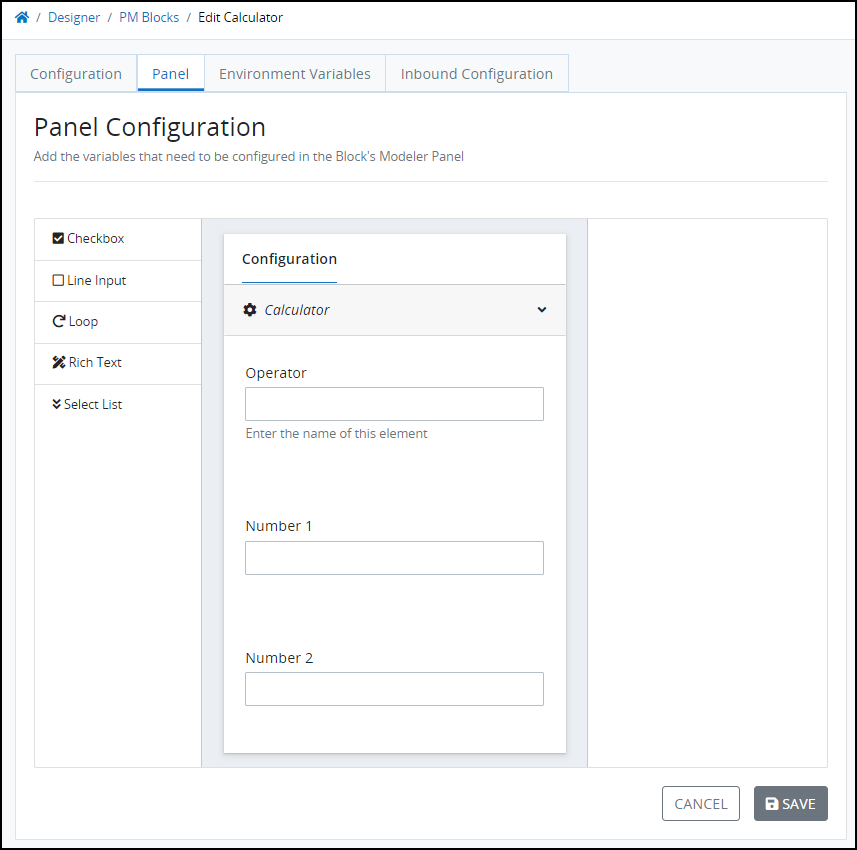
Drag and drop the controls in the required order. These controls will be displayed as the PM Block's settings in the Configuration panel within Process Modeler. Provide helper text for each control to instruct the Process Designer how to configure each setting.
See the following links for more details on how to use these controls:
Click Save to save the configuration.
Referencing PM Block Variables
Follow these guidelines to reference the value of a PM Block configuration in Processes:
Edit the process in the modeler and click the PM Block object to view its properties
Locate the PM Block setting in the Configuration panel.
Note its Variable Name value.
Reference that control's value by using the
_parentJSON key within mustache syntax{{ _parent.config.VariableName }}.
The_parentJSON key references Request data outside of that PM Block.If a control is within a loop, use only the variable name in the format
{{ VariableName }}.
Specify Environment Variables for a PM Block
Specify custom settings for this PM Block that store globally available data that may contain personal or authentication information. These variables, called Environment Variables, are similar to Environment Variables but may only be used for that PM Block. For every instance of this PM Block, these Environment Variables generate and become part of that Request's data.
Reference a Block Environment Variable's Value in a Process
To use a Block Environment Variable in a process, use a Script called from a Script Task to get the value of the Environment Variable. Similar to other Environment Variables, a Block Environment Variable's value may only be acquired from a Script because these variables often contain personal or authentication information that cannot be viewed.
See Environment Variable and Magic Variable Syntax, Usage, SDK, and Script Examples for examples on how to call Environment Variables using supported programming languages.
Follow these steps to specify Environment Variables for a PM Block:
Click the ellipsis icon
 , and then select the Configure PM Block option.
Click the Environment Variables tab.
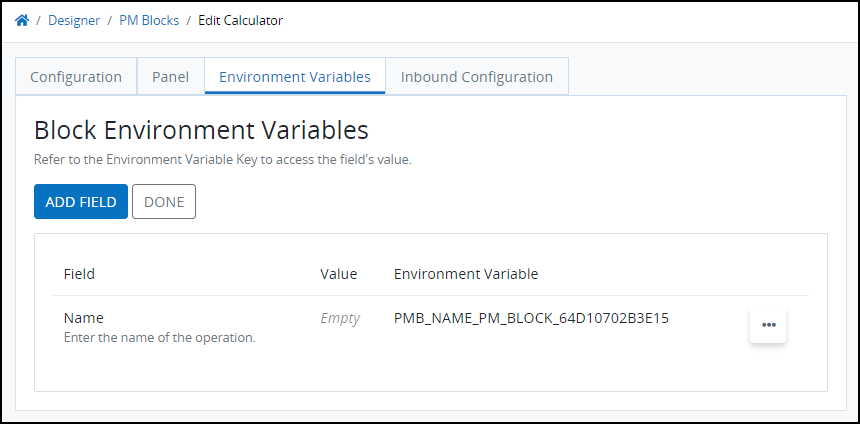
The Environment Variables page displays all variables configured for this PM Block:
Field: The Field column displays the label and helper text for the field.
Value: The Value column displays the field's value.
Environment Variable: The Environment Variable column displays the name that must be used to reference it in scripts.
Click the Add Field button to add a field. (Note: If added a field for the first time, click Edit Fields and then Add Field.)
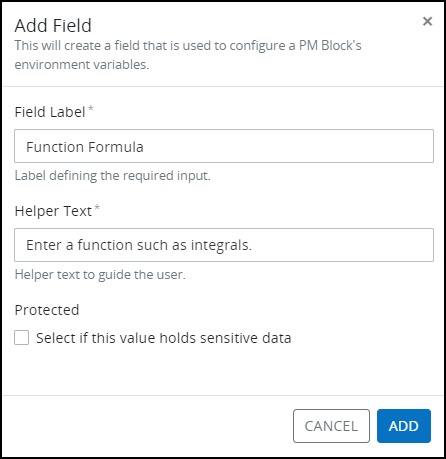
In the Field Label setting, enter a label to easily identify this variable. This is a required setting.
In the Helper Text setting, enter text that provides information about this variable. This is a required setting.
Use the Select if this value holds sensitive data checkbox to mask the data for this variable to prevent it from being displayed or copied. Use this setting when this variable may contain personal information, authentication information, or other data to keep private.
Click Add. The new Block Environment Variable will be added to the Environment Variables page.
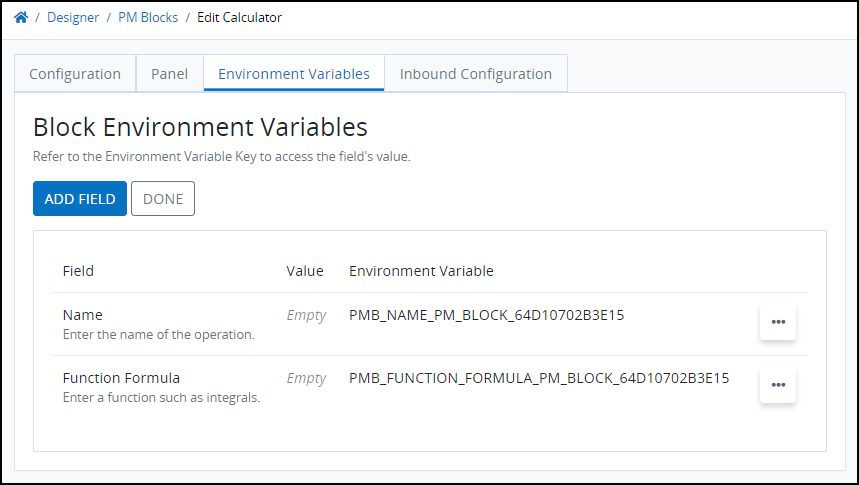
The PM Block Environment Variable has the following naming structure: PMB_ENVIRONMENT_VARIABLE_NAME_PM_BLOCK_ID, where
PMB: "PMB" is an acronym for PM Block.
ENVIRONMENT_VARIABLE_NAME: This is the name of the environment variable.
PM_BLOCK: Static text to indicate that this Environment Variable belongs to a PM Block.
ID: This is a unique ID automatically assigned to the Environment Variable.
Furthermore, the Environment Variable also displays in the Environment Variables page.
Optionally, click the ellipsis icon
 , and then select the Edit Field option for the Environment variable to edit. The Edit Field screen displays. Edit the Environment Variable settings as needed, and then click Update.
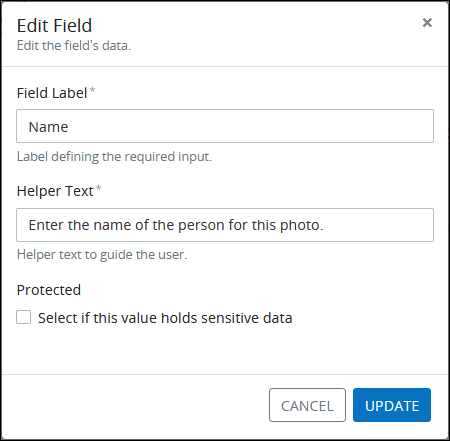
Click the Done button from the Environment Variables tab when all variables are configured properly.
Run a Case of the PM Block Setup
The Run Setup option allows you run a PM Block Case after selecting a Start Event. By clicking the Run Setup button, users can seamlessly trigger the necessary processes, ensuring secure access and proper configuration before proceeding with further actions in the PM Block.
Follow the steps below to run a PM Block setup:
Select a start event from the Setup Process Start Event setting.
Save the configuration to view the Run Setup button in the Environment Variables tab.
Configure the required environment variables for the PM Block.
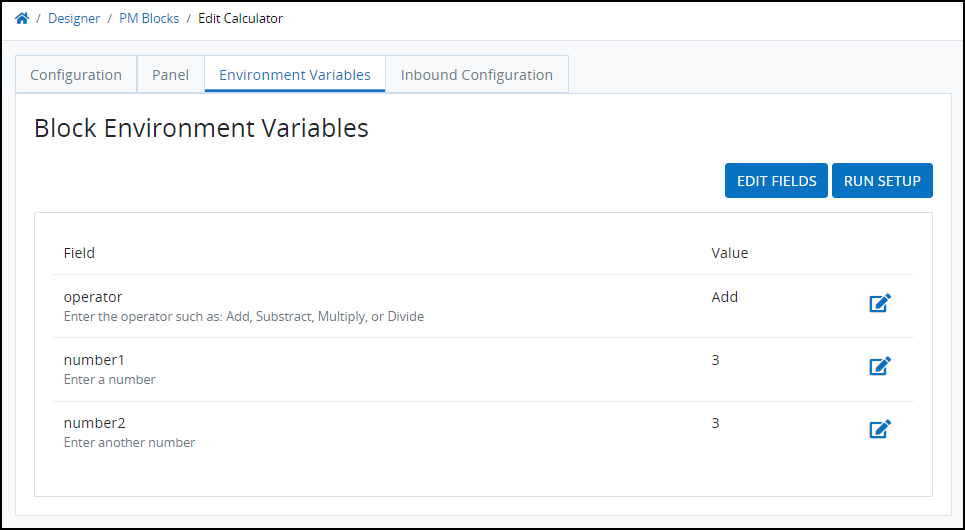
Click the Run Setup option next to the Edit Fields. A case for the PM Block will be created to complete the necessary pre-configuration.
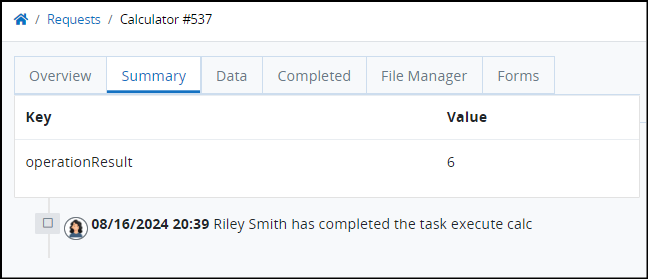
Configure Inbound Variables
From the Inbound Configuration tab, map inbound variables in the JSON format. These variables can then be used while configuring the PM Block object in the Modeler.
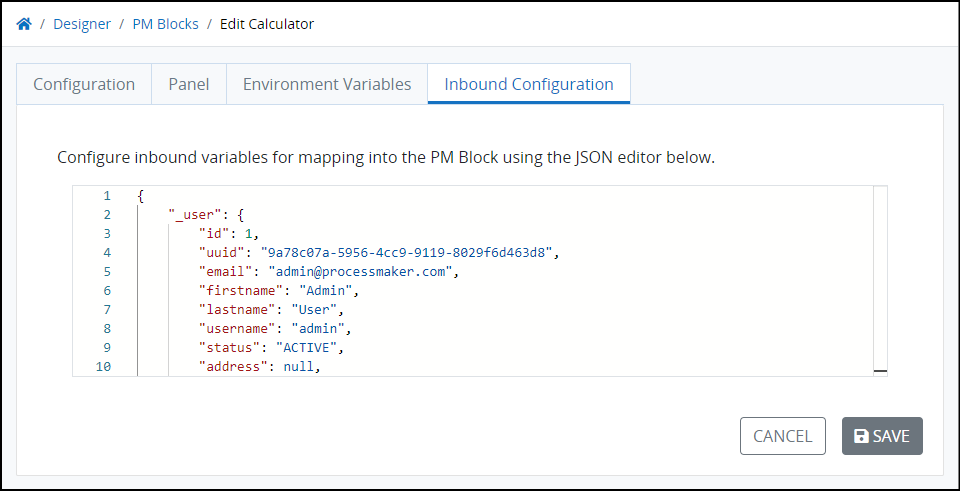
To easily use JSON data in the editor, view the Data tab for a previously completed task and copy the required JSON data format from there.