Configure General Settings
Permissions
Your user account or group membership must have the following permissions to configure a Process unless your user account has the Make this user a Super Admin setting selected:
Processes: Edit Processes
Processes: View Processes
See the Processes permissions or ask your Administrator for assistance.
Follow these steps to configure general settings for a Process:
Click the
 menu, then select the Configure option for your Process.
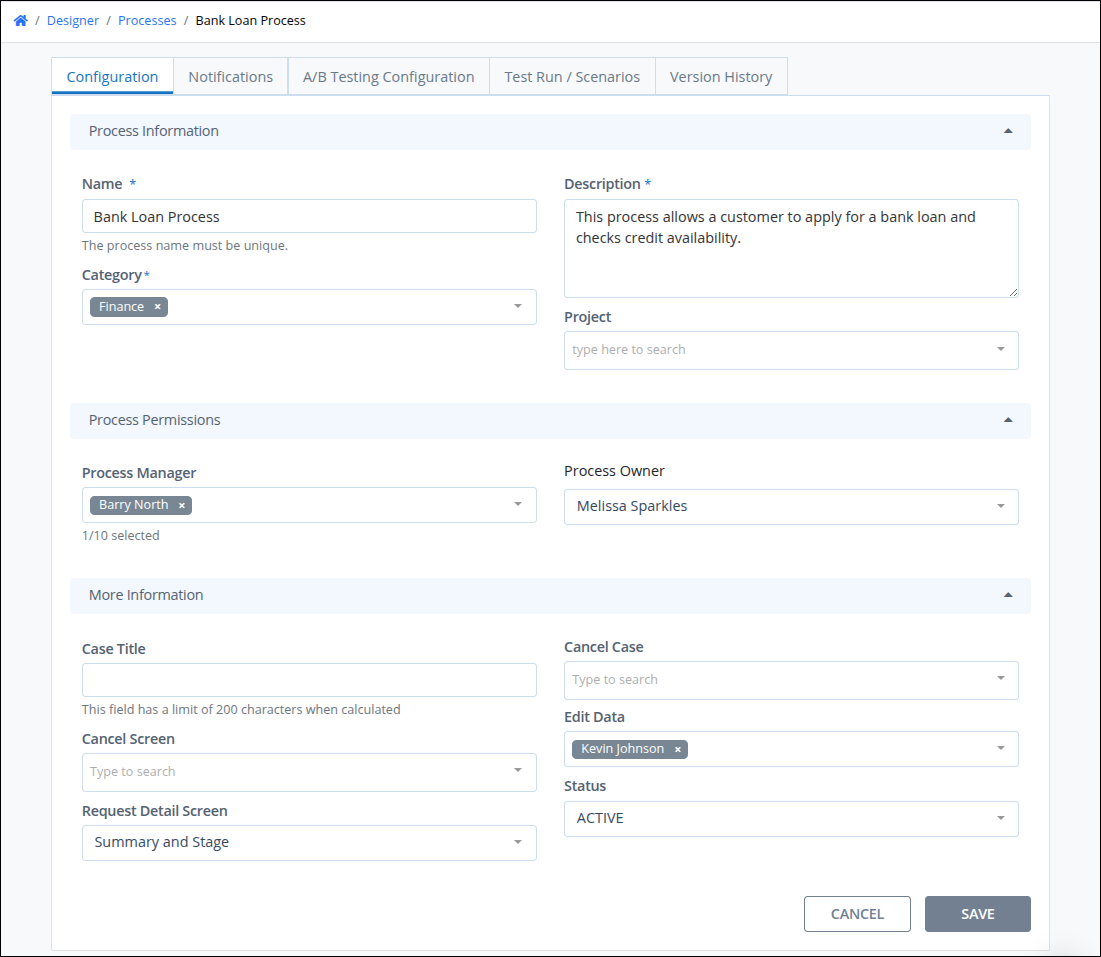
Edit the following Process configuration as necessary:
In the Name setting, edit the unique name of the Process. This is a required setting.
In the Description setting, edit the description of the Process. This is a required setting.
From the Category dropdown menu, select to which categories to assign this Process. In doing so, Process Categories may be sorted from the Processes page. To remove a Process Category that is currently selected, click the
 icon for that selection or press
 Enterwhen the dropdown is visible. This is a required setting. See What is a Process Category? for more information how this affects new Cases for this Process.From the Project dropdown menu, optionally select the Project(s) that this Process becomes an asset. This setting only displays Projects of which you are a member. To remove a Project that is currently selected, click the
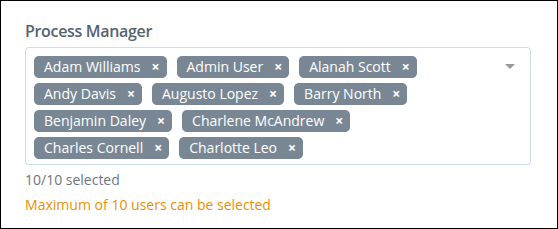
icon for that selection or press Enterwhen the dropdown is visible.From the Process Manager dropdown menu, select the user(s) to assign as Process Managers. You may assign up to ten Process Managers. If you attempt to exceed this limit, a warning message will appear.
If a designated manager is inactive, locked, or out of office during case creation, the task is automatically reassigned to one of the configured Process Managers.
If a process is not assigned a Process Manager, the Processes page displays the following icon before the process name:
 .
.
From the Process Owner dropdown menu, select who assign Process Managers.
From the Case Title setting, enter how the title for a Case displays for this Process. The Case title displays under the Case Title column in case pages and Task pages. Customize the Case title by referencing a case variable in mustache syntax that is used in this Process. For example, to customize the Case title for a new employee onboarding Process, use
Employee Onboarding: {{ FirstName }} {{ LastName }}. Note that the Case Title column only displays up to 200 characters after case variable values render.From the Cancel Case dropdown menu, assign which user(s) or group(s) have permission to cancel Case from this Process. If no users or groups are selected, no one can cancel a case from this Process. Type into the Cancel Case setting to filter users and/or groups that display in that setting's dropdown menu. To remove a user or group that is currently selected, click the
icon for that selection or press Enterwhen the dropdown is visible.From the Cancel Screen dropdown menu, select a Display-type Screen to display when a Case for this Process is canceled.
From the Edit Data dropdown menu, assign which user(s) or group(s) have permission to edit Request data from this Process. To remove a user or group that is currently selected, click the
icon for that selection or press Enterwhen the dropdown is visible.From the Request Detail Screen dropdown menu, select the Screen that displays in the Summary tab of the Request while that Request is in progress. After that Request completes, this Screen is replaced with the Summary Screen configured from the End Event element, if any.
From the Status dropdown menu, select one of these options:
Active: Select the Active option to allow users to start new Cases of this Process. Active processes display the Active icon
 when viewing your Processes.
 Inactive: Select the Inactive option to prevent users from starting new Cases of this Process. Setting a Process as Inactive only disables starting new Cases of this Process. Any in-progress Cases are not affected by this change and can complete. Inactive Processes display the Inactive icon
 when viewing your Processes.
Click Save.