Follow an example that uses two Data Connectors and a Watcher to get a list of all countries and their regions that display in dependent Select List controls.
Overview
Intended audience: Process designers, Web designers, graphic designers, software developers, coding engineers
Tags: Data Connector; Watchers; Select List control; dependent fields; geographical location; Screen design
The following example demonstrates dependent fields: how the options in one Select List control depend on which option is selected from a previous Select List control. This example demonstrates that after a country is selected from one Select List control, a second Select List control contains as options the states and/or provinces in that selected country. This example uses two Data Connectors, one to get the list of countries, the other to get the list of regions.
Dependent Select List Controls that Reference a Collection Source
Would you like to see this example that uses a Collection data source from which the Select List controls reference countries and their corresponding regions? See Example: Dependent Select List Controls Display Countries and Regions from a Collection.
The Select List control that contains the countries as its options gets those options from a Data Connector that uses a Resource to get the list of countries and their corresponding International Organization for Standardization (ISO) country code from a third-party application program interface (API). A Watcher monitors when a country is selected, and then another Data Connector uses a Resource to get the list of states and/or provinces from that selected country based on that country's ISO code. The Watcher stores that list of states/provinces as a Request variable in that Request's data so that the second Select List control may access that list to display as its options. The second Select List control's options depend on the first Select List control's selection.
Click the video below to watch a demonstration of this example.
Intended audience: Process designers, Web designers, graphic designers, software developers, coding engineers
Viewing time: 21 minutes; contains narration
Note: The video demonstrates how to configure the Select List controls using obsolete settings. The written form of this example documents how to configure the Select List controls using current settings.
Design dependent fields using two Select List controls, Data Connectors, and a Watcher
This example refers to Request data, Request variables, and uses JSON. If you are not familiar with these concepts or JSON, see the following topics for a primer:
This example contains the following procedures in this order:
Create the Data Connector that gets the list of countries for one Select List control: Create the Data Connector that gets a JSON array containing a JSON object for each country. One Select List control in this example uses this Data Connector's API response to get the list of countries as its options. This Data Connector accesses a public API that has been made available for demonstration purposes, so it does not require host authentication. As part of the Data Connector's JSON array response, it includes the two-letter International Organization for Standardization (ISO) country code in each JSON object, which is required for the second Data Connector as described below. See Create the Data Connector That Gets a JSON Array of Countries in its Response.
Create the Data Connector that gets the list of states and/or provinces for the dependent Select List control based on the first Select List control's option selection: After selecting a country as an option from the first Select List control, create another Data Connector that gets the region for the selected country based on its two-letter ISO country code.
This Data Connector accesses an API host under Creative Commons license that requires signing up for authentication. To demonstrate how to add request headers to a Data Connector's Resource, the authentication information for this API host is configured in a Resource's request headers instead of the Authentication tab of the Data Connector. Before creating this Data Connector, read about the API host, and then sign up to access the API. This example uses this API host for demonstration purposes since it returns only the first five JSON objects in its JSON array response for the United States that has the two-letter ISO country code of
US. Note that third-party APIs change their terms of use, so ensure that you are comfortable signing up to use this API host for this example. See Create the Data Connector That Gets a JSON Array of Regions in its Response Based on a Selected Country.Configure the Select List control to select a country: From the Screen to use for this example, add and configure the first Select List control from which to select a country. When a country is selected, that country's ISO code is stored in a Request variable called
countryfor the Watcher that monitors when a country has been selected. The Watcher, in turn, sends that country's ISO code to the second Data Connector to get that country's regions as described below. See Configure the Select List Control's Data Source That Gets the List of Countries.Configure the Watcher that monitors for a country selection: Configure the Watcher that monitors when a country is selected from the first Select List control, and then sends that country's ISO Code to the second Data Connector to get the regions for that country. The second Select List control contains no options until the Watcher sends the country's ISO code to the second Data Connector; this Data Connector's Resource URL requires that ISO code to successfully get the list of regions for that country. After the Data Connector gets the list of regions for the selected country as a JSON array, the Watcher stores that JSON array in that Request's data in a Request variable called
Regions, from which the second Select List control's regional options are available. See Configure the Watcher That Sends the Country Name to the Data Connector to Get That Country's Regions.Configure the dependent Select List control to select a region based on the country selection: Below the first Select List control, add and configure the second Select List control from which to select a region. The regional options that display in this second Select List control depend on which country is selected from the first Select List control. The regional options for this Select List control are not available until the Watcher receives them from the second Data Connector, and then adds them to that Request's data as described below. See Configure the Select List Control's Data Source That Gets the List of Regions.
Preview the Screen: Preview the Screen to see how the second Select List control depends on the country selected from the first Select List control. Further, preview the JSON data model from the controls as you interact with them. See Preview the Screen.
Create the Data Connector That Gets a JSON Array of Countries in its Response
Follow these steps to create the Data Connector that gets a JSON array containing the JSON objects of countries that the first Select List control uses to display a list of countries as its options as described in this example:
Log on to ProcessMaker Platform.
Click the Designer option from the top menu. The Processes page displays.
Click the Data Connectors icon
 from the left sidebar. The Data Connectors tab displays all Data Connectors in the Data Connectors page.
Verify the Data Connector Category exists in which to assign this Data Connector. If this Category does not exist, see Create a New Data Connector Category.
Click the +Data Connector button. The Create Data Connector screen displays.
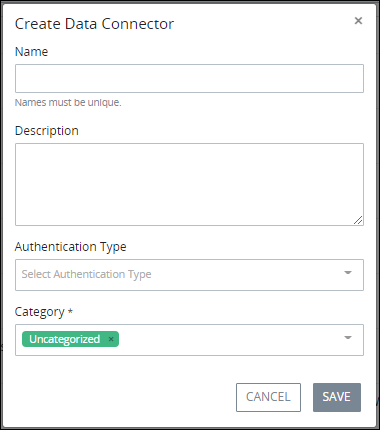
In the Name setting, enter the name of the Data Connector. This example uses the name
Call Countries API.In the Description setting, enter a description of this Data Connector.
From the Authentication Type drop-down menu, select the No Auth option. This example uses this option because the host does not require authentication from its publicly accessible API.
From the Category drop-down menu, select the Data Connector Category to assign this Data Connector. This example uses the following settings.
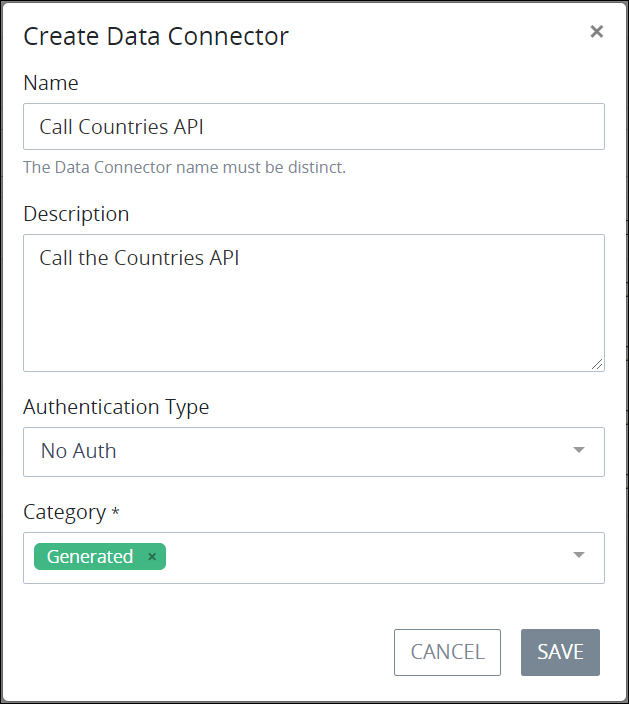
Click Save. The Data Connector is created and the Resources tab displays.
Go to the Configuration tab to disable the Enable SSL certificate verification setting, which is enabled by default.
Click Save. The Data Connector is updated.
Go back to the Resources tab and click the +Resource button. The Create Resource screen displays.
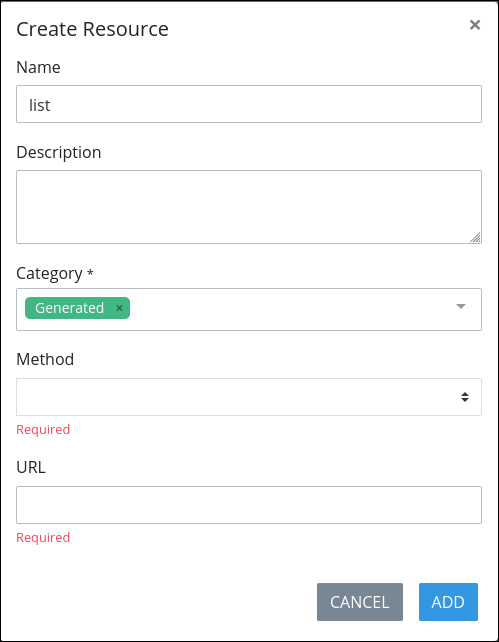
In the Name setting, optionally edit the purpose for this Resource. Therefore, provide a concise but relevant name for this Resource so other Process designers understand its function. This example uses the default
listfor this setting.In the Description setting, enter a description of this Resource. This example uses the following description:
Gets a list of countries..From the Category drop-down menu, select the Data Connector Category to assign this Resource.
From the Method drop-down menu, select the GET option. The GET method reads data from the API host.
In the URL setting, enter the following URL for this example:
https://restcountries.eu/rest/v2/all. This URL is provided by this host.Click Add. The new Resource displays in the Configuration tab.
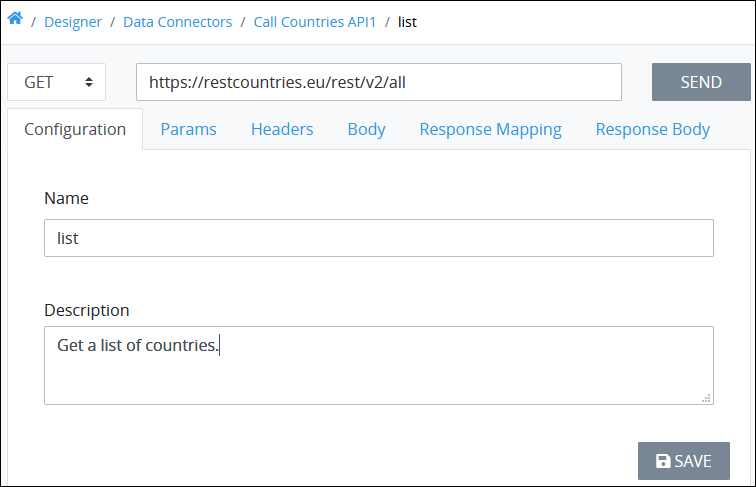
Click the Send button. If configured correctly, the Response Body tab displays the Resource response.
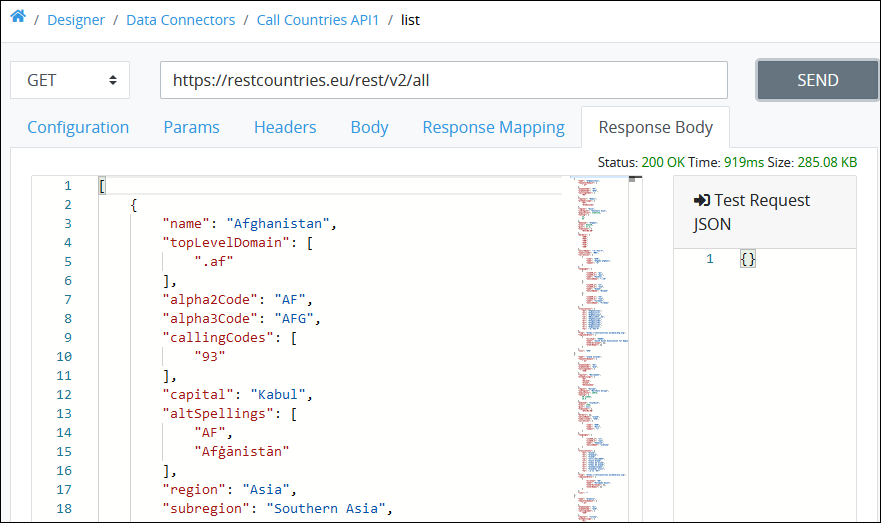
Notice which element in each JSON object within the resource response contains the name of the country. Look at the first JSON object. Notice the following key names in this JSON object:
name: Notice that thenamekey name in the JSON object contains the name of each country; the value of thenamekey name displays as each option in the Select List control from which a country name is selected.alpha2Code: Notice thealpha2Codekey name contains the two-letter International Organization for Standardization (ISO) code for each country; this Select List control stores the value of thealpha2Codekey name element. In this example, a Watcher uses the ISO country code to determine which regions to display in the dependent Select List control.
Make note of the relevant key name(s) that contains relevant data, as the ProcessMaker Platform asset requires this key name when configuring which data that asset requires from the Data Connector's response. In this example, the Screen containing the Select List control is the ProcessMaker Platform asset. See Example JSON Object from the Endpoint Response for the List of Countries.
Click Save to save the Resource. The Data Connector is configured for this example.
Create the Data Connector That Gets a JSON Array of Regions in its Response Based on a Selected Country
Before creating this Data Connector, read about the API host, and then sign up to access the API. Note that third-party APIs change their terms of use, so ensure that you are comfortable signing up to use this API host for this example.
Follow these steps to create the Data Connector that gets a JSON array containing the JSON objects of regions for the selected country from the first Select List control as described in this example:
Log on to ProcessMaker Platform.
Click the Designer option from the top menu. The Processes page displays.
Click the Data Connectors icon
 from the left sidebar. The Data Connectors tab displays all Data Connectors in the Data Connectors page.
Verify the Data Connector Category exists in which to assign this Data Connector. If this Category does not exist, see Create a New Data Connector Category.
Click the +Data Connector button. The Create Data Connector screen displays.

In the Name setting, enter the name of the Data Connector. This example uses the name
Get Regions.In the Description setting, enter a description of this Data Connector. This example uses the description:
Gets the region(s), state(s), department(s), and/or province(s) for the country selected from the first Select List control after the Watcher gets that country selection.From the Authentication Type drop-down menu, select the No Auth option. To demonstrate how to add request headers to a Data Connector's Resource, the authentication information for this API host is configured in a Resource's request headers instead of the Authentication tab of the Data Connector.
From the Category drop-down menu, select the Data Connector Category to assign this Data Connector. This example uses the following settings.
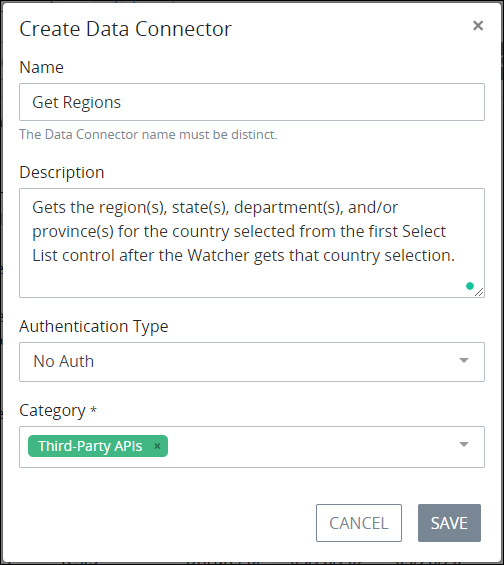
Click Save. The Data Connector is created and the Resources tab displays.
Go to the Configuration tab to disable the Enable SSL certificate verification setting, which is enabled by default.
Click Save. The Data Connector is updated.
Go back to the Resources tab and click the +Resource button. The Create Resource screen displays.
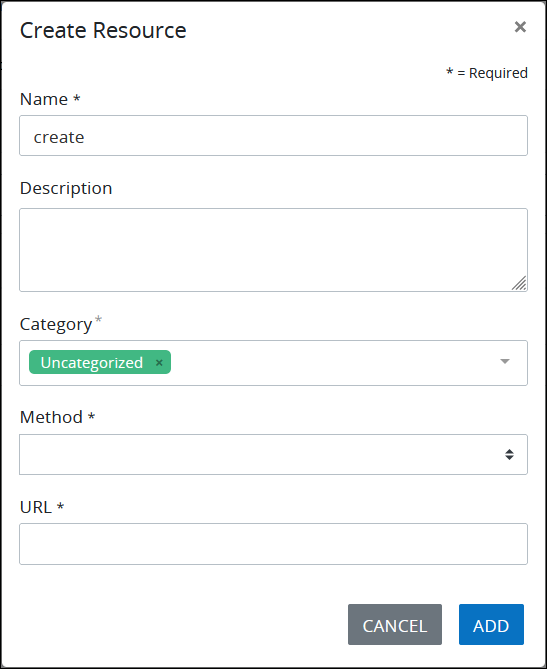
In the Name setting, optionally edit the purpose for this Resource. Therefore, provide a concise but relevant purpose for this Resource so other Process designers understand its function. This example uses the default
listfor this setting.In the Description setting, enter a description of this Resource. This example uses the following description:
Gets a list of regions from the selected country.From the Category drop-down menu, select the Data Connector Category to assign this Resource.
From the Method drop-down menu, select the GET option. The GET method reads data.
In the URL setting, enter the following URL for this example:
https://wft-geo-db.p.rapidapi.com/v1/geo/countries/{{country}}/regionsNotice how this URL contains the API resource parameter{{country}}within it. This URL uses mustache syntax to get the value from the Watcher; in this example, the Watcher monitors when the Select List control of which its Variable Name setting value iscountryhas a selected option, and then sends that country's ISO code to this Data Connector. By using mustache syntax in this Resource's URL, that country's ISO Code replaces{{country}}as an API resource parameter when this Resource calls that endpoint. See Create the Select List Control to Select a Country and Configure the Watcher That Sends the Country Name to the Data Connector to Get That Country's Regions.Click Add. The new Resource displays in the Configuration tab.
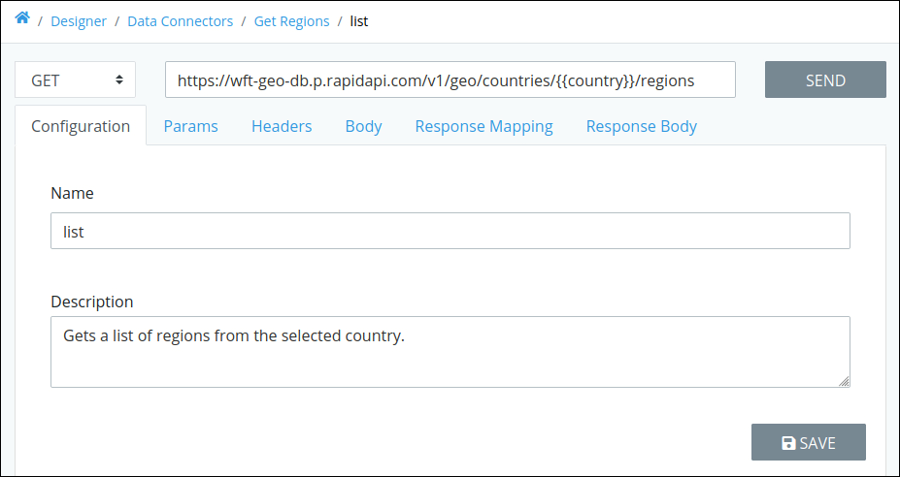
Click the Headers tab to add request headers that contain the authentication information to access the host's API. This example requires two request headers that provide valid authentication to access this API's endpoint.
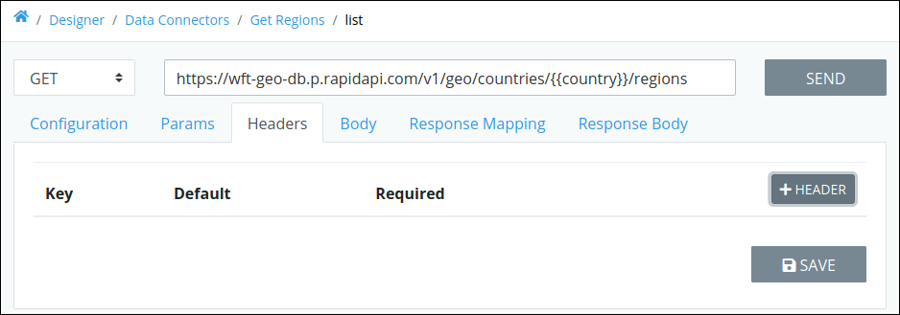
These request headers are required header parameters for the Country Regions endpoint using the GET method:
X-RapidAPI-HostandX-RapidAPI-Key. Note that theX-RapidAPI-Keyheader parameter value is unique for each person using this API for authentication. To obtain this information, see GeoDB Cities API Documentation and then copy the following information: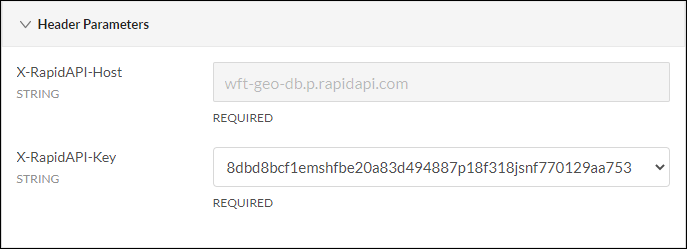
Click the +Header button to add the first request header. The Add screen displays.
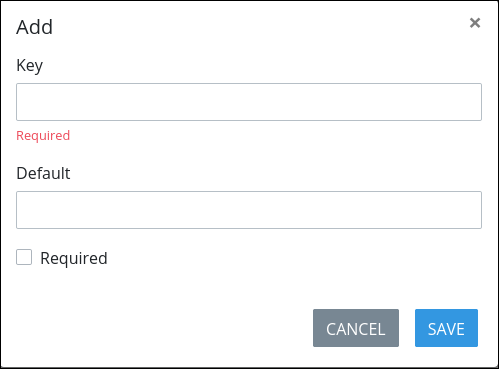
In the Key setting for the first request header, enter
X-RapidAPI-Hostas specified by the API host for this request parameter.In the Default setting for the first request header, enter
wft-geo-db.p.rapidapi.comas specified by the API host for this request parameter.Click Required to mandatory use this header for the API authentication.
Click Save. The first request header displays in the Headers tab.
Click the +Header button to add the second request header. The Add screen displays.
In the Key setting for the second request header, enter
X-RapidAPI-Keyas specified by the API host for this request parameter for authentication.In the Default setting for the second request header, enter your unique application key for authentication.
Click Required to mandatory use this header for the API authentication.
Click Save. The second request header displays in the Headers tab.
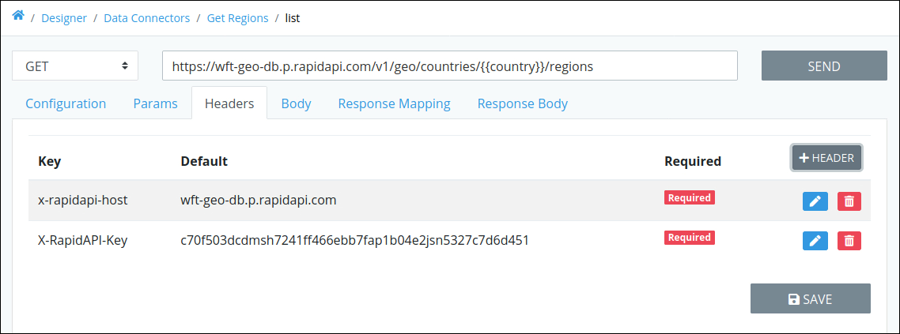
Click Save to save the Resource with the two configured request headers.
To test if the Resource and its authentication application key function as intended, click the Params tab to add a value for the
countryparameter in this Resource to a real two-letter ISO country code. This example uses the ISO country codeUS.
Click Send. If configured correctly, the Response Body tab displays the Resource response. This example returns only the first five JSON objects in its JSON array response since this example uses this API host for demonstration purposes.
Notice the following:
data: Notice that the JSON array containing the response is calleddata. The name of this JSON array is relevant when configuring the Select List control from which to select the country's region.name: Notice which key in each JSON object within the Resource response contains the name of the region: in this test, the states and provinces within the United States. Look at the first JSON object. Notice that the JSON key callednamecontains the name of the state; the value of the JSON keynamedisplays as each option in the Select List control from which a region is selected.
Click Response Mapping to map data from the API response to a ProcessMaker Platform asset; which is the Screen containing the Select List controls in this example.
Click +Mapping. The Add screen displays.
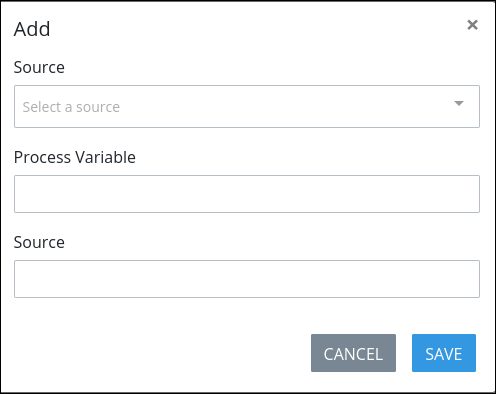
In the first Source setting, select from where you want to map the data. For this example, select BODY.
In the Process Variable, enter the Request variable in which to save the list of regions to display in the Select List control. This example uses
Regions.In the second Source setting, enter the key name from the API response containing the names of the regions as describe in step 34 above. This example uses
name.Click Save. The response mapping is listed.

Click Save to save the Resource with the response mapping.
Configure the Select List Control's Data Source That Gets the List of Countries
Follow these steps to configure the Select List control's data source to get the list of countries as described in this example:
Log on to ProcessMaker Platform.
Create the Screen for the example to contain the two Select List controls and the Watcher.
Add the Select List control from which to select a country from the list of countries.
In the Variable Name setting, enter
countrysince both the Watcher and the Data Connector that gets the regions for the selected country from this Select List control expect this Variable Name setting value.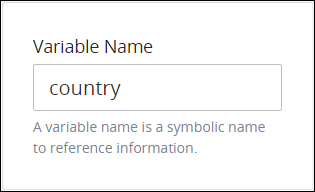
Click the Data Source panel.
From the Data Source drop-down menu, select Data Connector.
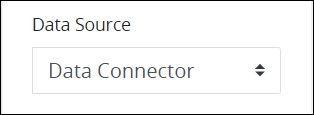
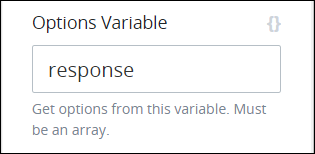
From the Options Variable setting, do not change the default response value.
From the Show Control As drop-down menu, select whether to show this Select List control's options as a drop-down menu or as a group of checkboxes. This example uses the Dropdown/Multiselect option.
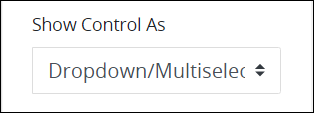
Do not select the Allow Multiple Selections option. In this example, only one country must be selected for this example to function because the Watcher that monitors when a selection is made may only send one country name to the Data Connector that gets the regions in that country.

From the Type of Value Returned setting, do not change the default Single Value option since this example requires only one value from the selected JSON object and not the entire JSON object itself.
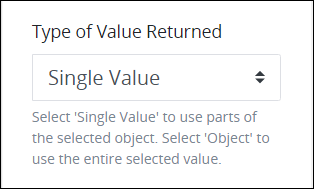
From the Value setting, enter
alpha2Codeto get the value of thealpha2CodeJSON object key name's value. When testing the first Data Connector that gets the list of countries,alpha2Codeis the JSON object key name that contains the two-letter ISO country code the second Data Connector uses to get that country's regions.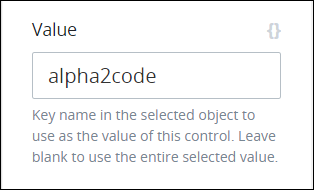
From the Content setting, enter name. When testing the first Data Connector that gets the list of countries,
nameJSON object key contains the country name as its value within each JSON object of the JSON array response.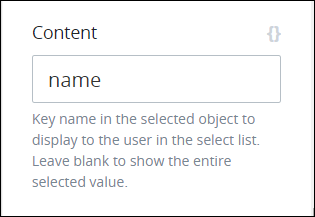
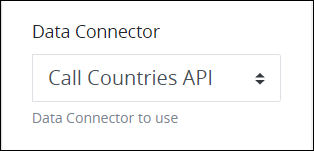
From the Data Connector drop-down menu, select Call Countries API, which is the name of the Data Connector that gets the list of countries.
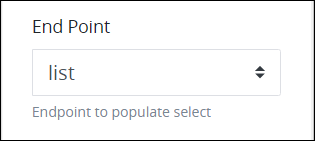
From the End Point drop-down menu, select list, which is the name of the Resource in the Call Countries API that gets the list of countries from the API's resource.
Configure the Watcher That Sends the Country Name to the Data Connector to Get That Country's Regions
Follow these steps to configure the Watcher as described in this example:
Log on to ProcessMaker Platform.
Open the Screen for this example. Ensure that this Screen contains the first Select List control configured for this example.
Click the Watchers button
 . The Watchers screen displays all Watchers configured for this Screen.
Click the +Watcher button. The Watchers screen displays with the Configuration panel expanded.
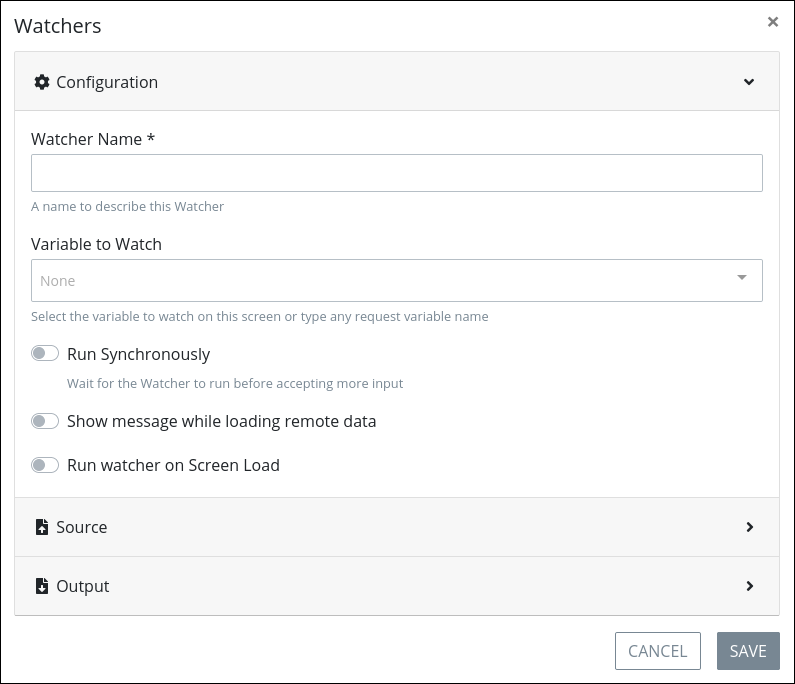
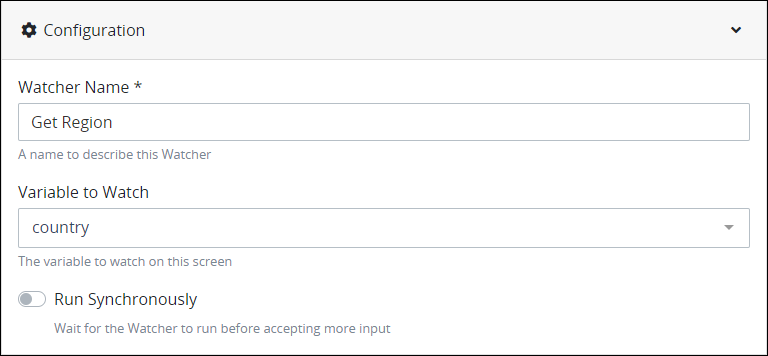
In the Watcher Name setting, enter the name of the Watcher. This example uses the name
Get Region.From the Variable to Watch drop-down menu, select country.
countryis the Variable Name setting value for the Select List control from which a country is selected. This Watcher monitors for when a value is selected from this control: in this example, a country name. After the monitored control has a value, then the Watcher triggers.Select the Run Synchronously toggle key to run the Watcher while still interacting with the Screen.
Check and confirm the settings in the Configuration panel.
Select the Source panel.
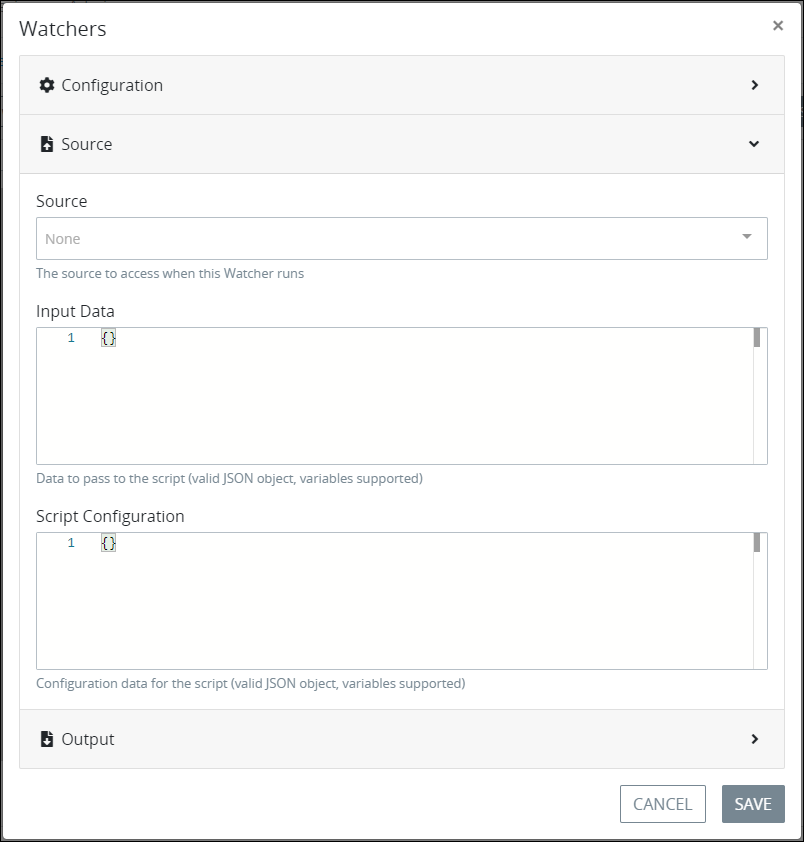
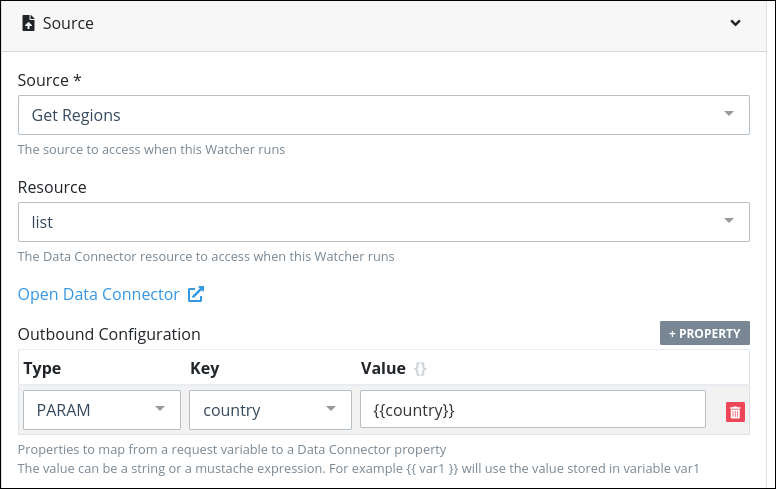
From the Source drop-down menu, select Get Regions.
Get Regionsis the name of the Data Connector that gets the list of regions from the selected country.From the Resource drop-down menu, select list.
listis the name of the Data Connector's Resource that gets the list of regions from the selected country.In the Outbound Configuration section, add the parameters that the Watcher passes to the Data Connector
Get Regions. This Data Connector requires the selected country's ISO code as a parameter to get a list of regions in that country. The Select List control that displays a list of countries also saves the selected country's ISO code in the Request variable{{country}}. When the Screen previews or displays during a Request, the selected country name in that Select List control replaces{{country}}.Confirm the settings in the Source panel.
Click the Output panel.
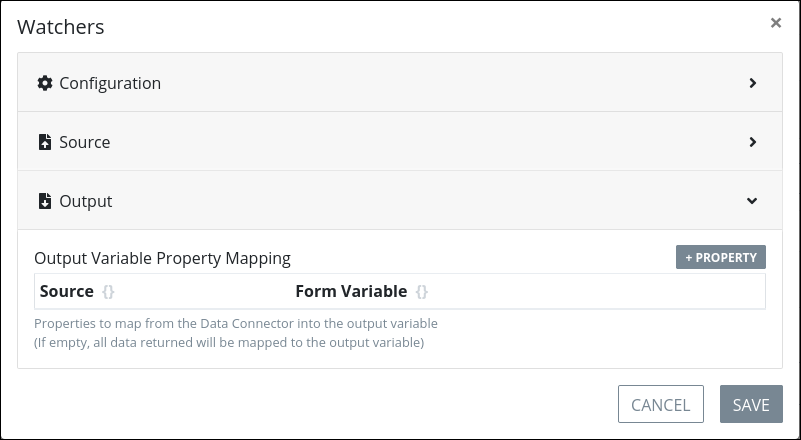
In the Output panel, specify how to map data returned by the Watcher or the Watcher's output to a Request variable. In this example, the Watcher's output is saved in the JSON object called
data; use this in the Source setting. The Request variable receiving the Watcher's output isRegions; use this in the Form Variable setting.Confirm the settings in the Output panel.

Click Save. The Watcher displays in the Watchers screen.

Close the Watchers screen, and then continue to add and configure the Select List control's data source that gets the list of regions.
Configure the Select List Control's Data Source That Gets the List of Regions
Follow these steps to configure the Select List control's data source to get the list of regions as described in this example:
Log on to ProcessMaker Platform.
Open the Screen for this example. Ensure that this Screen contains the first Select List control configured for this example.
Add the Select List control below the first Select List control from which to select a region from the selected country.
In the Variable Name setting, enter
regionName.Click the Data Source panel.
From the Data Source drop-down menu, select Request Data.
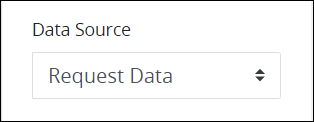
In the Options Variable setting, enter the Request variable
Regionsthat saves JSON data configured in the Watcher: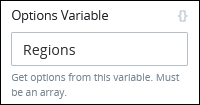
The Watcher outputs data it receives from the Data Connector to the Request variable called
Regions.The Data Connector receives its response from the API endpoint in a JSON object element called
responseby default.The JSON array nested in the
responseJSON object is calleddataas shown when testing the Data Connector's Resource to get a list of regions.
In the Option Label Shown setting, enter
name. When testing the Data Connector that gets the list of a country's regions, the key name callednamecontains the region in each JSON object of the JSON array the Data Connector returns to the Watcher. The Watcher then outputs this JSON array to the Request variableRegionsfrom which this Select List control's options derive.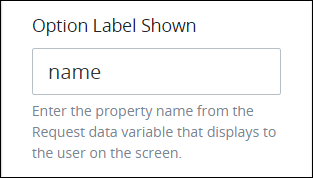
From the Show Control As drop-down menu, select whether to show this Select List control's options as a drop-down menu or as a group of checkboxes. This example uses the Dropdown/Multiselect option.

Select the Allow Multiple Selections option if you would like the Request participant to select more than one country region. This example does not use this setting.

From the Type of Value Returned setting, do not change the default Single Value option since this example requires only one value from the selected JSON object and not the entire JSON object itself.

From the Variable Data Property setting, enter
nameto store the selected country region in a JSON object key name calledname.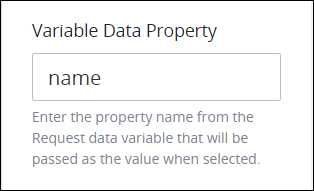
Save your Screen. The Screen is now ready to preview how this Select List control depends on the country selected from the first Select List control.
Preview the Screen
Follow these steps to preview the Screen as described in this example:
Log on to ProcessMaker Platform.
Open the Screen for this example.
Click the Preview button. The Screen is in Preview mode.
From the Country Select List control, select United States of America. After making a selection, a screen displays while the Watcher sends the selected country's ISO code to the Data Connector that gets that country's regions, returns that JSON array of objects to the Watcher, and then the Watcher stores that response to the
RegionsRequest variable in the preview.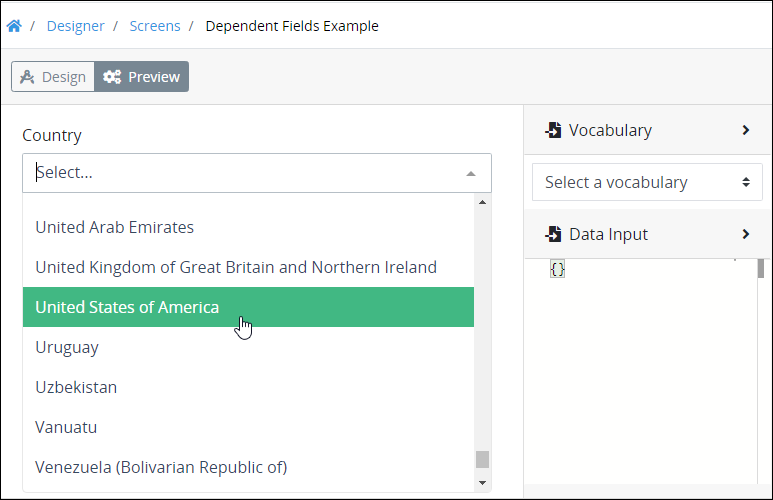
Click the Region Select List control. The first five alphabetical states in the United States are options. There are only five options since this example uses the API host that returns only five JSON objects in the JSON array response for demonstration purposes.
Select one of the five states.
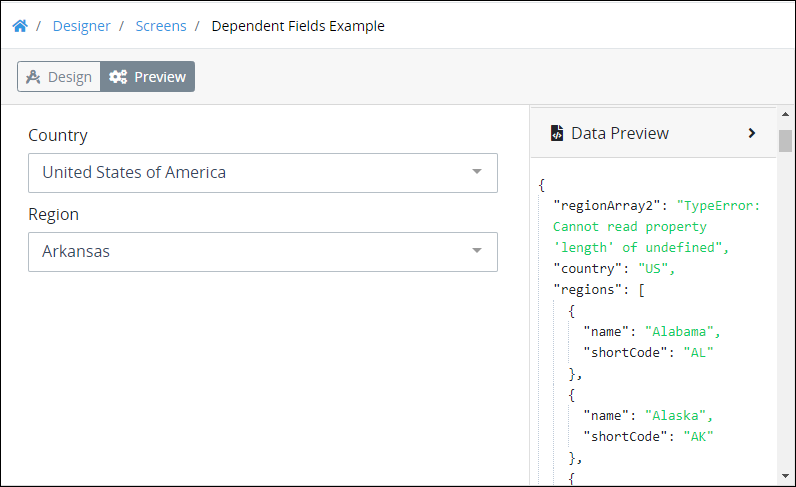
Expand the Data Preview panel. Notice the JSON data model generated by the ProcessMaker Platform assets used in this example:
country: The JSON data object with the key namecountryrepresents the Select List control from which the country was selected. This JSON data object contains the two-letter International Organization for Standardization (ISO) code for the United States ("US").regions: The JSON array calledregionscontains the JSON objects for the first five alphabetical states in the United States.
This example is complete.
Example JSON Object from the Resource Response for the List of Countries
Below is one JSON object from the Resource response that gets the list of countries. The key names relevant in this JSON object for this example are Call Countries API and alpha2Code.
{
        "name": "Afghanistan",
        "topLevelDomain": [
            ".af"
        ],
        "alpha2Code": "AF",
        "alpha3Code": "AFG",
        "callingCodes": [
            "93"
        ],
        "capital": "Kabul",
        "altSpellings": [
            "AF",
            "Afġānistān"
        ],
        "region": "Asia",
        "subregion": "Southern Asia",
        "population": 27657145,
        "latlng": [
            33,
            65
        ],
        "demonym": "Afghan",
        "area": 652230,
        "gini": 27.8,
        "timezones": [
            "UTC+04:30"
        ],
        "borders": [
            "IRN",
            "PAK",
            "TKM",
            "UZB",
            "TJK",
            "CHN"
        ],
        "nativeName": "افغانستان",
        "numericCode": "004",
        "currencies": [
            {
                "code": "AFN",
                "name": "Afghan afghani",
                "symbol": "؋"
            }
        ],
        "languages": [
            {
                "iso639_1": "ps",
                "iso639_2": "pus",
                "name": "Pashto",
                "nativeName": "پښتو"
            },
            {
                "iso639_1": "uz",
                "iso639_2": "uzb",
                "name": "Uzbek",
                "nativeName": "Oʻzbek"
            },
            {
                "iso639_1": "tk",
                "iso639_2": "tuk",
                "name": "Turkmen",
                "nativeName": "Türkmen"
            }
        ],
        "translations": {
            "de": "Afghanistan",
            "es": "Afganistán",
            "fr": "Afghanistan",
            "ja": "アフガニスタン",
            "it": "Afghanistan",
            "br": "Afeganistão",
            "pt": "Afeganistão",
            "nl": "Afghanistan",
            "hr": "Afganistan",
            "fa": "افغانستان"
        },
        "flag": "https://restcountries.eu/data/afg.svg",
        "regionalBlocs": [
            {
                "acronym": "SAARC",
                "name": "South Asian Association for Regional Cooperation",
                "otherAcronyms": [],
                "otherNames": []
            }
        ],
        "cioc": "AFG"
    },