What is Single Sign-On (SSO)?
Single Sign-On (SSO) allows a user to sign on with one set of credentials to log on to ProcessMaker. This increases security and provides a better user experience for customers, employees, and partners by reducing the number of required accounts/passwords.
As a prerequisite to enable SSO, the Administrator must implement an Identity Provider. If you use a centralized user system, such as Microsoft or Google, you already have access to an Identity Provider.
Notice to Administrators
Enhance security for your ProcessMaker Platform instance by following these best practices. Among these best practices are to require all ProcessMaker users to log on to your ProcessMaker Platform instance via Single Sign-On (SSO), OAuth, OKTA and/or two-factor authentication.
To use one or more Identity Providers, view SSO settings, and then enable the toggle key for the Identity provider(s). Doing so adds a new Settings tab to configure that specific Identity Provider. ProcessMaker Platform supports the following Identity Providers:
View SSO Settings
Display all SSO settings in one location. This makes it easy to manage these settings.
Permissions
Your user account or group membership must have the "Settings: Update Settings" permission to view SSO settings unless your user account has the Make this user a Super Admin setting selected.
See the Settings permissions or ask your Administrator for assistance.
Follow these steps to view all SSO settings to synchronize users in your organization:
Ensure that you are logged on to ProcessMaker.
Click the Admin option from the top menu. The Users page displays.
Click the Settings icon
 from the left sidebar to view all settings.
From the Settings panel on the left, expand the Log-in & Auth section.
Select SSO to view the following details:
Setting: The Setting column displays the SSO Setting name.
Configuration: The Configuration column displays the setting value and how it is configured.
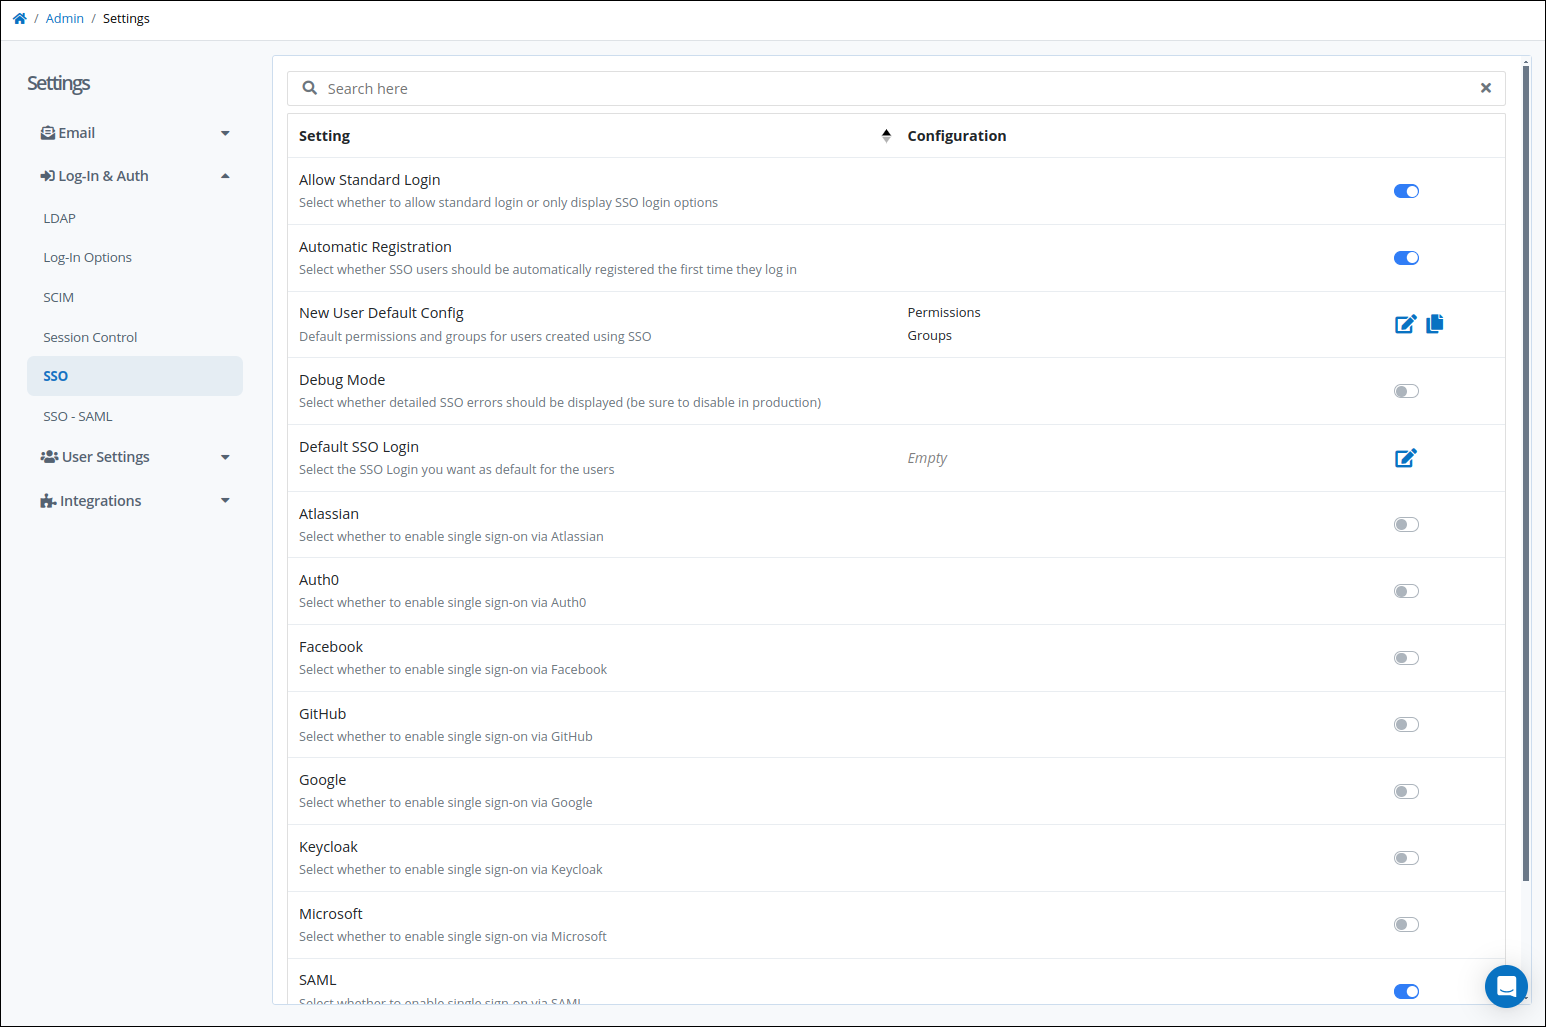
Settings to enable logon through SSO
Search for an SSO Setting
Follow the next steps to search for a setting:
In the Search setting, enter the Setting name to filter settings.
Click the Search icon
or press enter to view SSO settings that match your entered text.
Configure SSO Settings
Notice to Administrators
Enhance security for your ProcessMaker Platform instance by following these best practices. Among these best practices are to require all ProcessMaker users to log on to your ProcessMaker Platform instance via Single Sign-On (SSO), OAuth, OKTA and/or two-factor authentication.
Permissions
Your user account or group membership must have the "Settings: Update Settings" permission to edit SSO settings unless your user account has the Make this user a Super Admin setting selected.
See the Settings permissions or ask your Administrator for assistance.
Configure the following SSO settings as necessary:
Enable Standard Login
Enable to display settings to log on using user credentials. When disabled, settings only display SSO log on options.
Follow these steps to enable display settings for standard log on:
View your SSO settings. The SSO tab displays.
Enable the Allow Standard Login toggle key. The following message displays: The setting was updated.
Enable Automatic Registration
Enable whether SSO users should automatically register the first time that they log on.
Follow these steps to enable automatic registration:
View your SSO settings. The SSO tab displays.
Enable the Automatic Registration toggle key. The following message displays: The setting was updated.
Enable Permissions for SSO Users
Specify which permissions to assign new users that are created via SSO:
Follow these steps to specify which user permissions to assign new users created via SSO:
View your SSO settings. The SSO tab displays.
Click the Edit icon
 for the New User Default Config setting. The New User Default Config screen with the Permissions tab displays.
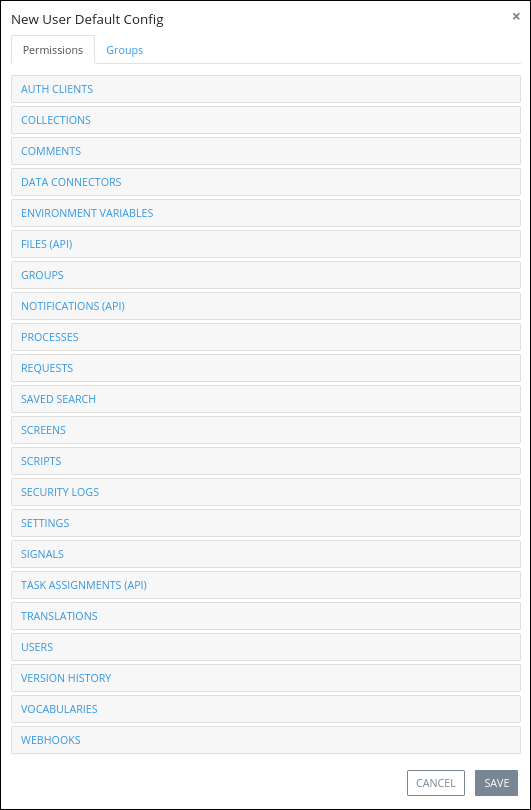
Select a collapsed permission category to expand the view of individual permissions within that category. Otherwise, select an expanded permission category to collapse that category.
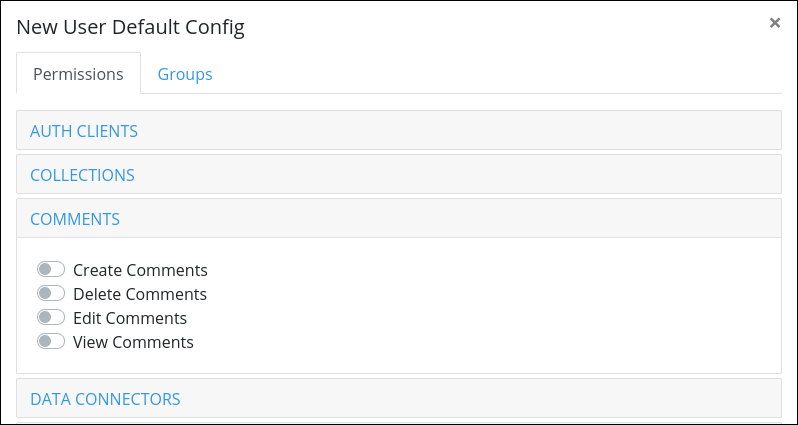
Enable permissions as necessary. See Permission Descriptions for Users and Groups for descriptions.
Click Save. The following message displays: The setting was updated.
Enable Groups for SSO Users
Select to which groups to assign users created via SSO.
Follow these steps to select to which groups to assign users created via SSO:
View your SSO settings. The SSO tab displays.
Click the Edit icon
 for the New User Default Config setting. The New User Default Config screen with the Permissions tab displays.
Click the Groups tab. All available groups display.
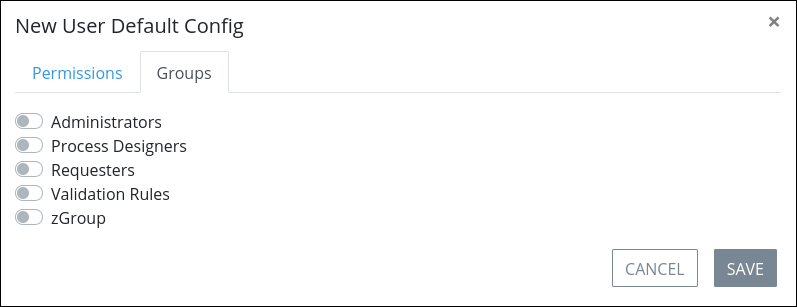
Enable groups as necessary.
Click Save. The following message displays: The setting was updated.
Copy Permissions and Groups for SSO Users
Copy to clipboard a JSON-formatted object of all assigned permissions and groups for users created via SSO.
Follow these steps to copy the permissions and groups for SSO users:
View your SSO settings. The SSO tab displays.
Click the Copy to Clipboard icon
 for the New User Default Config setting. The following message displays: The setting was copied to your clipboard.
Enable Default SSO Login
Select a default SSO integration to allow users be automatically redirected to the IDP Single Sign On log on page instead of displaying the normal Login page. When the user goes to the log on page, that user is redirected to the selected provider.
Follow these steps to enable default SSO Integration:
View your SSO settings. The SSO tab displays.
Click the Edit icon
 for the Default SSO Login setting. The Default SSO Login screen with the SSO identity providers displays.
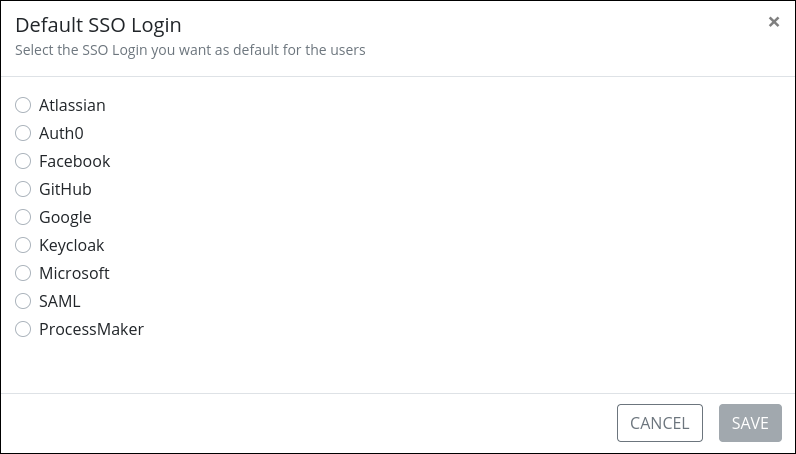
Select an SSO identity provider among:
Select the ProcessMaker SSO login option if you do not want an SSO identity provider as the default log on. This option ensures LDAP users to verify accounts in ProcessMaker Platform. This option also helps to log on as an administrator while fixing SSO problems.
Click Save. The following message displays: The setting was updated.
Enable Debug Mode
Select whether detailed SSO errors should be displayed. It is recommended to disable the debug mode in production servers.
Follow these steps to enable automatic registration:
View your SSO settings. The SSO tab displays.
Switch on the Debug Mode toggle key. The following message displays: The setting was updated.
Enable SSO Identity Providers
Select whether to enable single sign-on via SSO identity providers to log on as necessary. The SSO identity provider options display on the log on screen.
View your SSO settings. The SSO tab displays.