Configure SSO SAML Settings
Permissions
Your user account or group membership must have the "Settings: Update Settings" permission to edit SSO SAML settings unless your user account has the Make this user a Super Admin setting selected.
See the Settings permissions or ask your Administrator for assistance.
Notice to Administrators
Enhance security for your ProcessMaker Platform instance by following these best practices. It is recommended to require all ProcessMaker users to log in using Single Sign-On (SSO), OAuth, OKTA, and/or two-factor authentication (2FA).
The following information is required to configure SSO with SAML:
SSO endpoint
SSO identifier
SLO endpoint
Encryption type
Authentication context
Public certificate
Name ID format
To generate or locate this information, contact your SAML identity provider.
Watch the following video for an example of how to configure SAML SSO settings.
Intended audience: System administrators and Process designers
Viewing time: 6 minutes; contains narration
Follow these steps to configure SAML SSO settings:
From the list of SSO identity providers, select the SAML option. The SSO - SAML tab displays.
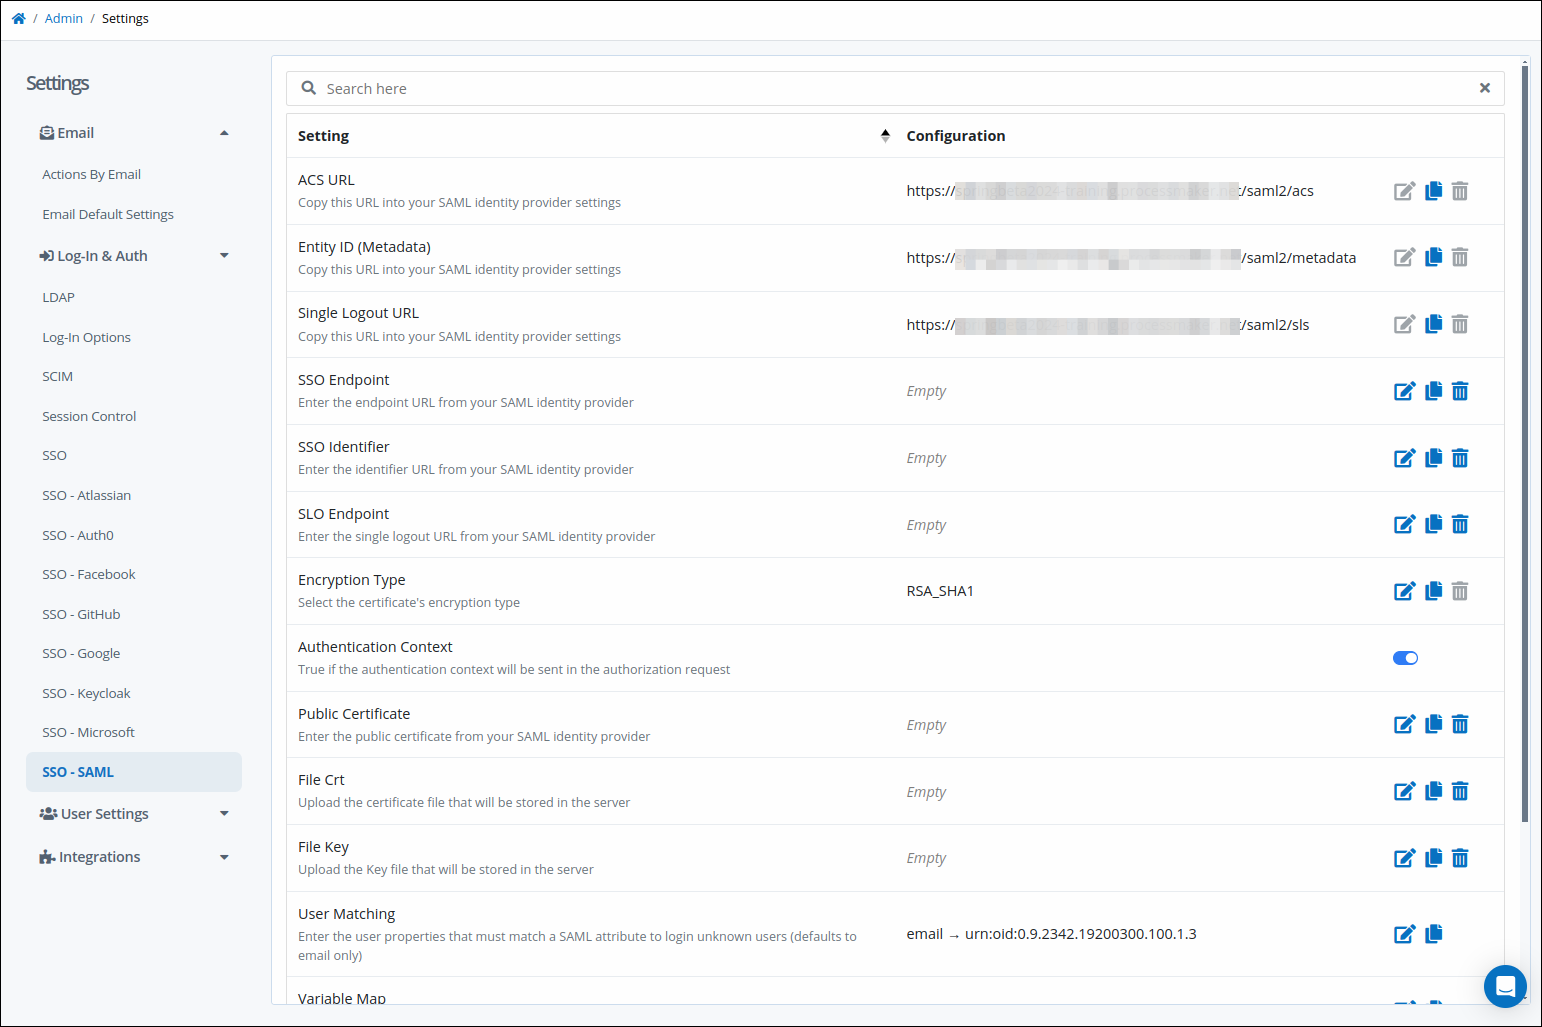
Use the copy icon
 to copy the URL from the ACS Url setting, and then provide it to your SAML identity provider.
Use the copy icon
to copy the URL from the Entity ID (Metadata) setting, and then provide it to your SAML identity provider.Use the copy icon
to copy the URL from the Single Logout URL setting, and then provide it to your SAML identity provider.Click the Edit icon
 for the SSO Endpoint setting. The SSO Endpoint screen displays.
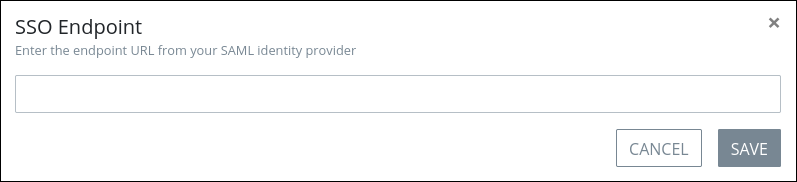
Enter the identity provider URL from which ProcessMaker retrieves the authentication response and validates it when establishing the SSO session. Your identity provider provides this URL.
Click the Edit icon
for the SSO Identifier setting. The SSO Identifier screen displays. 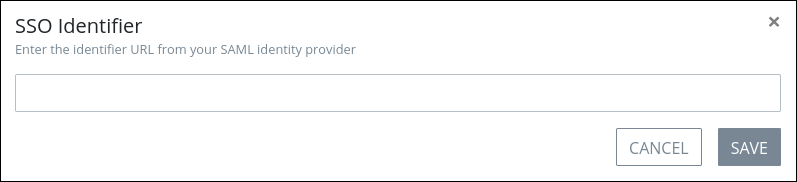
Enter the URL that references the SAML XML file for your identity provider (IdP). Your identity provider provides this URL.
Click the Edit icon
for the SLO Endpoint setting. The SLO Endpoint screen displays. 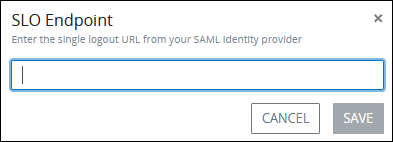
Enter the logout URL provided by your identity provider.
Click the Edit icon
for the Encryption Type setting. The Encryption Type screen displays.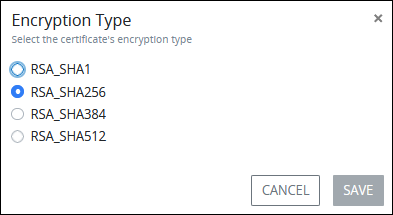
From the list of encryption types, select the encryption type your identity provider uses.
Use the Authentication Context toggle to indicate whether to send authentication context in the authorization request or not.
Click the Edit icon
for the Public Certificate setting. The Public Certificate screen displays. 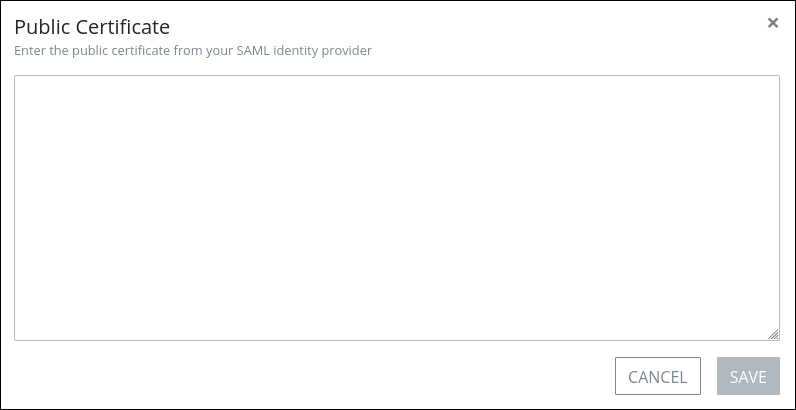
Enter the identity provider's certificate fingerprint by pasting it into this setting. Your identity provider provides this certificate. Ensure to include the -----BEGIN CERTIFICATE----- header. ProcessMaker retrieves the authentication response and validates it using the identity provider's certificate fingerprint.
Click the Edit icon
for the File crt setting. The File crt screen displays. 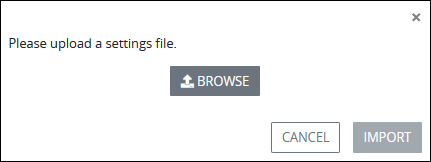
Click the browse button and then select the file containing your SAML certificate, if one is available from your identity provider.
Click the Edit icon
for the File key setting. The File key screen displays. Click the browse button and then select the file containing your SAML key, if one is available from your identity provider.
Click the Edit icon
for the User Matching setting. The User Matching screen displays. 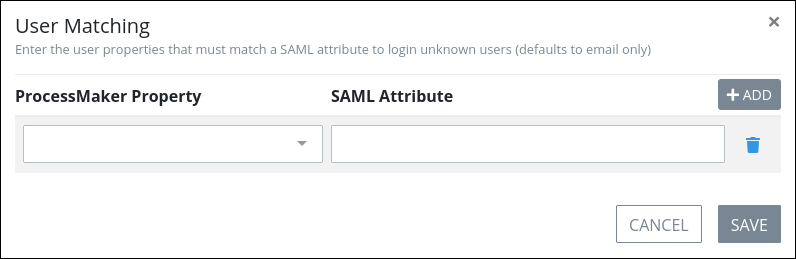
Click the Add button. An empty row displays.
In the ProcessMaker Property setting, enter the ProcessMaker user property to which to match the SSO SAML attribute.
In the SAML Attribute setting field, enter the SSO SAML attribute from which to map to the ProcessMaker user property.
Optionally, click the Delete icon
 to delete a mapped ProcessMaker user property.
Click Save. The following message displays: The setting was updated.
Click the Edit icon
for the Variable Map setting. The Variable Map screen displays. 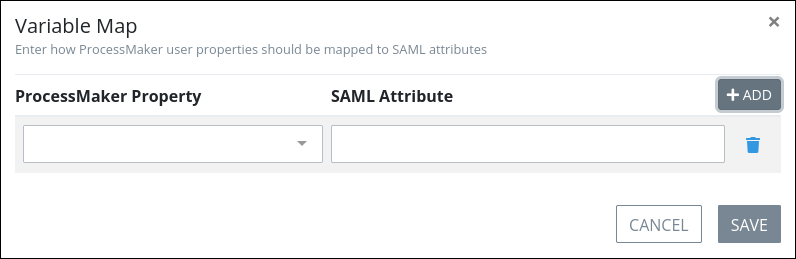
Click the Add button. An empty row displays.
In the ProcessMaker Property setting, enter the ProcessMaker user property to which to match the SSO SAML attribute.
In the SAML Attribute setting, enter the SSO SAML attribute from which to map to the ProcessMaker user property.
Optionally, click the Delete icon
to delete a mapped ProcessMaker user property, .Click Save. The following message displays: The setting was updated.
Click the Edit icon
for the Name ID Format setting. The Name ID Format screen displays. 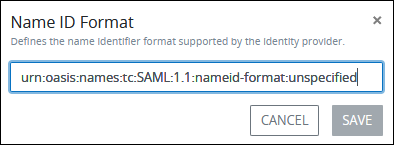
Enter the name identifier format supported by your SAML identity provider.