Configure General Settings
Permissions
Your user account or group membership must have the following permissions to configure a Screen unless your user account has the Make this user a Super Admin setting selected:
Screens: Edit Screens
Screens: View Screens
See the Screens permissions or ask your Administrator for assistance.
Follow these steps to configure a Screen:
View your Screens. The Screens page displays.
Click the
 menu, and then select the Configure option for your Screen. The Configuration page displays.
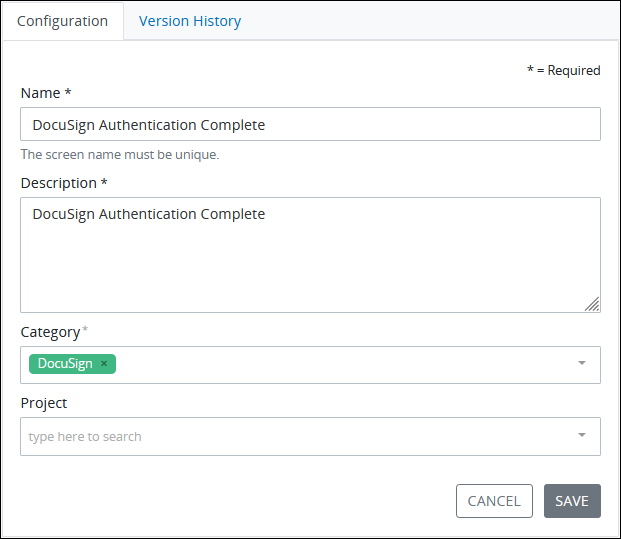
Edit the following information about the Screen as necessary:
In the Name setting, edit the unique name of the Screen. This is a required field.
In the Description setting, edit the description of the Screen. This is a required setting.
From the Category drop-down menu, select one or more Screen Categories to associate with this Screen. In doing so, Screen Categories may be sorted from the Screens page. To remove a Screen Category that is currently selected, click the
 icon for that selection or press
 Enterwhen the drop-down is visible. This is a required setting.From the Project drop-down menu, optionally select the Project(s) that this Screen becomes an asset. This setting only displays Projects of which you are a member. To remove a Project that is currently selected, click the
icon for that selection or press Enterwhen the drop-down is visible.
Click Save.
Configure Version History
Permissions
Your user account or group membership must have the following permissions unless your user account has the Make this user a Super Admin setting selected:
Screens: Edit Screens
Screens: View Screens
Version History: Edit Version History
Version History: View Version History
See the Screens and Version History permissions or ask your Administrator for assistance.
A version is a set of changes made to a Screen at a particular time by a Process designer. Versioning maintains a record of all named and unnamed changes to that Screen. Any of these versions may be viewed or retrieved, if needed. The Version History page displays all saved versions of the Screen in a tabular format from where they can be edited and/or marked as the Current Version according to your business needs. The current version of a Screen is used in all new Requests of a Process using that Screen. Version changes are not reflected in Requests which were in-progress or already completed when the version changed.
Follow these steps to view or edit the version history of your Screen:
View your Screens. The Screens page displays.
Click the
menu, and then select the Configure option for your Screen. The Configuration tab of the Edit Configuration page displays.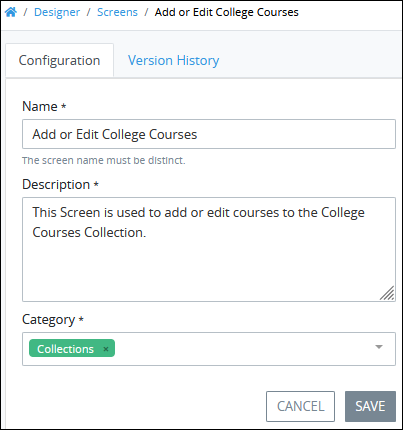
Click on the Version History tab. The Version History page displays.

The Version History page organizes versions in a monthly format and displays the following information:Date: The date and time of when a Process designer saved this version in the Screen Builder.
Current Version: The most recent version of the Screen is displayed at the top and is marked as the
Current Version. This version is used in all in-progress and new Requests.Name: The name of this version as entered by a Process designer when saving the Screen in Screen Builder.
Description: A description of the changes in this version as entered by a Process designer when saving the Screen in Screen Builder.
Saved by: The name of the Process designer who saved this version.
Toggle the Only show named versions toggle key to show only the versions with a name assigned to them.
Click the Change Version Details icon
 to edit version details for this version. The Change Version Details screen displays.
Optionally, edit any of the following existing details about this named version:
In the Version Name setting, edit the name to this named version. If saving this named version with no name, this version does not display in the Version History page if the Only show named versions toggle key is enabled.
In the Additional Details (optional) setting, edit the details about this version. For example, describe the changes in this version for auditing, historical, or maintenance purposes.
Click Confirm and Save to save your changes. Otherwise, click Cancel.
Click the Copy to Latest icon
 to set a version as the current version. The Copy to Latest screen displays.
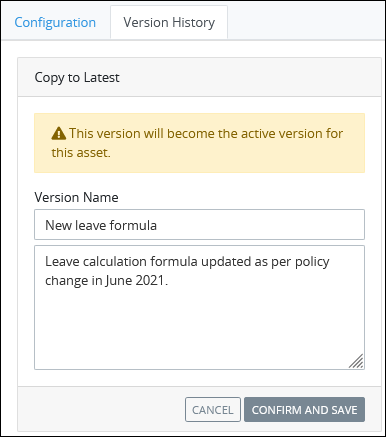
The screen displays the warningThis version will become the active version for this asset, indicating that this action will set this version as the current version.Click Confirm and Save to set this version as the current version. Otherwise, click Cancel.
Edit a Screen
Permissions
Your user account or group membership must have the following permissions to edit a Screen unless your user account has the Make this user a Super Admin setting selected:
Screens: Edit Screens
Screens: View Screens
See the Screens permissions or ask your Administrator for assistance.
Follow these steps to edit a Screen:
View your Screens. The Screens page displays.
Click the
menu, and then select the Edit Screen option or click the Screen name. The Screen opens in Screen Builder. See Screen Builder.
Copy a Screen
Permissions
Your user account or group membership must have the following permissions to copy a Screen unless your user account has the Make this user a Super Admin setting selected:
Screens: View Screens
Screens: Create Screens
See the Screens permissions or ask your Administrator for assistance.
Follow these steps to copy a Screen:
View your Screens. The Screens page displays.
Click the
menu, and then select the Copy option for your Screen. The Copy Screen screen displays.
Edit the following information from the original Screen as necessary:
In the Name setting, edit the name of the copied Screen. After the original Screen is copied, the word Copy is suffixed to the original Screen's name. This is a required setting.
From the Category drop-down menu, optionally change one or more Screen Categories to associate with this Screen. In doing so, Screen Categories may be sorted from the Screens page. To remove a Screen Category that is currently selected, click the
icon for that selection or press Enterwhen the drop-down is visible. This is a required setting.In the Description field, edit the description of the original Screen.
Click Save.
The Type field shows which type the original Screen is. The copied Screen must be of the same Screen type as the original.
Add a Screen to a Project
Adding a Screen to a Project adds that Process as an asset to that Project. Any Project member may then use that asset toward the goals of that Project.
Follow these steps to add a Screen to a Project:
View your Screens. The Screens tab displays.
Click the
menu, and then select the Add to Project option. The Add to a Project screen displays.
From the Select Project drop-down, select to which Project(s) this Screen becomes an asset. To remove a Project that is currently selected, click the
icon for that selection or press Enterwhen the drop-down is visible.Optionally, select the Use a copy of this asset option to use a copy of this Screen as the Project asset instead of the original. When selecting this option, any revisions made to the original Screen do not affect yours in your Project(s), and vice versa. Consider this option a best practice to use, especially if you intend to make changes from the original Screen that may not be an asset in any Project.
Click Add. The Screen is added as an asset to the selected Project(s).
Delete a Screen
Permissions
Your user account or group membership must have the following permissions to delete a Screen unless your user account has the Make this user a Super Admin setting selected:
Screens: Delete Screens
Screens: View Screens
See the Screens permissions or ask your Administrator for assistance.
When a Screen is deleted, Process models that use that Screen in Task elements are not affected. However, that Screen can no longer be referenced from other Process models thereafter.
Deleting a Screen from the Screens page cannot be undone.
Follow these steps to delete a Screen:
View your Screens. The Screens page displays.
Click the
menu, and then select the Delete option for the Screen to delete. The Caution screen displays to confirm the deletion of the Screen. 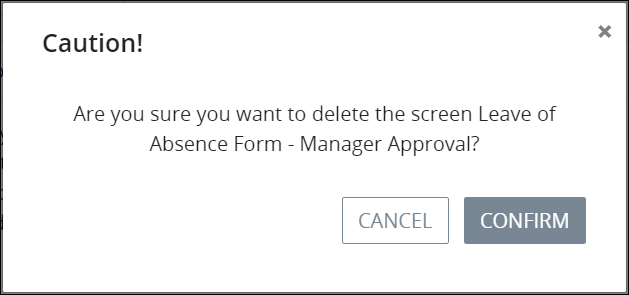
Click Confirm. The following message displays: The screen was deleted.