Configure a Script
Permissions
Your user account or group membership must have the following permissions to configure a Script unless your user account has the Make this user a Super Admin setting selected:
Scripts: Edit Scripts
Scripts: View Scripts
See the Scripts permissions or ask your Administrator for assistance.
Notice to Administrators
Enhance the security of your ProcessMaker Platform instance by following these best practices.
Ensure all user accounts running scripts are valid and appropriate.
Review the Run script as setting for each script to verify which user's API client token is used with the ProcessMaker REST API.
Configure General Settings
Follow these steps to configure general settings for a Script:
View your Scripts. The Scripts page displays.
Click the
 menu, and then select the Configure option for your Script. The Edit Configuration page displays.
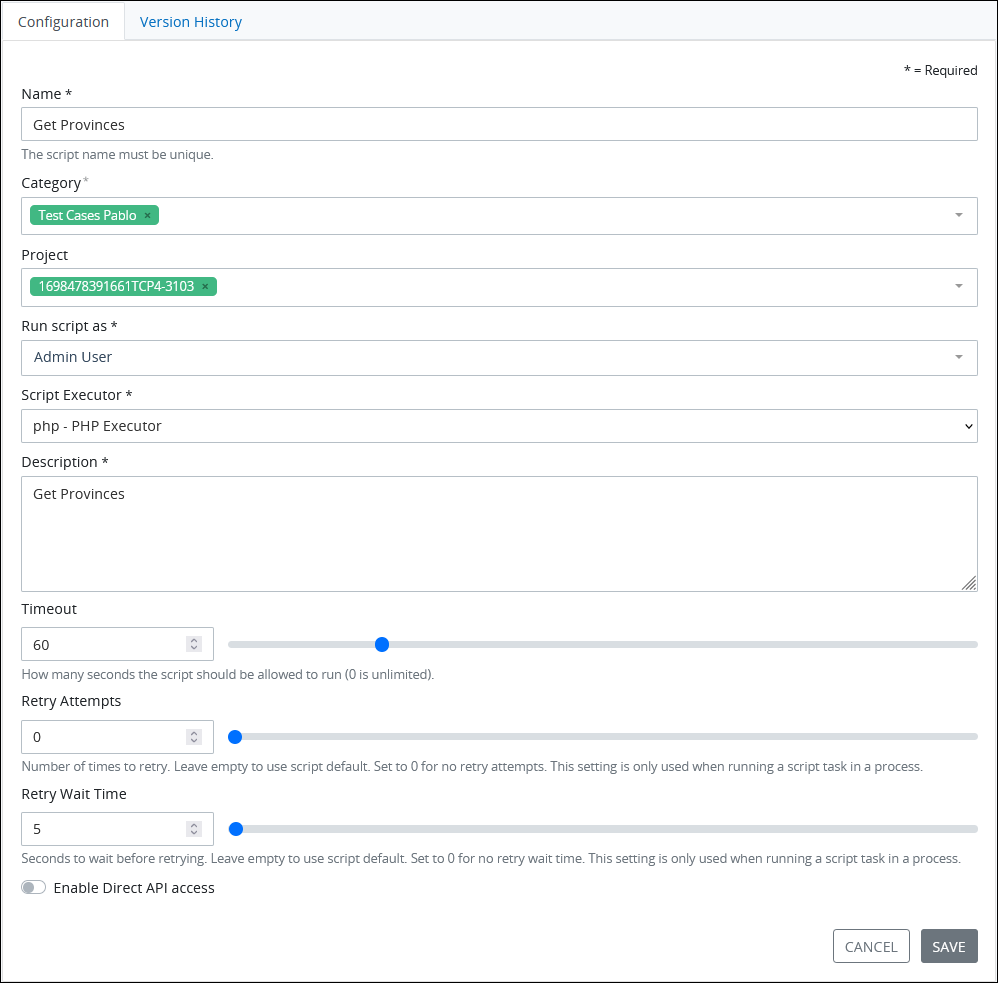
Edit the following information about the Script as necessary:
In the Name setting, edit the unique name of the Script. This is a required setting.
From the Category drop-down menu, select one or more Script Categories to associate with this Script. In doing so, Script Categories may be sorted from the Scripts page. To remove a Script Category that is currently selected, click the
 icon for that selection or press
 Enterwhen the drop-down is visible. This is a required setting.From the Project drop-down menu, optionally select the Project(s) that this Script becomes an asset. This setting only displays Projects of which you are a member. This setting only displays Projects of which you are a member. To remove a Project that is currently selected, click the
 icon for that selection or press
 Enterwhen the drop-down is visible.From the Run script as drop-down menu, select which user's API client token with appropriate permissions to use with the ProcessMaker Platform REST API. This is a required setting.
From the Script Executor drop-down menu, select which Script Executor to run this Script. This setting only displays Script Executors that this Script has been developed using. Your Administrator may have created custom Script Executors using ProcessMaker Platform-supported languages to run sanctioned custom third-party code and/or Docker commands that allow Scripts to successfully call third-party Application Program Interfaces (APIs) and Software Development Kits (SDKs). Below are the Script Executors ProcessMaker Platform provides, though some require packages to be installed:
csharp - C# Executor: This is the default Script Executor to run Scripts developed using C#.
java - Java Executor: This is the default Script Executor to run Scripts developed using Java.
javascript - Node Executor: This is the default Script Executor to run Scripts developed using JavaScript.
lua - LUA Executor: This is the default Script Executor to run Scripts developed using Lua.
python - Python Executor: This is the default Script Executor to run Scripts developed using Python.
r - R Executor: This is the default Script Executor to run Scripts developed using R.
This is a required setting.
In the Description setting, edit the description of the Script. This is a required setting.
In the Timeout setting, use the slider control or enter how many seconds the Script is allowed to run before it times out. Use
0to indicate that the Script never times out. The default timeout is 60 seconds. This setting requires an integer.In the Retry Attempts setting, configure how many times to re-run the Script if the Script returns a runtime error as follows:
Enter a number. Use the up and down arrows to increase or decrease the number.
Set
0for no retry attempts.
In the Retry Wait Time setting, configure how many seconds to wait before attempting a retry as follows:
Enter the number of seconds. Use the up and down arrows to increase or decrease seconds.
Set
0for no timeout.
Click Save.
Enable a Script with API Access as an Endpoint
Enable a Script to function as an Application Program Interface (API) endpoint. Use a Script as an API endpoint to perform multiple scripting tasks that do not require be run from a Process. The Script may use either GET and/or POST methods as an independent endpoint. By enabling the Script with direct API access, a unique API URL is generated. Copy the API URL and insert it wherever that Script's API endpoint must be called. Enabling and then disabling a Script's API access maintains the same API URL.
Configure API access settings independently from the Script's basic settings. API access settings require the following:
Specify Basic Authentication of user name and password, if used.
Specify from which URLs may access the Script's independent API endpoint if other Scripts run this one.
Refer to the following HTTP responses for their corresponding events when using a Script's API endpoint:
200 OK: The Script's API endpoint successfully returns the JSON response when set to run synchronously.204 No Content: There is no content for the Script API endpoint to return because it is being run asynchronously. The Script's API endpoint successfully fulfilled the request and that there is no JSON response in payload body.Error 403 Forbidden: The Script's API access is not accessible to that URL. Grant that URL access.Error 404 Not Found: The Script's API access is not available. Enable the Script's API endpoint.
Use an application like Postman that can send API requests to the Script to more easily inspect and debug the Script's API endpoint responses.
Follow these steps to enable a Script with API access as an independent endpoint:
View your Scripts. The Scripts page displays.
Click the
 menu, and then select the Configure option for your Script. The Edit Configuration page displays. Ensure that the Script's basic settings are configured properly to run.
Locate the Enable Direct API access setting. This setting is disabled by default.
Select the Enable Direct API access toggle key. Settings display to configure the Script's API access.
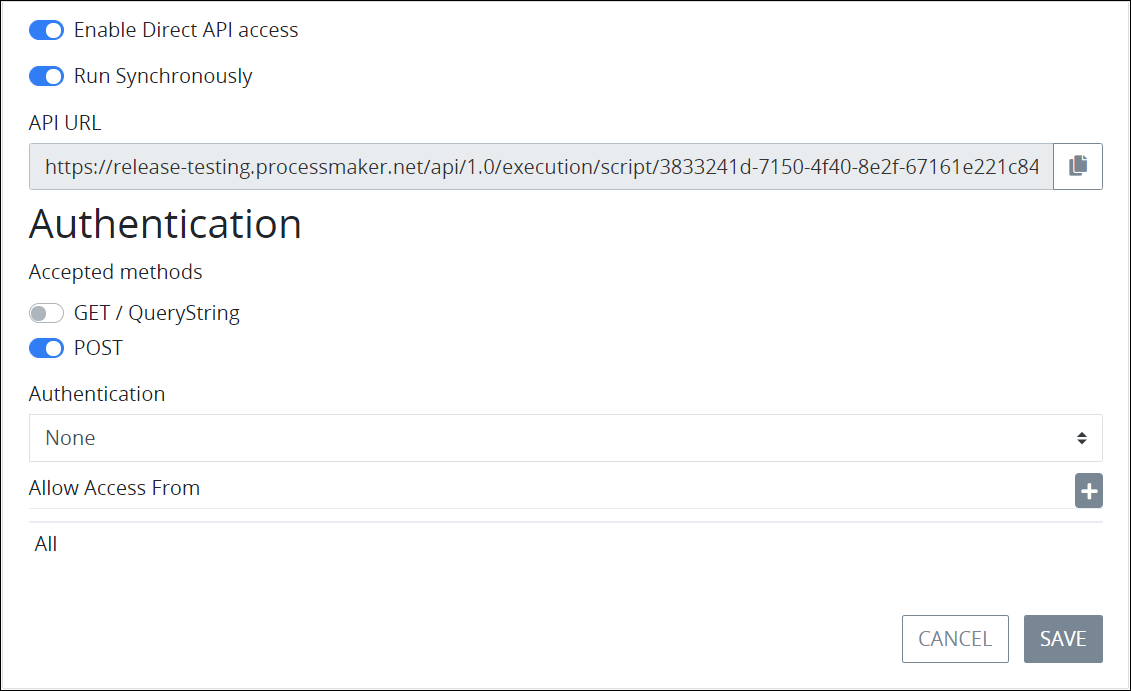
Disable the Run Synchronously toggle key to run the Script asynchronously. The Run Synchronously toggle key is enabled by default.
From the Accepted methods setting, select which method(s) this Script uses as an endpoint:
GET/ Query String: The GET / Query String method retrieves data using parameters passed in the Script's auto-generated URL. The GET toggle key is disabled by default.
POST: The POST method sends JSON data as provided in the Script. The POST toggle key is enabled by default.
From the Authentication setting, select either None or Basic Authentication as the authentication method. Follow these steps to configure basic authentication settings when selecting the Basic Authentication option from the Authentication section:
In the User setting, enter or edit the user name that the Script authenticates endpoint access.
In the Password setting, enter or edit the password that the Script authenticates endpoint access.
From the Allow Access From setting, enter or edit from which URLs may access this Script's endpoint. The default setting is All, allowing any URL to access the Script's endpoint. Follow these guidelines to specify URLs:
Click the +URL button to add a URL. A field displays to enter the URL.
Enter the URL that this Script allows access to its endpoint.
Click the Delete
 icon to delete the URL, if necessary.
From the API URL setting, copy the generated API endpoint and insert it wherever that Script's API endpoint must be called.
Click Save.
Configure Version History
Permissions
Your user account or group membership must have the following permissions unless your user account has the Make this user a Super Admin setting selected:
Scripts: Edit Scripts
Scripts: View Scripts
Version History: Edit Version History
Version History: View Version History
See the Scripts and Version History permissions or ask your Administrator for assistance.
A version is a set of changes made to a Script at a particular time by a Process designer. Versioning maintains a record of all named and unnamed changes to that Script. Any of these versions may be viewed or retrieved, if needed. The Version History page displays all saved versions of the Script in a tabular format from where they can be edited and/or marked as the Current Version according to your business needs. The current version of a Script is used in all new Requests in which that Script is run from Script Task elements or Watchers. Version changes are not reflected in Requests which were in-progress or already completed when the version changed.
Follow these steps to view or edit the version history of your Script:
View your Scripts. The Scripts page displays.
Click the
 menu, and then select the Configure option for your Script. The Configuration tab of the Edit Configuration page displays.
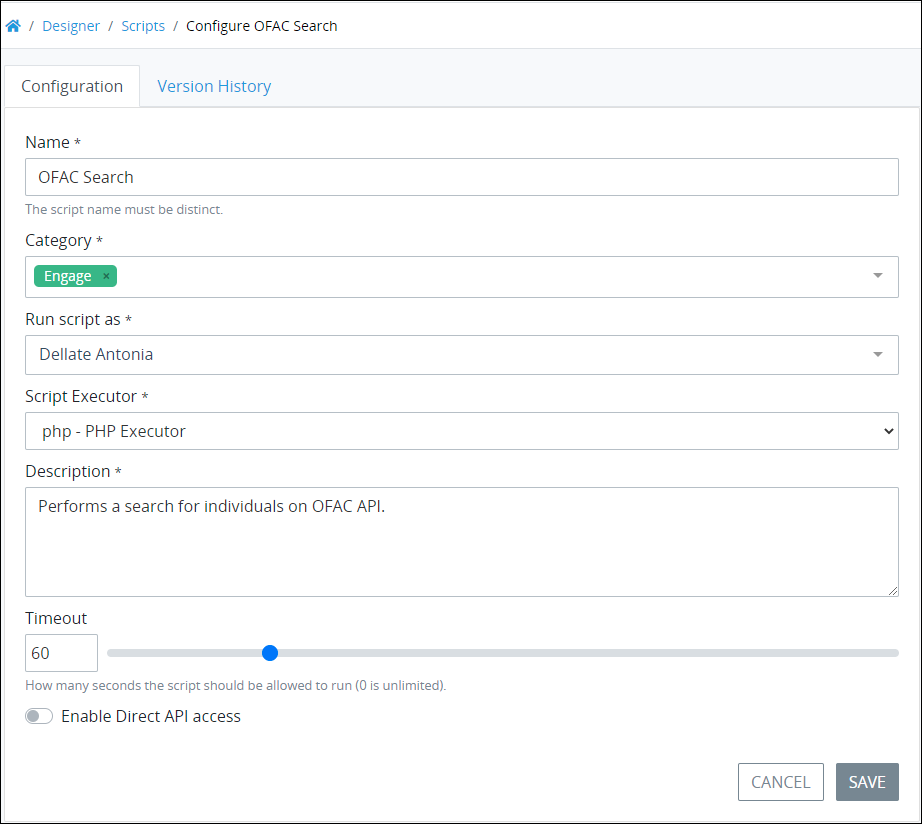
Click on the Version History tab. The Version History page displays.
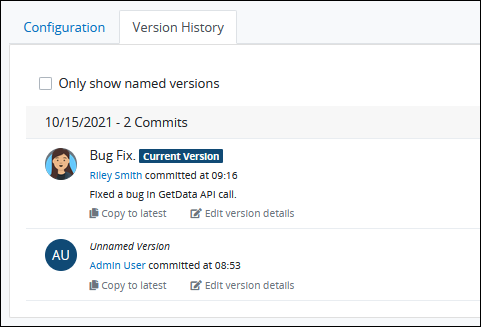
The Version History page organizes versions in a monthly format and displays the following information:Date: The date and time of when a Process Designer saved this version in Script Editor.
Current Version: The most recent version of the Script is displayed at the top and is marked as the
Current Version. This version is used in all in-progress and new Requests.Name: The name of this version as entered by a Process designer when saving the Script in Script Editor.
Description: A description of the changes in this version as entered by a Process designer when saving the Script in Script Editor.
Saved by: The name of the Process designer who saved this version.
Toggle the Only show named versions toggle key to show only the versions with a name assigned to them.
Click the Change Version Details icon
 to edit version details for this version. The Change Version Details screen displays.
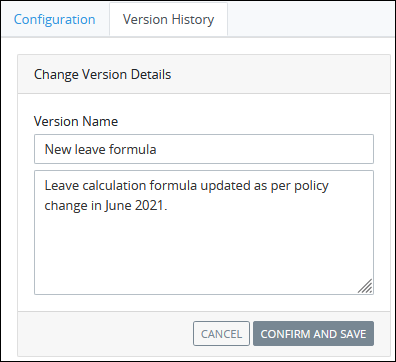
Optionally, edit any of the following existing details about this named version:
In the Version Name setting, edit the name to this named version. If saving this named version with no name, this version does not display in the Version History page if the Only show named versions toggle key is enabled.
In the Additional Details (optional) setting, edit the details about this version. For example, describe the changes in this version for auditing, historical, or maintenance purposes.
Click Confirm and Save to save your changes. Otherwise, click Cancel.
Click the Copy to Latest icon
 to set a version as the current version. The Copy to Latest screen displays.
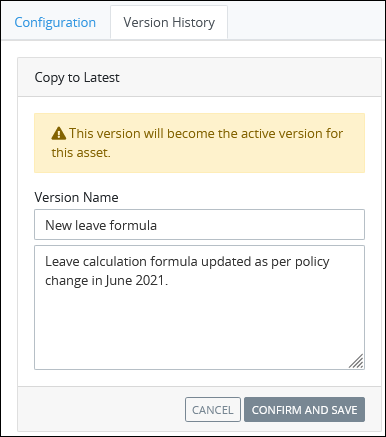
The screen displays the warningThis version will become the active version for this asset, indicating that this action will set this version as the current version.Click Confirm and Save to set this version as the current version. Otherwise, click Cancel.