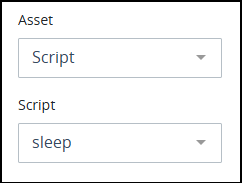
The Action Control is used in Conversational Screens and enables powerful, on-the-spot task execution, allowing the screen to dynamically call various process design assets within the conversation flow. With this control, designers can seamlessly integrate actions such as calling decision tables, FlowGenie automations, scripts, and data connectors directly into the conversational form experience.
Key Features:
Decision Tables: Implement rule-based logic to drive automated decisions based on user input.
FlowGenie: Trigger a Genie to use AI magic in the conversation.
Scripts: Execute custom scripts to handle unique business logic or data processing.
Data Connectors: Access and retrieve data from external sources or databases for real-time information display.
In-Line Action Controls bring advanced functionality directly into the Conversational Screen, enabling responsive interactions, enhancing user engagement, and supporting sophisticated conversational flows without leaving the form. This feature helps create a rich, interactive experience that responds instantly to user actions, making Conversational Screens more dynamic and efficient.
This control is only available for Conversational Screens. See Screen Types.
Watch the following product tour to learn how to use the In-line Action control.
Add an In-Line Action Control
Permissions
Your user account or group membership must have the following permissions to design a Screen unless your user account has the Make this user a Super Admin setting selected:
Screens: Edit Screens
Screens: View Screens
See the Screens permissions or ask your Administrator for assistance.
Follow these steps to add this control to the Screen:
Create a new Conversational-type Screen or edit an existing one.
From the Controls Menu on the left, expand the Advanced category, and then locate the Action icon
 .
.Drag and drop the control onto the Screen Builder.

Configure the control. See Settings.
Validate that the control is configured correctly. See Validate Your Screen.
Settings
The Action control has the following configurable settings in the Properties Panel:
Configuration Panel Settings
Expand the Configuration panel from the Properties Panel on the right to configure the following properties:
Inbound Configuration
The inbound configuration defines how data gets transferred from the screen to the select asset.
Follow these steps to specify inbound configuration:
Expand the Configuration panel.
.png)
Click the
.png) icon. The Add Option screen displays.
icon. The Add Option screen displays..png)
In the Property setting, enter the property of the asset.
In the Request Variable setting, enter the Request variable (in mustache syntax) to use to send data to the selected asset.
Click Save.
Repeat steps 2-5 to add additional properties.
Click Delete to remove a property, and click Edit to make changes.
Response Mapping
The Response Mapping setting defines how data is passed from the asset back to the Conversational Screen.
Response mapping is the process of integrating data from a data source into the Request's JSON data model by specifying which Request variable will store the data. If the variable already exists, its value will be overwritten. If the variable doesn’t exist, a new variable will be created and assigned the value returned by the data source.
Follow these steps to specify the request variable for saving the response returned from UiPath:
Expand the Configuration panel.
.png)
Click the
.png) icon to add a variable for saving data from the asset. The Source and Set to Request Variable settings display to add the JSON source name and its variable, respectively.
icon to add a variable for saving data from the asset. The Source and Set to Request Variable settings display to add the JSON source name and its variable, respectively.The Source setting determines how data returned by the selected asset is incorporated into the screen. By carefully selecting the appropriate Source option, you can tailor the request to include exactly the data you need. Use the following guidelines to configure this setting:
Use a Request Variable: Enter a request variable to store specific data.
Use this option when you need to include only certain parts of the response in the screen.
The selected data will be embedded within the JSON request body.
Leave Blank: Leave empty to include the entire response in the specified request variable.
Use this option when you need to pass all data to the screen.
In the Set to Request Variable setting, enter the Request variable in which the response should be saved.
Click Save.
Repeat Steps 2 through 6 to add additional variables.
Click Delete to remove a variable, and click Edit to make changes.
Advanced Panel Settings
Expand the Advanced panel from the Properties Panel on the right to configure the following properties:
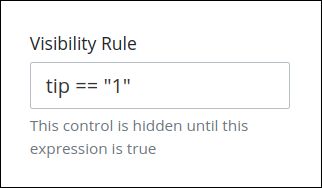
Visibility Rule
Specify an expression that indicates the condition(s) under which this control displays. See Expression Syntax Components. If this setting does not have an expression, then this control displays by default.

For example, this control displays if the variable value tip is 1. For a detailed example of the Visibility Rule setting, see Show or Hide Controls Based on Button Selection.
Note the following regarding how to use visibility rules:
To make this control hidden until another control contains a value, enter the Variable Name setting value of that control to this control's Visibility Rule setting.
See how to configure a Submit Button control that prevents the Request participant from clicking on that control multiple times so the Screen cannot be submitted after the first click.
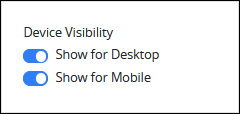
Device Visibility
Select on which device types this control displays:
Desktop: The control displays only on desktop devices. Enable the Show for Desktop toggle key.
Mobile: The control displays only on mobile devices. Enable the Show for Mobile toggle key.
Both: The control displays on both desktop and mobile devices. Both toggle keys are enabled by default.

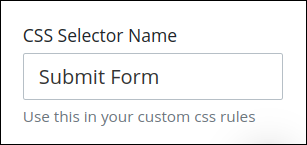
CSS Selector Name
Enter the value to represent this control in custom CSS syntax when in Custom CSS mode. As a best practice, use the same CSS Selector Name value on different controls of the same type to apply the same custom CSS style to all those controls.

Then, use this name in the Custom CSS feature to apply CSS styling to this control as follows:
[selector='Submit Form'] {
    color: blueviolet;
}
See the following best practices regarding custom CSS in Screens:
See the following best practices regarding custom CSS in Screens:
