DevLink provides a streamlined way to manage, share, and synchronize assets across ProcessMaker instances, enabling administrators to maintain consistency and making the transition from development to production seamless. Key capabilities include:
Consistent Configuration: Use DevLink to ensure all linked instances share the same assets, reducing discrepancies and errors.
Streamlined Deployment: Bundle assets for easy deployment to multiple instances, ensuring consistency across different environments.
This feature automates synchronization, reducing administrative effort of moving each individual asset and ensuring up-to-date asset management. Once linked, any changes in assets can be updated across all linked instances in minutes.
Setting up DevLink involves two steps:
DevLink Configuration: Link ProcessMaker instances to enable secure, automated asset sharing.
Bundle Creation and Management: Package assets into bundles and update linked instances when bundles are modified.
Watch the following product tour to learn how to use DevLink for environment synchronization.
DevLink Configuration
Permissions
Your user account or group membership must have the Make this user a Super Admin permission selected. Only Super Admins are allowed to authorize DevLink connections.
Follow these steps to link instances in your organization:
Ensure that you are logged on to ProcessMaker Platform.
Access the Admin tab from the top menu, and then click the DevLink icon
 from the left sidebar.
Click the Add Instance button to add a new instance.
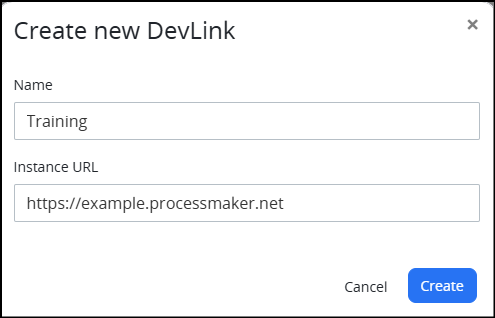
Enter the name and the target instance URL, then click Create.
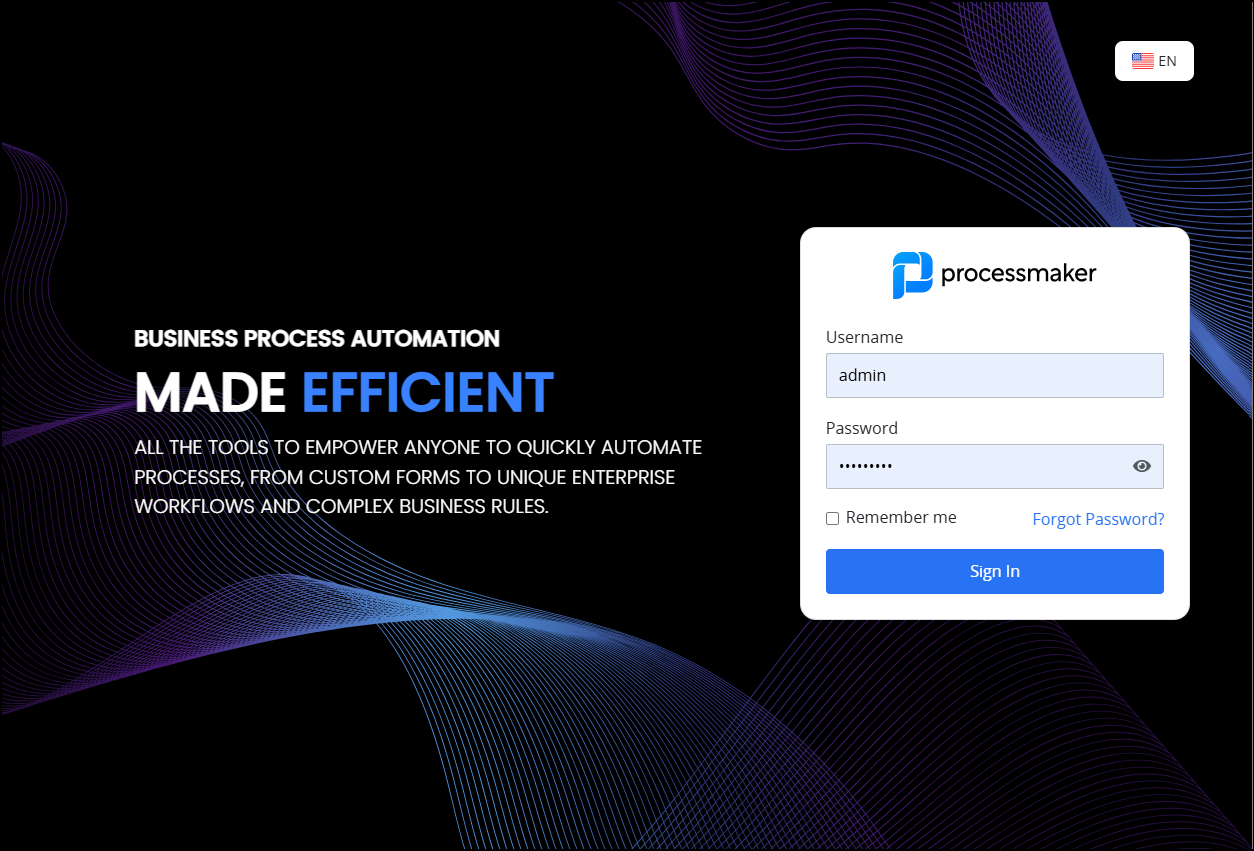
You will be redirected to the target instance’s login page. Enter login credentials and sign in.
After entering credentials, authorize the connection request from the target instance.
Note: Only Super Admin users can authorize DevLink connections.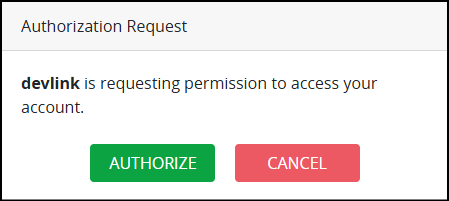
Once authorized, the instances will be linked, allowing secure sharing of assets and configurations.

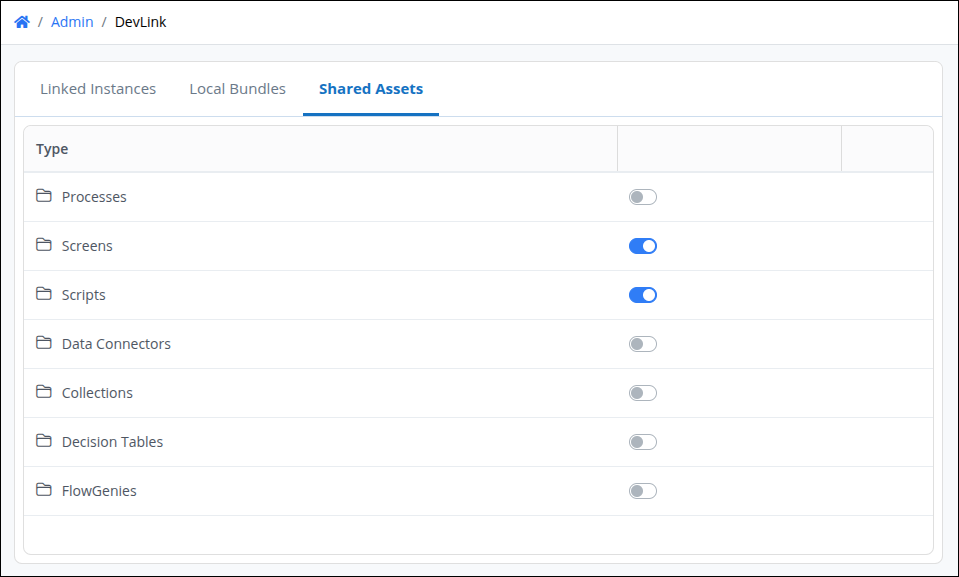
Click the Shared Assets tab to enable sharing of assets on the remote instance, allowing the other instances to access and view them directly.
Connection Troubleshooting
Verify that the URL entered for the target instance is correct and it is reachable.
Confirm that the target instance has been upgraded to the latest ProcessMaker release
Ensure that you are using Super Admin credentials for both local and target instances.
If the connection times out, contact ProcessMaker Support to adjust the session timeout setting for your instances.
Bundle Creation and Management
Bundles are packaged groups of assets such as processes, screens, scripts, data connectors, and settings, that can be shared and installed across different instances. Bundles streamline deployment, simplify version control, and ensure consistency, making it easy for administrators to manage assets across environments. Key capabilities include:
Comprehensive Asset Management: Include various assets, from processes and screens to data connectors and scripts, within a single bundle for easy deployment across instances.
Efficient Version Control: Track and manage different versions of assets, ensuring all linked instances maintain the latest updates and changes.
Admin Control: Administrators can create, lock, and update bundles as needed, granting full control over assets across instances.
Seamless Environment Synchronization: Enable standardization across environments by managing consistent assets across all linked instances.
Asset Update Notifications:: Receive automatic notifications whenever asssets within a Bundle are updated.
Permissions
Your user account or group membership must have the Make this user a Super Admin permission selected. Only Super Admins are allowed to manage Bundles.
Create a Bundle
Follow these steps to create a new bundle:
Access the Admin tab from the top menu, then click the DevLink icon
 from the left sidebar.
Click the Local Bundles tab, and then click the Create Bundle button to create a new Bundle.
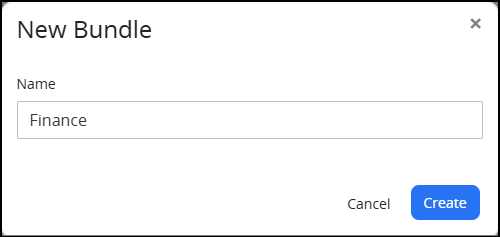
Enter a name for the Bundle and click Create. The new bundle is added to the list of bundles.
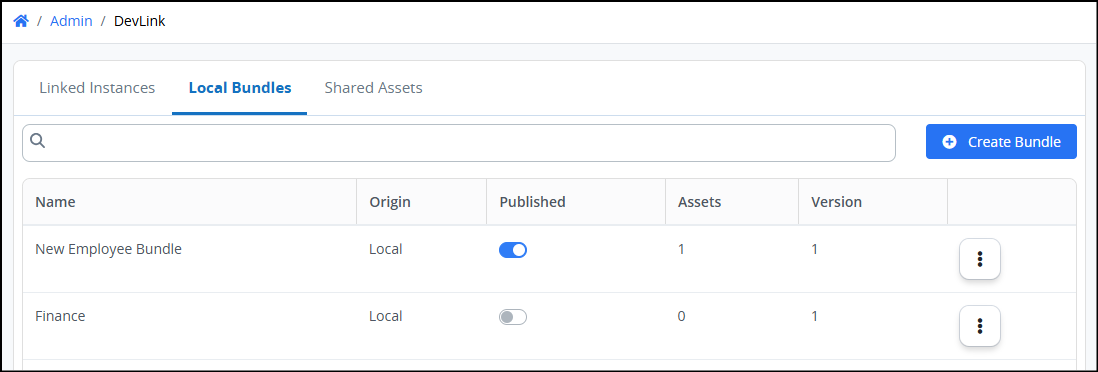
Click the Published toggle key to make the bundle visible in any linked instances.
Disable access to the bundle at any time by disabling the Published toggle key.
Add Assets to a Bundle
The following assets can be added to a Bundle:
Processes
Scripts
Screens
Data Connectors
Decision Tables
Genies
Collections
Follow these steps to add assets to a bundle:
Access the asset list you want to add. For example, view the Process List from the Designer Home Screen.
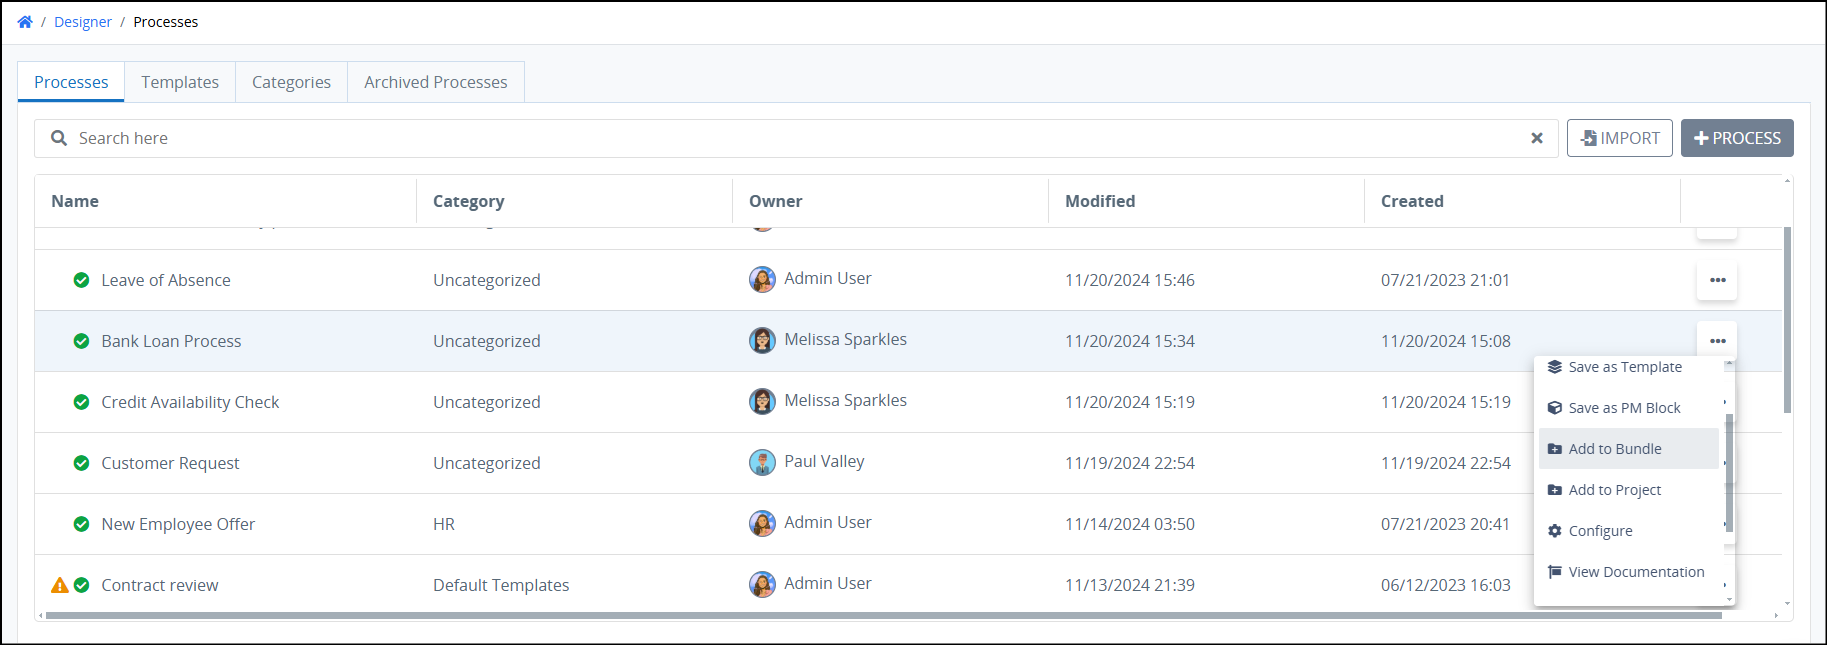
Click the options menu
 , then select Add to Bundle.
Select the required bundle from the list.
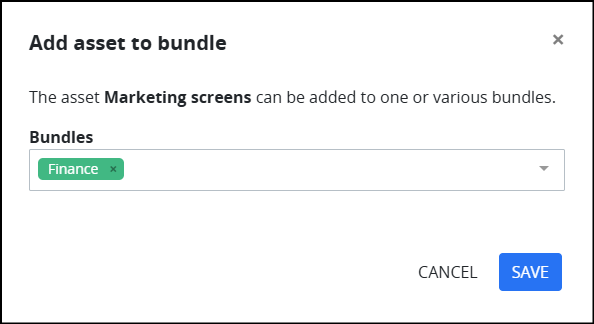
Click Save. The process is now added to the Bundle and can be accessed from linked instances.
Other assets (screens, scripts, collections, etc) can also be added to Bundles in a similar manner.
Bundle Guidelines for Assets
When a process is added to a bundle, the following assets in the process (if any) are also added to the bundle:
Screens
Scripts
Data Connectors
Collections
Decision Tables
FlowGenies
When a process is downloaded from a bundle, all related assets, along with their configurations, are automatically imported to ensure seamless integration.
Add Platform Configurations and Settings to a Bundle
In additional to designer assets, certain platform configurations and settings can also be added to a Bundle. Follow these steps to add configurations and settings:
Click on the Local Bundles tab to view available Bundles.
Click on a Bundle to open it.
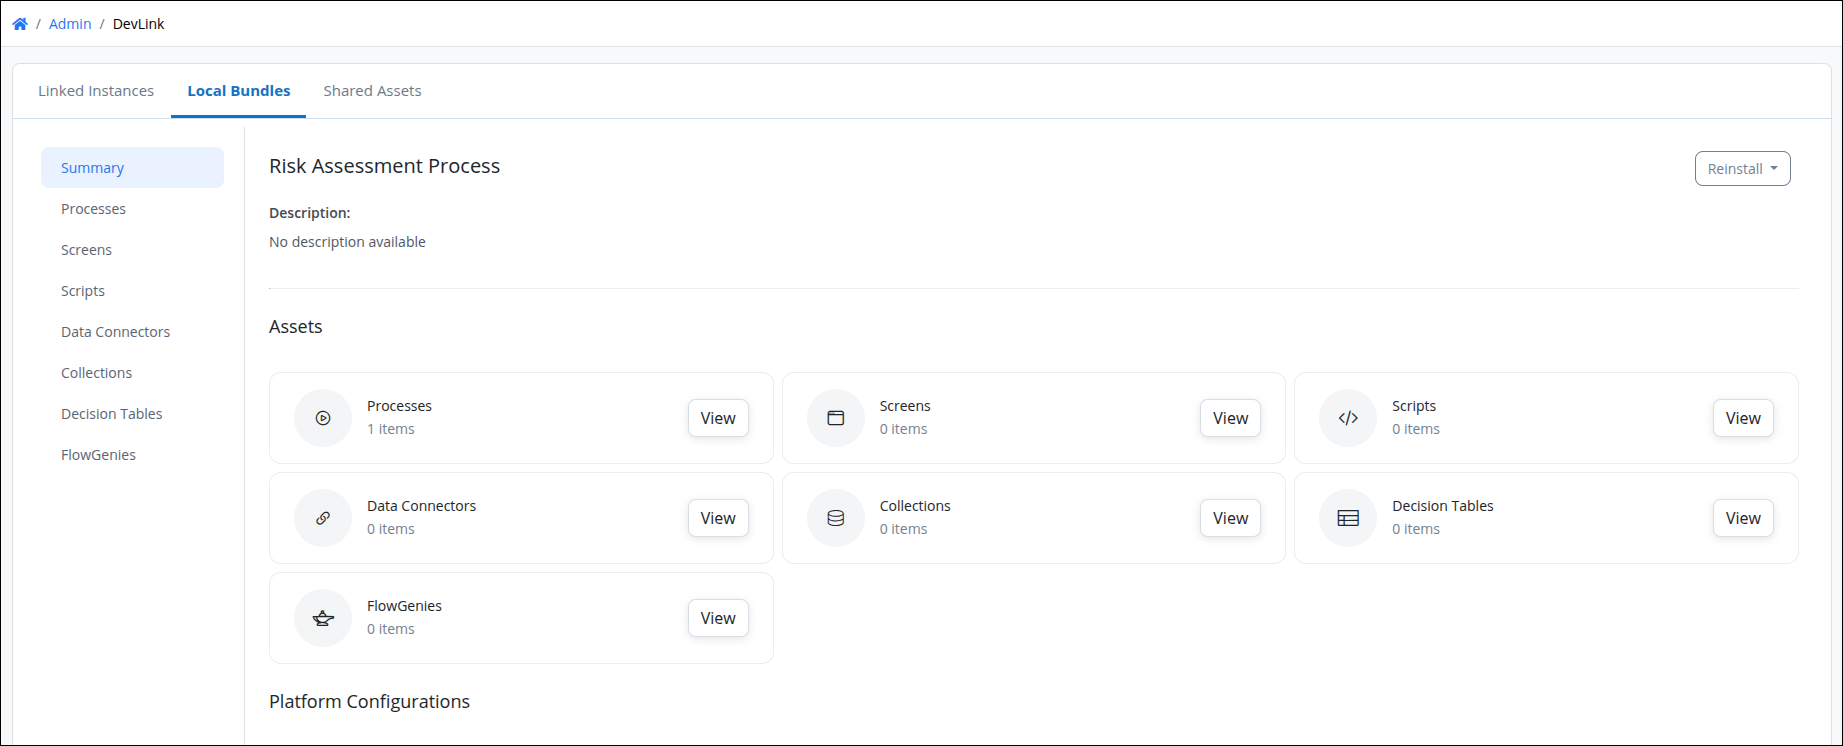
From the Platform Configurations section, select one or more of the following configurations:
Users
Groups
Dashboards
Menus
Script Executors
Public Files

From the Settings section, select one of more of the following settings:
Email Settings
Login and Auth
User Settings
Integrations
UI Settings

Bundle Guidelines for settings and configurations
Individual user account or groups can be added to Bundles, using their respective ellipses menus from the User/Group lists.
Individual system settings can be added to Bundles using their respective ellipses menus, from the Admin page.
Install a Complete Bundle
Access the Admin tab from the top menu, then click the DevLink icon
 from the left sidebar.
Click a linked instance to view the available bundles in it.
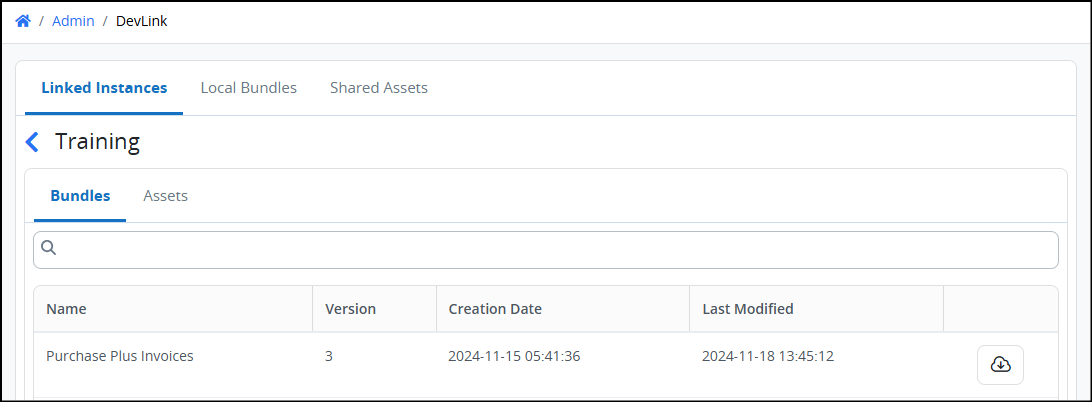
Choose the bundle you want to install in your instance, and then click the install icon
 .
.
If assets in the bundle already exist in the destination instance, the install icon
 will not be displayed.
Once installed, the bundle will appear in the Local Bundles tab. The Origin column indicates whether a bundle is local or synced from another instance.
Click the options menu to reinstall any of the bundles, if needed.
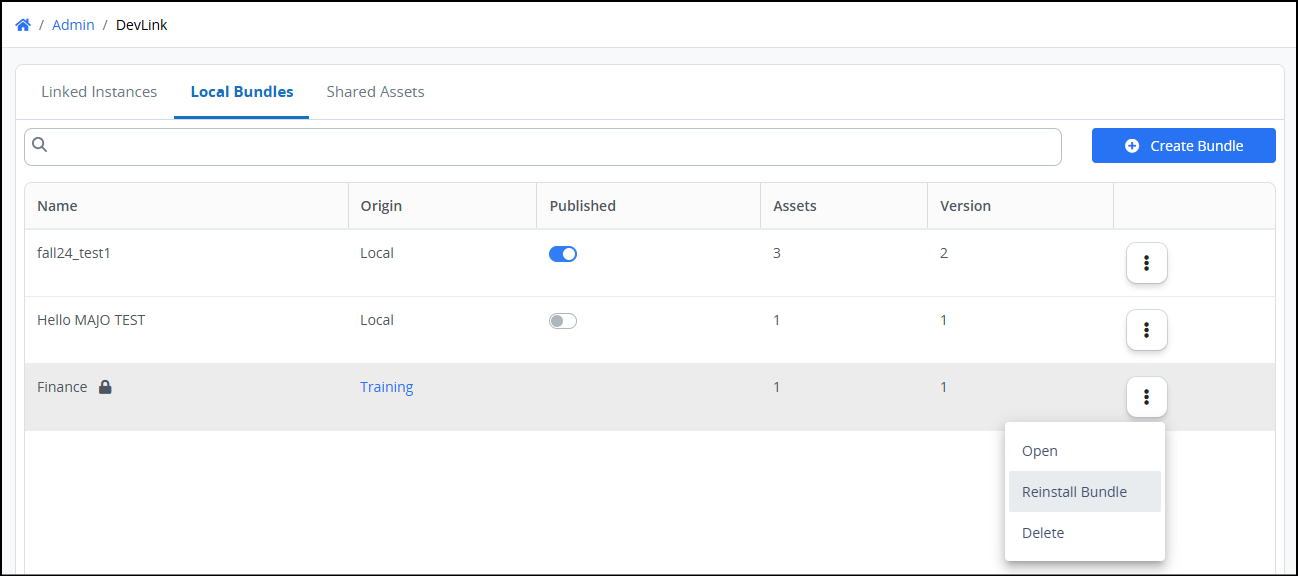
Click Open to view the assets in the Bundle.
Click Reinstall Bundle to reinstall an already installed Bundle.
Click Delete to remove a Bundle from this instance.
When a process is downloaded from a bundle, all related assets, along with their configurations, are automatically imported to ensure seamless integration.
Install Selected Assets
Access the Admin tab from the top menu, then click the DevLink icon
 from the left sidebar.
Click a linked instance to view available bundles.
Click the Assets tab to view available assets.
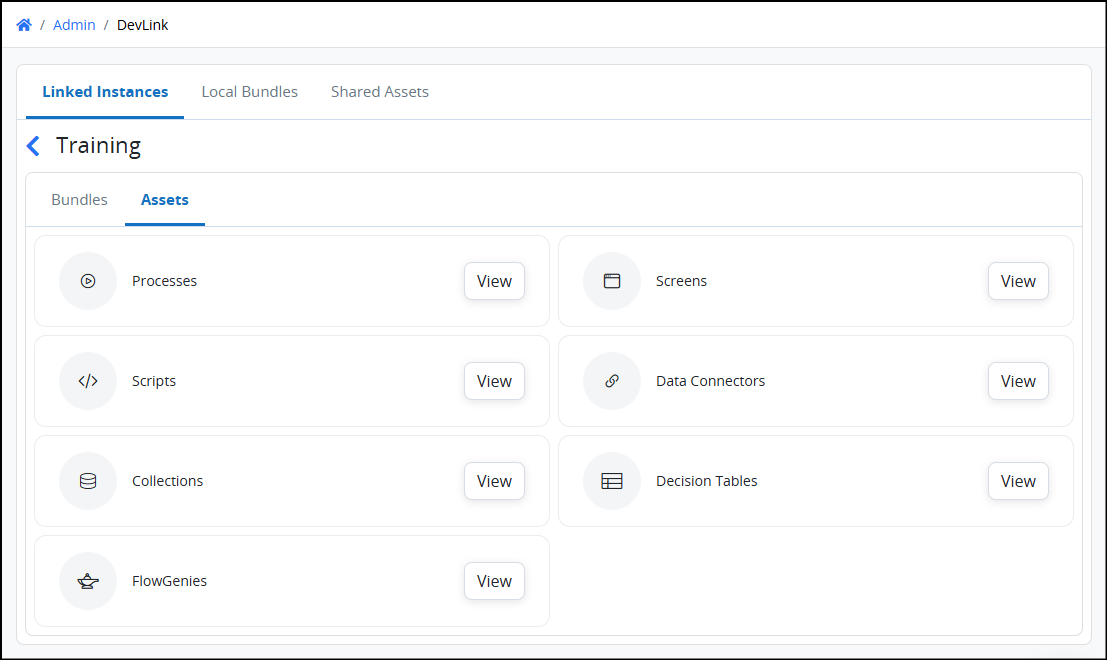
Click the View button next to an asset type to view relevant assets.
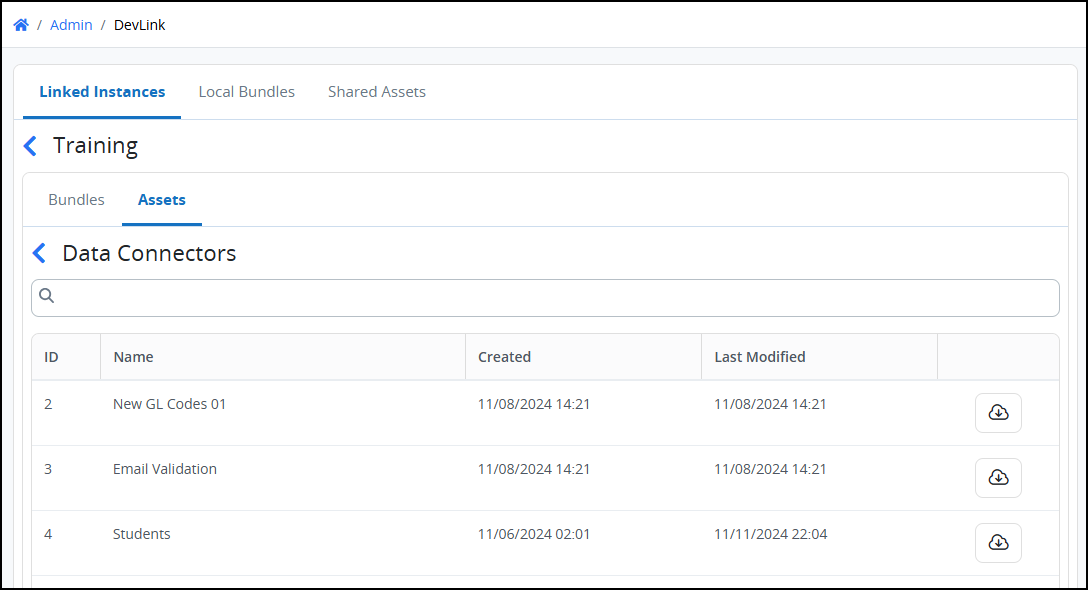
Choose an asset and click the cloud icon
 to open the Install Asset window.
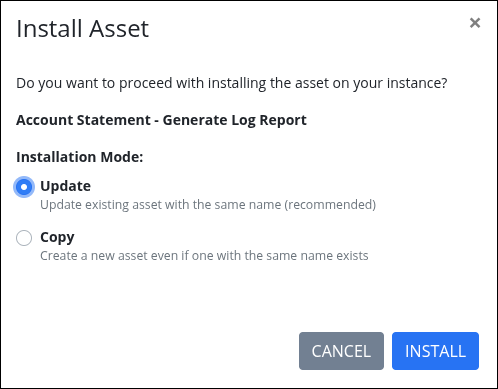
In the window, select one of the following:
Update: Replace the existing asset with the latest version.
Copy: Create a new, separate version of the asset.
Click Install to begin the installation.

Once the installation is complete, the asset can be accessed from the Designer Welcome Screen. For example if the asset is a process, it appears in the Process List.
Reinstall a Bundle
If an installed remote Bundle is updated, it can be re-installed using the following steps:
Access the Admin tab from the top menu, then click the DevLink icon
 from the left sidebar.
Click on the Local Bundles tab to view available Bundles.
Click on a Bundle to open it.
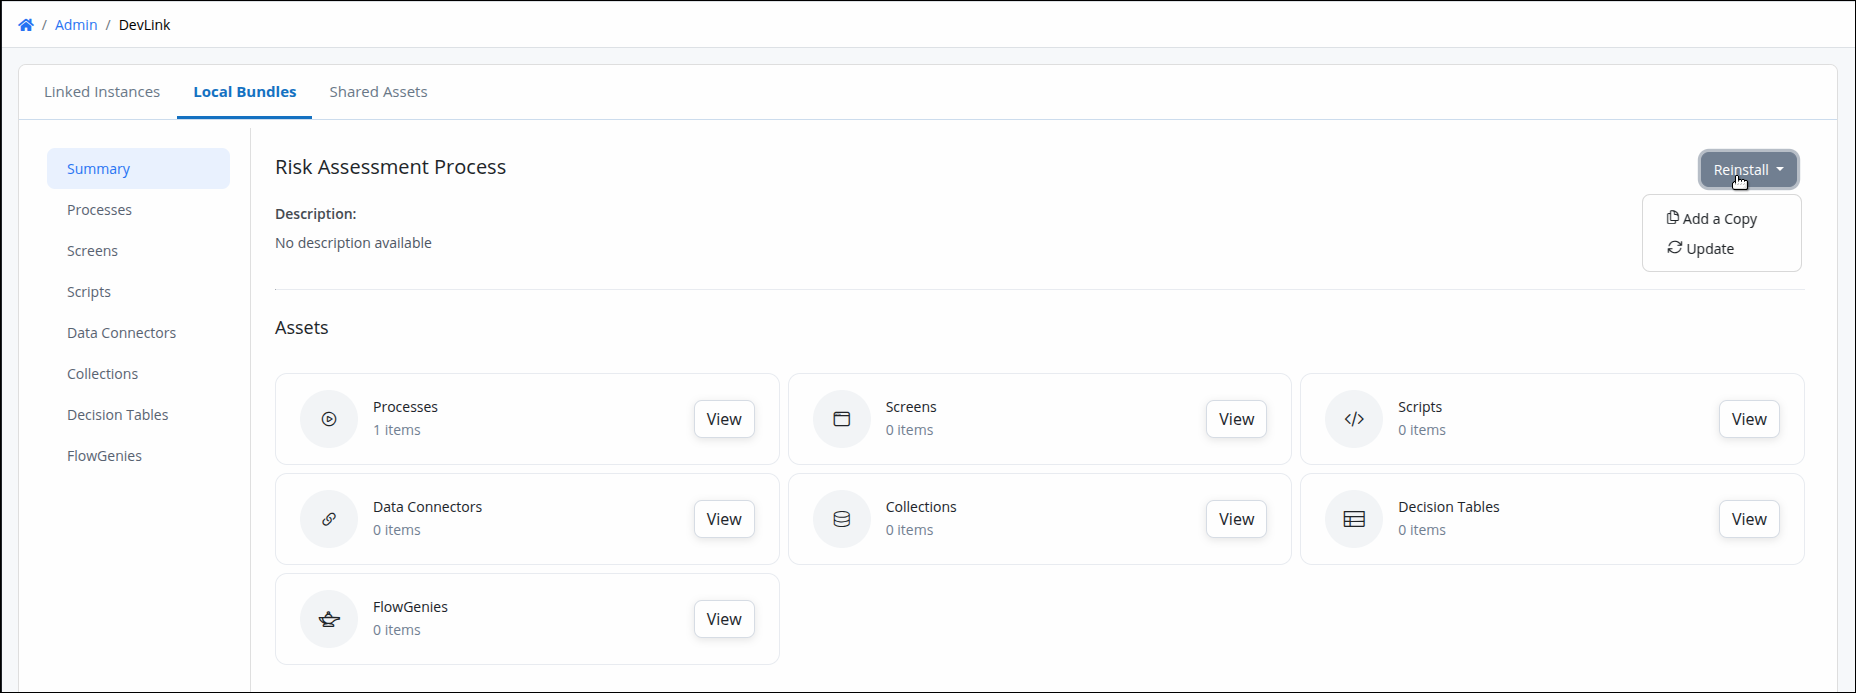
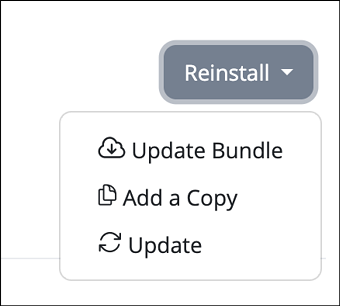
Click the Reinstall button to reinstall the Bundle.
If the bundle has no available updates, the following options are available:
Click Add a Copy to create a duplicate version of all assets in the Bundle.
If the remote instance has published a new version of the bundle, the following options are available:
Click Update Bundle to update the bundle with the latest available version.
Click Add a Copy to create a duplicate of the current bundle.
