Deprecation Notice
The External Integrations feature has been deprecated and is no longer available in ProcessMaker platform.
What are External Integrations?
ProcessMaker Platform facilitates integration with a large library of third-party applications and services, including the following:
BambooHR
DocuSign
GitHub
Gmail
Microsoft Excel
Slack
ProcessMaker Platform integrates with the external drivers in the following manner:
Administrators add a supported driver from Settings and configure authentication for that external integration.
Process Designers see the External Integration like any other Process model object. They add the external integration to their Process model, and then configure it for that object.
View External Integration Settings
Display all External Integration settings in one location. This makes it easy to manage these settings.
Permissions
Your user account or group membership must have the "Settings: View Settings" permission to view External Integration settings unless your user account has the Make this user a Super Admin setting selected.
See the Settings permissions or ask your Administrator for assistance.
Follow these steps to view all External Integration settings to synchronize users in your organization:
Ensure that you are logged on to ProcessMaker Platform.
Click the Admin option from the top menu. The Users page displays.
Click the Settings icon
 from the left sidebar to view all settings.
From the Settings panel on the left, expand the Integrations section.
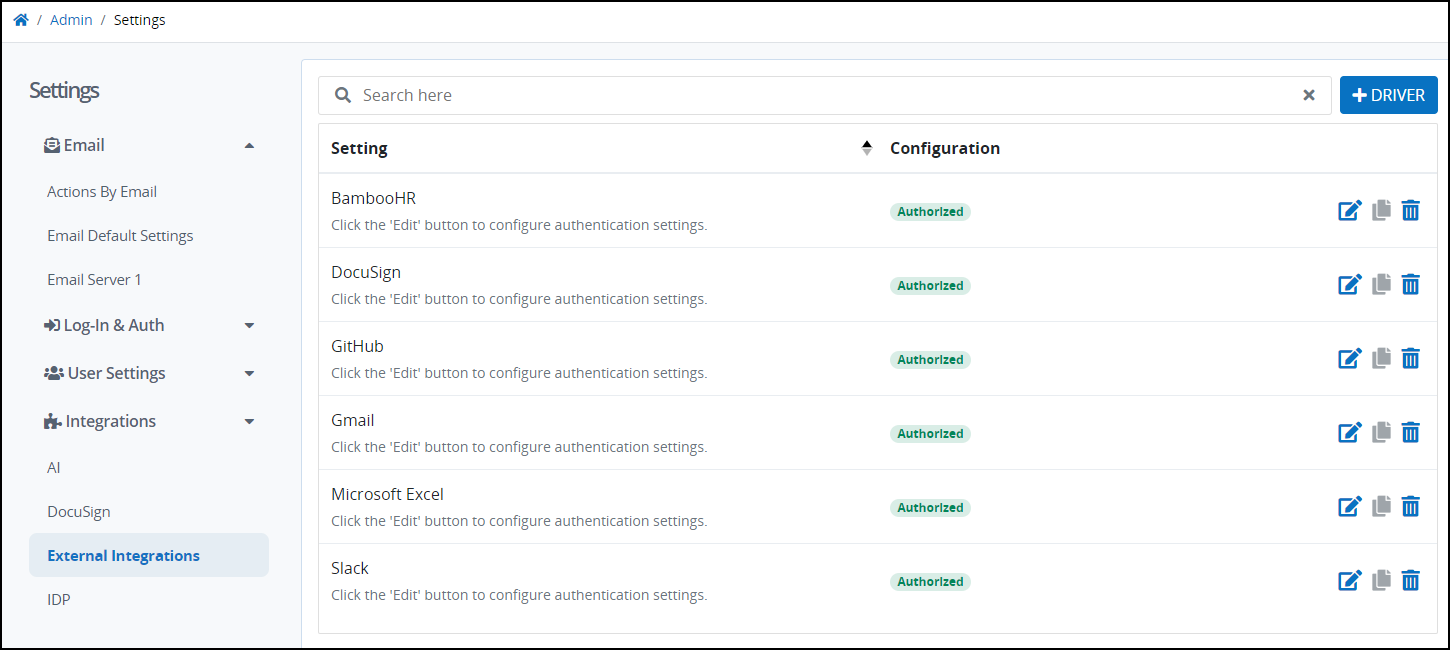
Select External Integrations to view the following details:
Setting: The Setting column displays the External Integrations setting name.
Configuration: The Configuration column displays the value of the setting and how it is configured.
External Integrations settings to synchronize data in your organization
Add a Driver
Permissions
Your user account or group membership must have the "Settings: View Settings" permission to add a driver unless your user account has the Make this user a Super Admin setting selected.
See the Settings permissions or ask your Administrator for assistance.
Follow these steps to add a driver for an External Registration:
View your External Integrations. The External Registrations tab displays.
Click the +Driver button. The Add Driver window displays.
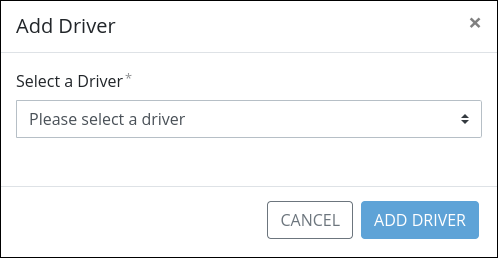
From the Select a Driver dropdown, select one of the following drivers:
BambooHR
DocuSign
GitHub
Gmail
Microsoft Excel
Slack
Click Add Driver.
Configure an External Integration
Expand the options below to view configuration settings for each external integration.
Configure to Connect the BambooHR Server
Before proceeding, ensure that you have the API Key from your registered BambooHR server. For information on how to obtain this key, see BamboHR's Getting Started with the API guide.
Permissions
Your user account or group membership must have the "Settings: Update Settings" permission to edit External Integrations unless your user account has the Make this user a Super Admin setting selected.
See the Settings permissions or ask your Administrator for assistance.
Follow these steps to connect to the BambooHR server:
View your External Integrations. The External Integrations tab displays.
Click the Edit icon
 next to BambooHR to view its settings. If you do not see BamboHR in the list, see instructions on how to dd the driver.
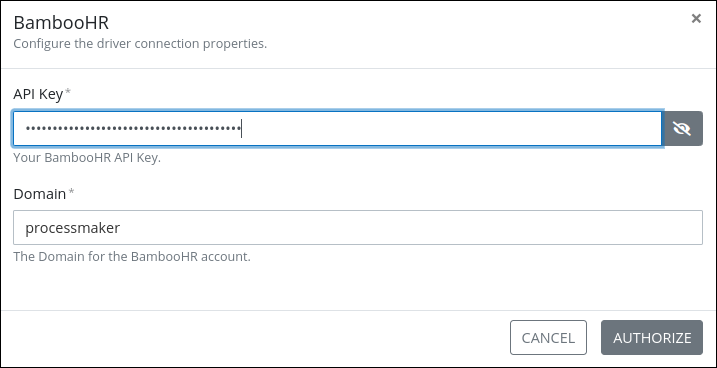
In the API Key setting, enter the API Key from your registered BambooHR account. For more information on how to get the API Key, see Authentication.
In the Domain setting, enter the domain from your registered BambooHR account. The domain is the text just before
.bamboohr.comfor your domain.Click Authorize. If authorization is successful, BambooHR will be listed as authorized on the External Integrations page.
Configure to Connect to the DocuSign Server
Before proceeding, ensure that you have the client ID and client secret from your registered DocuSign driver.
Follow these steps to connect to the DocuSign server:
Permissions
Your user account or group membership must have the "Settings: Update Settings" permission to edit External Integrations unless your user account has the Make this user a Super Admin setting selected.
See the Settings permissions or ask your Administrator for assistance.
View your External Integrations. The External Integrations tab displays.
Click the Edit icon
for the DocuSign setting. The DocuSign screen displays.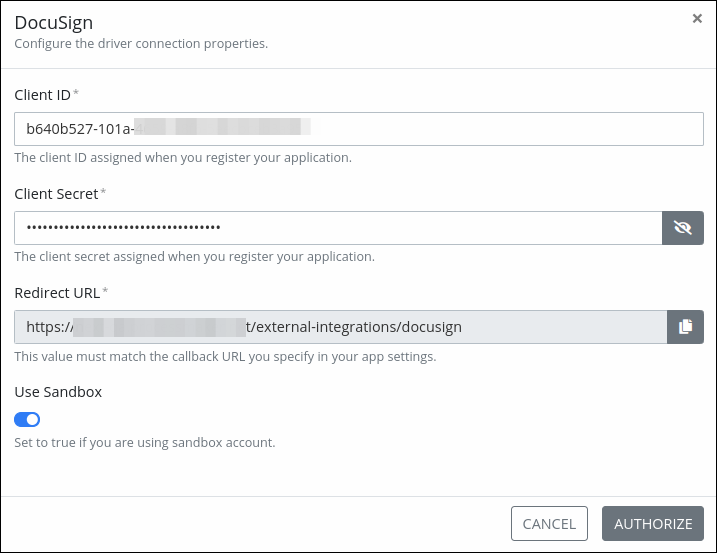
In the Client ID setting, enter the client ID from your registered DocuSign driver. If testing DocuSign to get the client ID, see Enable OAuth for Connect.
In the Client Secret setting, enter the client secret from your registered DocuSign driver. If testing DocuSign to get client secret, see Enable OAuth for Connect.
Use the copy icon
 to copy the URL from the Redirect URL setting, and then provide it to your OAuth identity provider.
Enable Use Sandbox if you are using a sandbox account.
Click Authorize. If authorization is successful, the External Integrations page lists DocuSign as authorized.
Configure to Connect the GitHub Server
Before proceeding, ensure that you have the client ID and client secret from your registered GitHub driver.
Permissions
Your user account or group membership must have the "Settings: Update Settings" permission to edit External Integrations unless your user account has the Make this user a Super Admin setting selected.
See the Settings permissions or ask your Administrator for assistance.
Follow these steps to connect to the GitHub server:
View your External Integrations. The External Integrations tab displays.
Click the Edit icon
for the GitHub setting. The GitHub screen displays.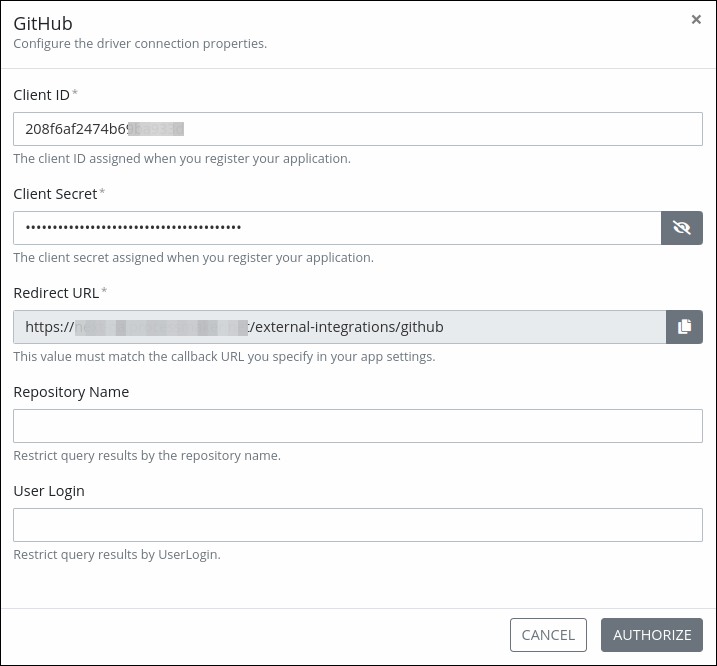
In the Client ID setting, enter the client ID from your registered GitHub driver. If testing GitHub to get the client ID, see Creating an OAuth app.
In the Client Secret setting, enter the client secret from your registered GitHub driver. If testing GitHub to get the client secret, see Creating an OAuth app.
Use the copy icon
to copy the URL from the Redirect URL setting, and then provide it to your OAuth identity provider.In the Repository Name setting, enter the GitHub repository name to restrict query results.
In the User Login setting, enter the GitHub user name to restrict query results.
Click Authorize. If authorization is successful, the External Integrations page lists GitHub as authorized.
Configure to Connect the Gmail Server
Before proceeding, ensure that you have the client ID and client secret from your registered Gmail driver. For information on getting the client ID and secret, see Google's Authentication API guide.
Permissions
Your user account or group membership must have the "Settings: Update Settings" permission to edit External Integrations unless your user account has the Make this user a Super Admin setting selected.
See the Settings permissions or ask your Administrator for assistance.
Follow these steps to connect to the Gmail server:
View your External Integrations. The External Integrations tab displays.
Click the Edit icon
next to Gmail to view its settings. If you do not see Gmail in the list, see instructions on how to add the driver.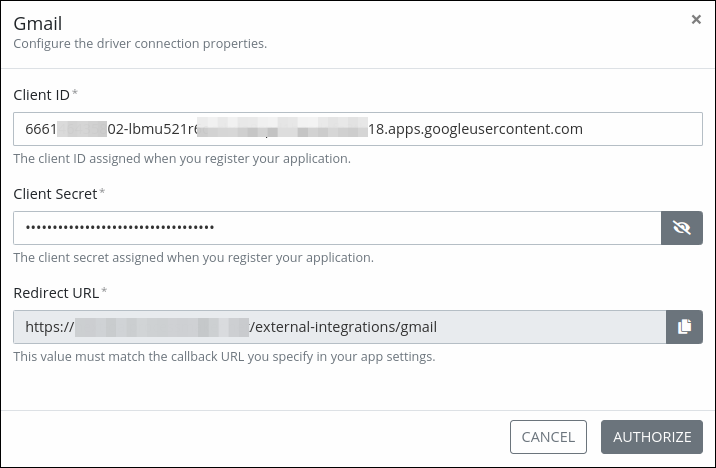
In the Client ID setting, enter the client ID from your registered Gmail driver. For more information about how to get the client ID, see Obtain OAuth 2.0 credentials from the Google API Console.
In the Client Secret setting, enter the client secret from your registered Gmail driver. For more information about how to get the client secret, see Obtain OAuth 2.0 credentials from the Google API Console.
Use the copy icon
 to copy the URL from the Redirect URL setting, and then provide it to your OAuth identity provider.
Click Authorize. If authorization is successful, the External Integrations page lists Gmail as authorized.
Configure to Connect the Microsoft Excel Server
Before proceeding, ensure that you have the client ID and client secret from your registered Microsoft Excel driver.
Permissions
Your user account or group membership must have the "Settings: Update Settings" permission to edit External Integrations unless your user account has the Make this user a Super Admin setting selected.
See the Settings permissions or ask your Administrator for assistance.
Follow these steps to connect to the Microsoft Excel server:
View your External Integrations. The External Integrations tab displays.
Click the Edit icon
for the Microsoft Excel setting. The Microsoft Excel screen displays.
In the Client ID setting, enter the client ID from your registered Microsoft Excel driver. If testing Microsoft Excel to get the client ID, see Add a client ID and client secret.
In the Client Secret setting, enter the client secret from your registered Microsoft Excel driver. If testing Microsoft Excel to get the client secret, see Add a client ID and client secret.
Use the copy icon
to copy the URL from the Redirect URL setting, and then provide it to your OAuth identity provider.From the Connection Type dropdown, select the service for storing and retrieving Microsoft Excel files such as Amazon S3, Azure Blog Store, Box, Dropbox, Google Cloud Storage, Google Drive, OneDrive, or SharePoint REST.
In the URI setting, enter the Uniform Resource Identifier (URI) for the Microsoft Excel resource location.
Click Authorize. If authorization is successful, the External Integrations page lists Microsoft Excel as authorized.
Configure to Connect the Slack Server
Before proceeding, ensure that you have the client ID and client secret from your registered Slack driver.
Permissions
Your user account or group membership must have the "Settings: Update Settings" permission to edit External Integrations unless your user account has the Make this user a Super Admin setting selected.
See the Settings permissions or ask your Administrator for assistance.
Follow these steps to connect to the Slack server:
View your External Integrations. The External Integrations tab displays.
Click the Edit icon
for the Slack setting. The Slack screen displays.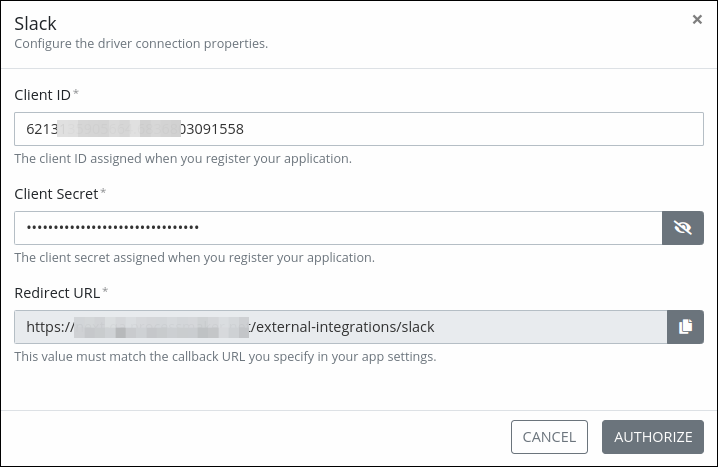
In the Client ID setting, enter the client ID from your registered Slack driver. If testing Slack to get the client ID, see Creating a Slack App.
In the Client Secret setting, enter the client secret from your registered Slack driver. If testing Slack to get the client secret, see Creating a Slack App.
Use the copy icon
to copy the URL from the Redirect URL setting, and then provide it to your OAuth identity provider.Click Authorize. If authorization is successful, the External Integrations page lists Slack as authorized.