The Break and Jump controls are used in Conversational Screens and provide powerful tools for guiding conversation flow dynamically, enhancing user engagement and interactivity. Together, these controls create flexible pathways in a screen, adapting to user input for a tailored experience.
Dynamic Routing: The Jump control triggers specific Break points based on predefined conditions, allowing the form to respond directly to user actions.
Adaptive Flow: This setup ensures that each user follows a path suited to their responses, creating a seamless and intuitive navigation experience.
Personalized Interactions: By routing users to different Break points, the conversation becomes more interactive, catering to individual needs and making the experience feel more responsive.
Enhanced Engagement: This functionality not only improves user satisfaction but also supports more complex conversation flows, increasing the form's effectiveness in gathering information or completing tasks.
Together, the Break and Jump controls create a conversational journey that feels intuitive and custom-fitted, enhancing the overall user experience.
These controls are only available for Conversational Screens. See Screen Types.
Watch the following product tour to learn how to use the Break and Jump controls.
Add the Break Control to a Screen
Permissions
Your user account or group membership must have the following permissions to design a Screen unless your user account has the Make this user a Super Admin setting selected:
Screens: Edit Screens
Screens: View Screens
See the Screens permissions or ask your Administrator for assistance.
Follow these steps to add this control to the Screen:
Create a new Conversational-type Screen or edit an existing one.
From the Controls Menu on the left, expand the Navigation category, and then locate the Break icon
 .
.Drag and drop the control onto the Screen Builder.
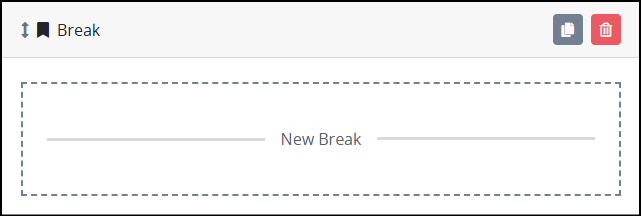
Configure the Break control. See Settings.
Validate that the control is configured correctly. See Validate Your Screen.
Settings
The Break control has the following configurable settings in the Properties Panel:
Variable Panel Settings
Expand the Variable panel from the Properties Panel on the right to configure the following properties:
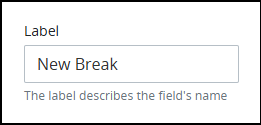
Label
Edit the default label that identifies this control. This name will be used to call the break point from a Jump control.
Advanced Panel Settings
Expand the Advanced panel from the Properties Panel on the right to configure the following properties:
Visibility Rule
Specify an expression that indicates the condition(s) under which this control displays. See Expression Syntax Components. If this setting does not have an expression, then this control displays by default.
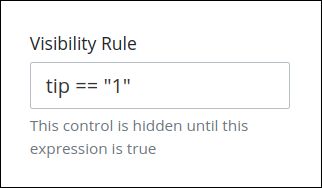
For example, this control displays if the variable value tip is 1. For a detailed example of the Visibility Rule setting, see Show or Hide Controls Based on Button Selection.
Note the following regarding how to use visibility rules:
To make this control hidden until another control contains a value, enter the Variable Name setting value of that control to this control's Visibility Rule setting.
See how to configure a Submit Button control that prevents the Request participant from clicking on that control multiple times so the Screen cannot be submitted after the first click.
Device Visibility
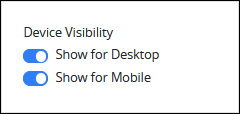
Select on which device types this control displays:
Desktop: The control displays only on desktop devices. Enable the Show for Desktop toggle key.
Mobile: The control displays only on mobile devices. Enable the Show for Mobile toggle key.
Both: The control displays on both desktop and mobile devices. Both toggle keys are enabled by default.
CSS Selector Name
Enter the value to represent this control in custom CSS syntax when in Custom CSS mode. As a best practice, use the same CSS Selector Name value on different controls of the same type to apply the same custom CSS style to all those controls.
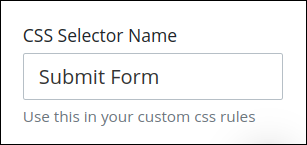
Then, use this name in the Custom CSS feature to apply CSS styling to this control as follows:
[selector='Submit Form'] {
    color: blueviolet;
}
See the following best practices regarding custom CSS in Screens:
See the following best practices regarding custom CSS in Screens:
Add the Jump Control to a Screen
Permissions
Your user account or group membership must have the following permissions to design a Screen unless your user account has the Make this user a Super Admin setting selected:
Screens: Edit Screens
Screens: View Screens
See the Screens permissions or ask your Administrator for assistance.
Follow these steps to add this control to the Screen:
From the Controls Menu on the left, expand the Navigation category, and then locate the Jump icon
 .
.Drag and drop the control onto the Screen Builder.
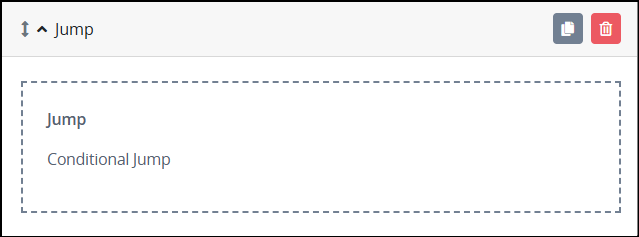
Configure the Jump control. See Settings.
Validate that the control is configured correctly. See Validate Your Screen.
Settings
The Jump control has the following configurable settings in the Properties Panel:
Variable Panel Settings
Expand the Variable panel from the Properties Panel on the right to configure the following properties:
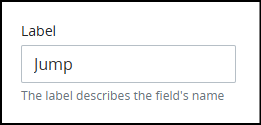
Label
Edit the default label that displays for this control if necessary. This name will be used to call the break point from a Jump
Configuration Panel Settings
Expand the Configuration panel from the Properties Panel on the right to configure the following properties:
Conditions
In the Add Condition property, define the rules for triggering a break point in the Conversational screen from this Jump control.
Click the Add Condition icon
 to create a new condition.
In the Condition setting, enter the rule that determines when to jump to a break point. See Expression Syntax Components.
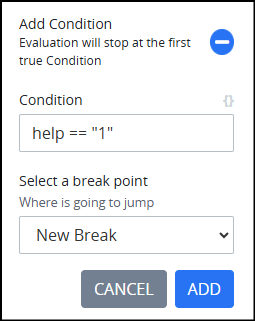
In the Select a Break Point setting, choose the Break control label to which the user should be directed.
Click Add to add the condition.
Repeat steps 1-4 to add additional conditions.
If multiple conditions are defined, the evaluation will stop at the first condition that evaluates to true.
Advanced Panel Settings
Expand the Advanced panel from the Properties Panel on the right to configure the following properties:
Visibility Rule
Specify an expression that indicates the condition(s) under which this control displays. See Expression Syntax Components. If this setting does not have an expression, then this control displays by default.

For example, this control displays if the variable value tip is 1. For a detailed example of the Visibility Rule setting, see Show or Hide Controls Based on Button Selection.
Note the following regarding how to use visibility rules:
To make this control hidden until another control contains a value, enter the Variable Name setting value of that control to this control's Visibility Rule setting.
See how to configure a Submit Button control that prevents the Request participant from clicking on that control multiple times so the Screen cannot be submitted after the first click.
Device Visibility
Select on which device types this control displays:
Desktop: The control displays only on desktop devices. Enable the Show for Desktop toggle key.
Mobile: The control displays only on mobile devices. Enable the Show for Mobile toggle key.
Both: The control displays on both desktop and mobile devices. Both toggle keys are enabled by default.

CSS Selector Name
Enter the value to represent this control in custom CSS syntax when in Custom CSS mode. As a best practice, use the same CSS Selector Name value on different controls of the same type to apply the same custom CSS style to all those controls.

Then, use this name in the Custom CSS feature to apply CSS styling to this control as follows:
[selector='Submit Form'] {
    color: blueviolet;
}
See the following best practices regarding custom CSS in Screens:
See the following best practices regarding custom CSS in Screens: