Configure ProcessMaker Platform and PM Classic to use SSO SAML authentication with the identity provider Microsoft Entra ID (Microsoft Azure Active Directory) as follows:
Create and configure an enterprise application in Microsoft Entra ID
Configuration for PM Classic (needed only for PM Classic users)
It is recommended to create and configure an enterprise application in Microsoft Entra ID concurrently with configuring ProcessMaker Platform and PM Classic. This is because each configuration procedure requires values from the other.
The web browser must support third-party cookies.
Create and Configure an Enterprise Application in Microsoft Entra ID
Follow these steps to add an enterprise application in Microsoft Entra ID:
Log on to your Microsoft Azure account. The Welcome to Azure! window displays.
.png "image(302).png")
Click View in the Manage Microsoft Entra ID section. The Default Directory screen displays.
.png "image(304).png")
Click Enterprise Applications, then select the All Applications option. The Browse Microsoft Entra Gallery screen displays.
.png "image(305).png")
Click Create your own application. Create your own application screen displays on the right.
.png "image(306).png")
From the Create your own application screen:
In the What's the name of your app?, enter the application name.
Select Integrate any other application you don't find in the gallery (Non-gallery).
Click Add.
On the sidebar, click Single sign-on. The Single sign-on screen displays.
.png "image(307).png")
Click the SAML option. The SAML-based Sign-on page displays.
.png "image(308).png")
From the Basic SAML Configuration section, click the Edit link. The Basic SAML Configuration page displays.
.png "image(309).png")
Pause this procedure, and then begin configuring the ProcessMaker Platform SAML authentication until the SSO - SAML settings display.
Configure ProcessMaker Using SAML With Microsoft Entra ID
Permissions
Your user account or group membership must have the "Settings: Update Settings" permission to edit SSO SAML settings unless your user account has the Make this user a Super Admin setting selected.
See the Settings permissions or ask your Administrator for assistance.
Notice to Administrators
Enhance security for your ProcessMaker Platform instance by following these best practices. Among these best practices are to require all ProcessMaker users to log on to your ProcessMaker Platform instance via Single Sign-On (SSO), OAuth, OKTA and/or two-factor authentication.
Follow these steps to configure SAML SSO settings with Microsoft Entra ID as necessary:
View your SSO Settings. From the list of SSO identity providers, enable the SAML option. The SSO - SAML tab displays.
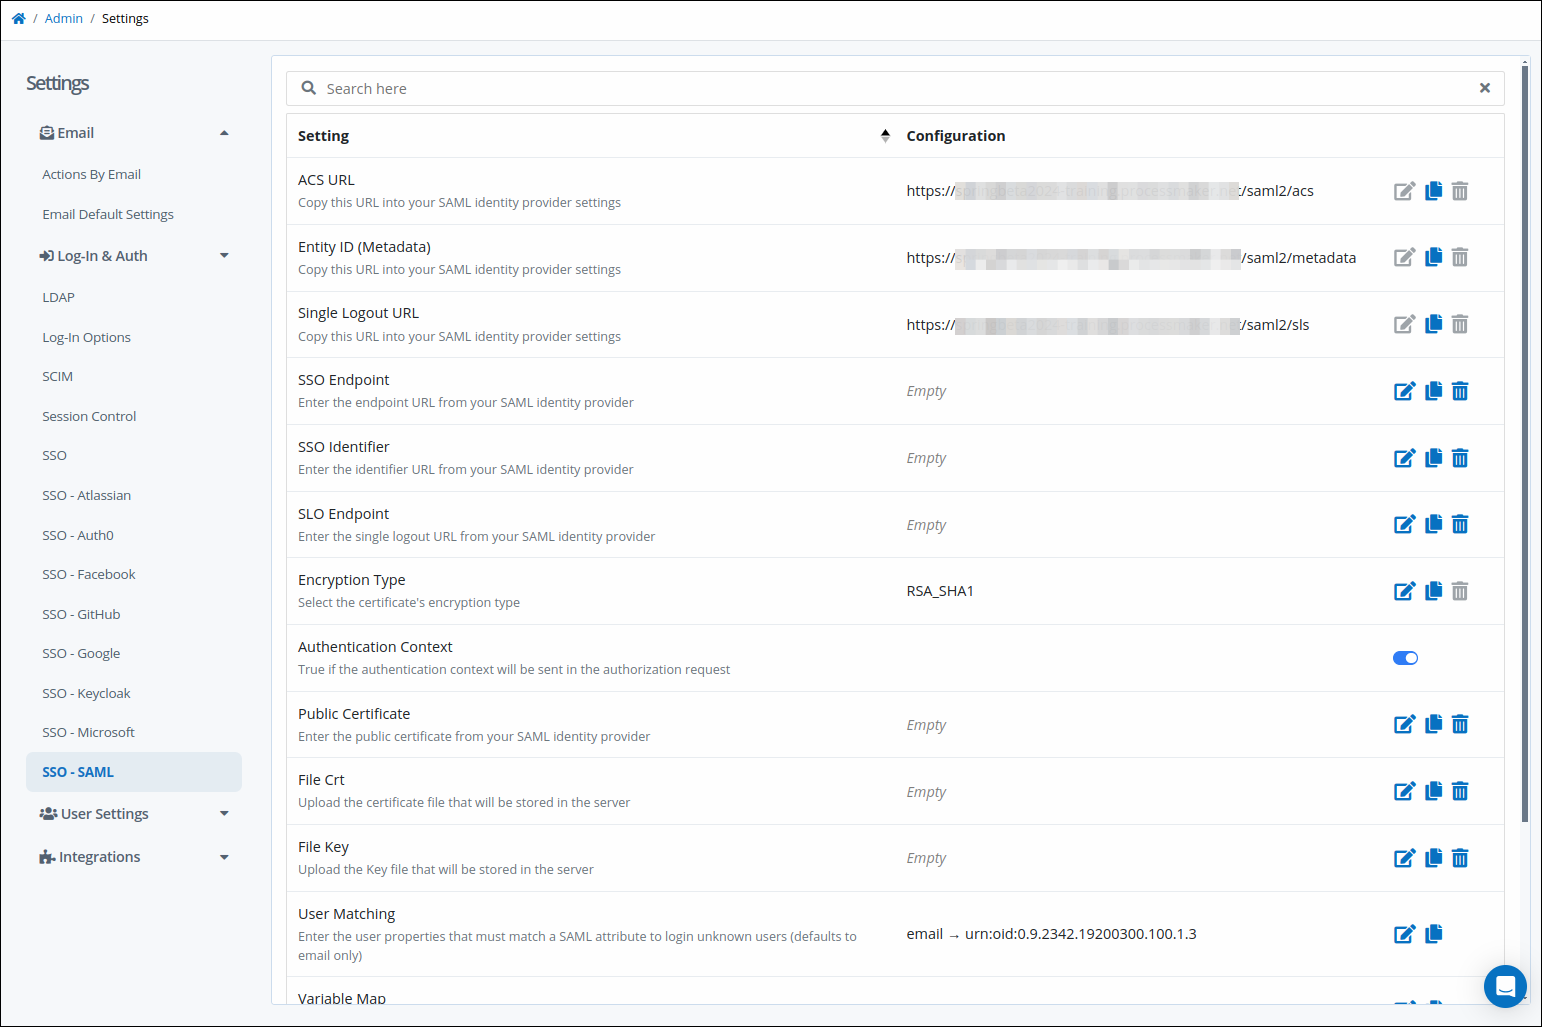
Click the SSO - SAML tab. The SSO - SAML settings display.
In Microsft Azure, go to the Basic SAML Configuration.
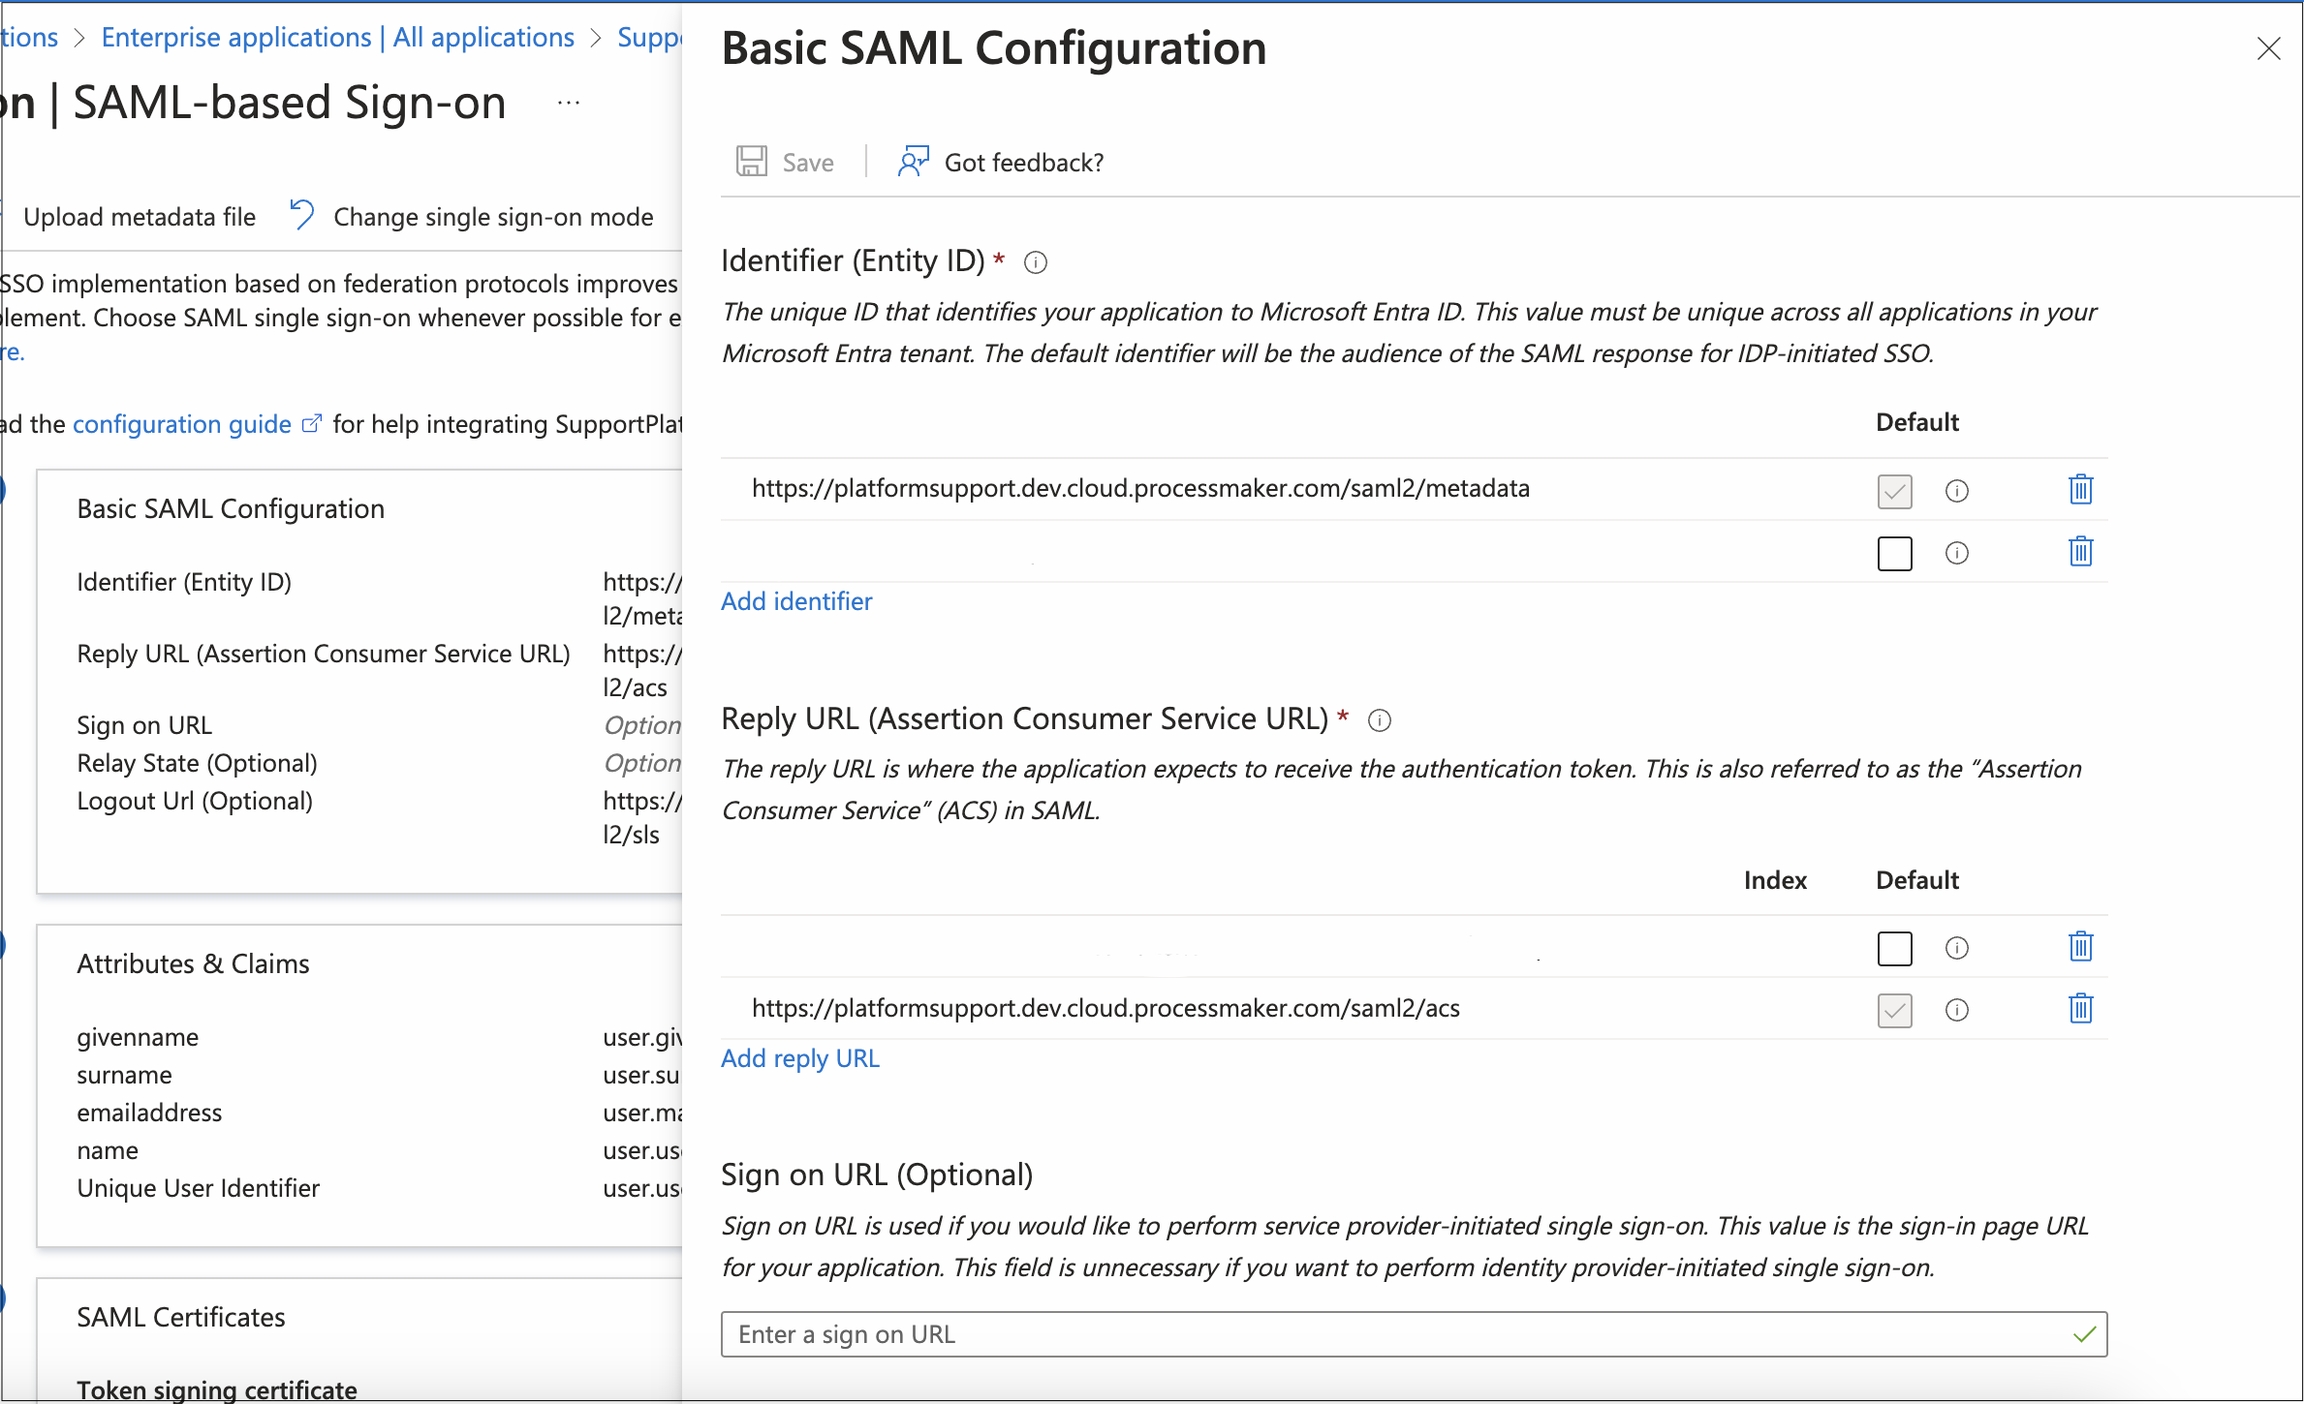
Copy the ProcessMaker Platform settings from the SSO - SAML settings in step two to Microsoft Azure settings in step three as follows:
Use the copy icon
 to copy the URL from the ACS Url setting, and then provide it to the Add reply URL setting.
Use the copy icon
to copy the URL from the Entity ID (Metadata) setting, and then provide it to the Add identifier setting.Use the copy icon
to copy the URL from the Single Logout URL setting, and then provide it to the Logout Url (Optional) setting.
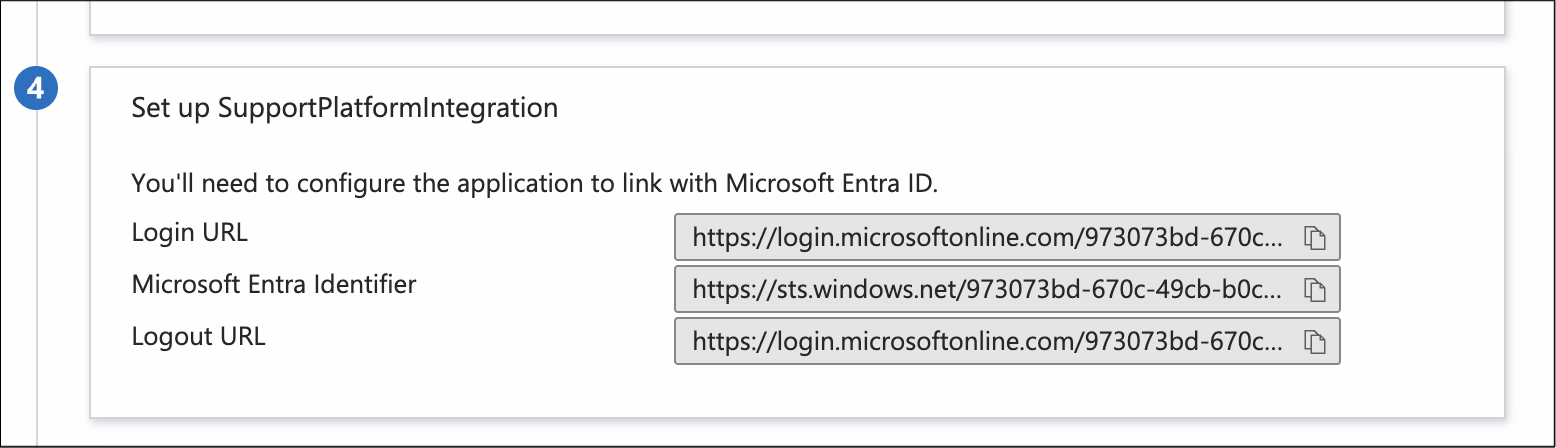
In Microsoft Azure, go to the Set up section and copy the following fields:
Login URL
Microsoft Entra Identifier
Logout URL
In ProcessMaker Platform, go to the following settings:
Copy Microsoft Azure settings described in step five as follows:
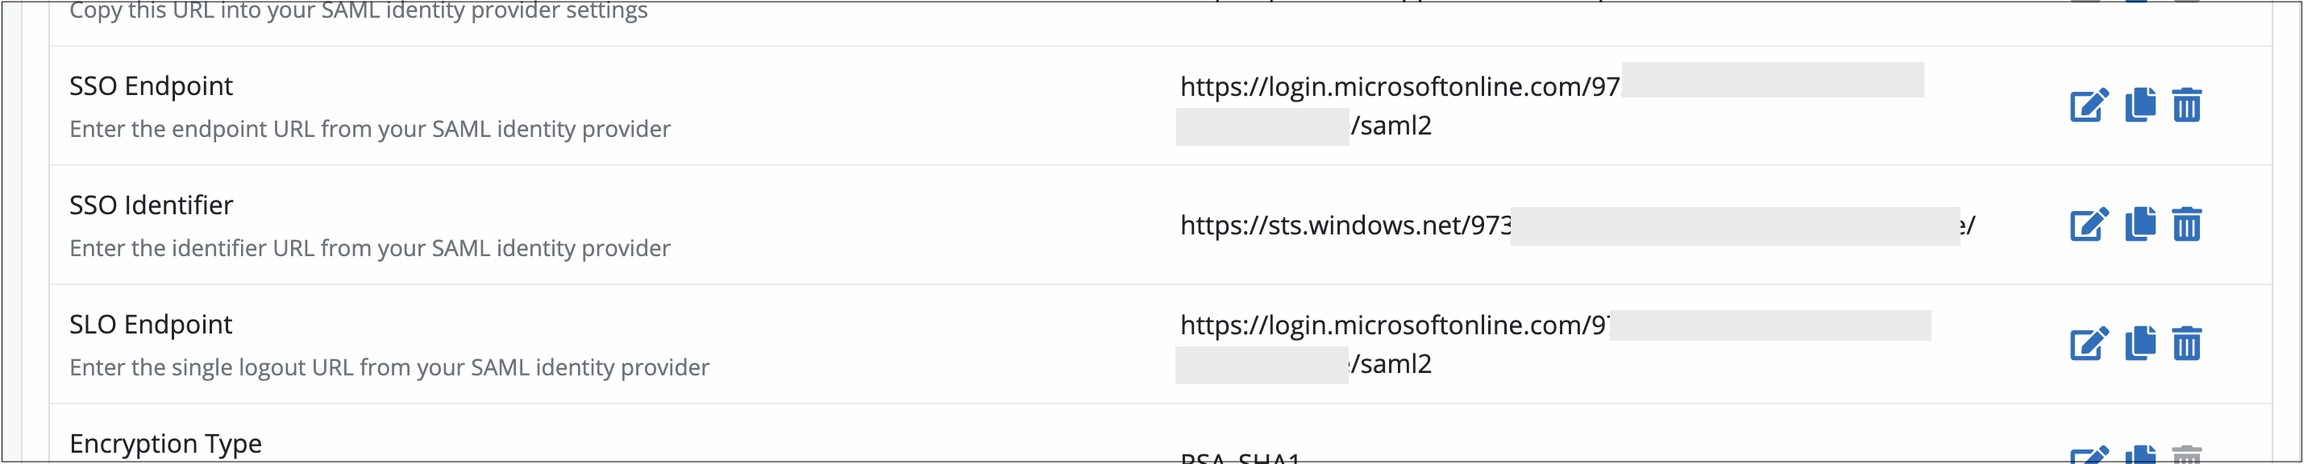
Click the Edit icon
 for the SSO Endpoint setting. Enter the identity provider URL from which ProcessMaker retrieves the authentication response and validates it when establishing the SSO session. Get this value from the
Login URL value of Microsoft Azure settings described in step five.
Click the Edit icon
for the SSO Identifier setting. Enter the URL that references the SAML XML file for your identity provider (IdP). Get this value from the Microsoft Entra Identifier value of Microsoft Azure settings described in step five.Click the Edit icon
for the SLO Endpoint setting. Enter the logout URL. Get this value from the Logout URL value from the Microsoft Entra Identifier value of Microsoft Azure settings described in step five.
In the Encryption Type setting, select the encryption type set in your Microsoft Azure environment. For this example, leave the default value as RSA_SHA1.

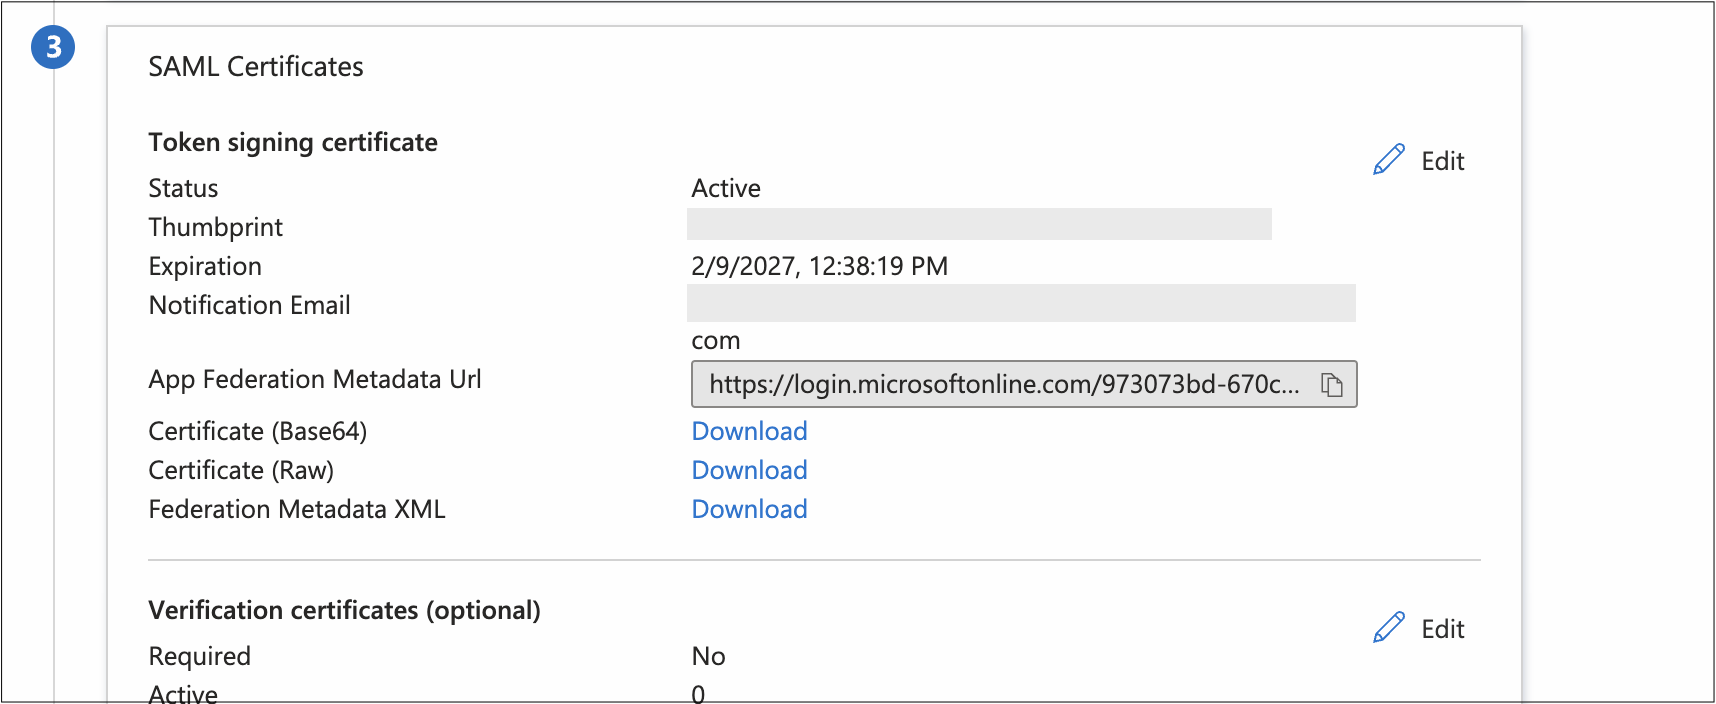
In Microsoft Azure, go to the SAML Certificates section and download the Certificate (Base 64) file. Open the file, copy all the content including BEGIN/END certificate lines.
In ProcessMaker Platform, click the Edit icon
for the Public Certificate setting. The Public Certificate screen displays.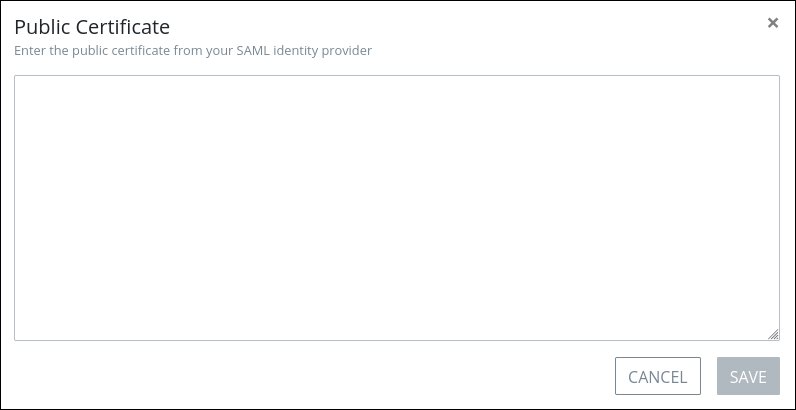
If Microsoft Azure requires, enter the identity provider's certificate fingerprint. Get this value from the SAML Certificates setting in step eight.
Click the Edit icon
.png "image(310).png") for the Variable Map and the User Matching setting. In this case, the Variable Map screen displays default values.
for the Variable Map and the User Matching setting. In this case, the Variable Map screen displays default values..png "image(311).png")
Variable Map
Match the variables of the User Matching and Variables Map fields with one of the following Microsoft Azure data according to your needs and attributes available:
The attributes retrieved from the Federation Metadata XML file.
.png "image(312).png")
The data in the Attributes and Claims sections.
.png "image(313).png")
In Microsoft Azure, do the following:
In the SAML Certificates section, download the Federation Metadata XML file.
.png "image(316).png")
Open the file.
.png "image(315).png")
In ProcessPlatform, click the Copy icon for the Name ID Format setting to copy this value in the Required claim setting when configuring Microsoft Azure. Otherwise, leave with the default value.
.png "image(314).png")
Web Browser Configuration
Configure the Web Browser
To complete the SSO configuration, it is necessary to allow third-party cookies in the web browser. See instructions to enable cookies for your respective browse using the following links: