The FlowGenie Studio offers a robust, intuitive interface for designers to create and manage Genies efficiently. Its well-structured layout and comprehensive features allow users to train Genies to meet specific needs.
Create a New Genie
Permission
Your user account or group membership must have the following permissions to create a new FlowGenie unless your user account has the Make this user a Super Admin setting selected:
FlowGenies: Create FlowGenies
FlowGenies: View FlowGenies
See the FlowGenie permissions or ask your Administrator for assistance.
Follow these steps to create a new FlowGenie:
From the Designer Welcome Screen, do one of the following:
Hover over the FlowGenie icon
.png "image(122).png") , and then select the New Genie option.
, and then select the New Genie option.Hover over the FlowGenie icon
.png "image(123).png") , select View all Genies to view a list of Genies. Then click the +Genie button.
, select View all Genies to view a list of Genies. Then click the +Genie button.
The Create Genie screen displays.
.png "image(124).png")
In the Name setting, enter the name of the Genie. Names must be unique in your organization and can only use apostrophe characters (
') and spaces. This is a required setting.In the Description setting, enter a description for the Genie.
From the Category drop-down menu, select one or more FlowGenie Categories to associate with this Genie. To remove a FlowGenie Category that is currently selected, click the
 icon for that selection or press Enter when the drop-down is visible. This is a required setting.
From the Project drop-down menu, optionally select the Project(s) to which this Genie will be added as an asset. Only Projects where you are a member will be displayed. To remove a selected Project, click the
.webp "image(1).webp") icon next to it or press Enter when the drop-down is visible.
icon next to it or press Enter when the drop-down is visible.Click Save.
Continue editing in the FlowGenie Studio.
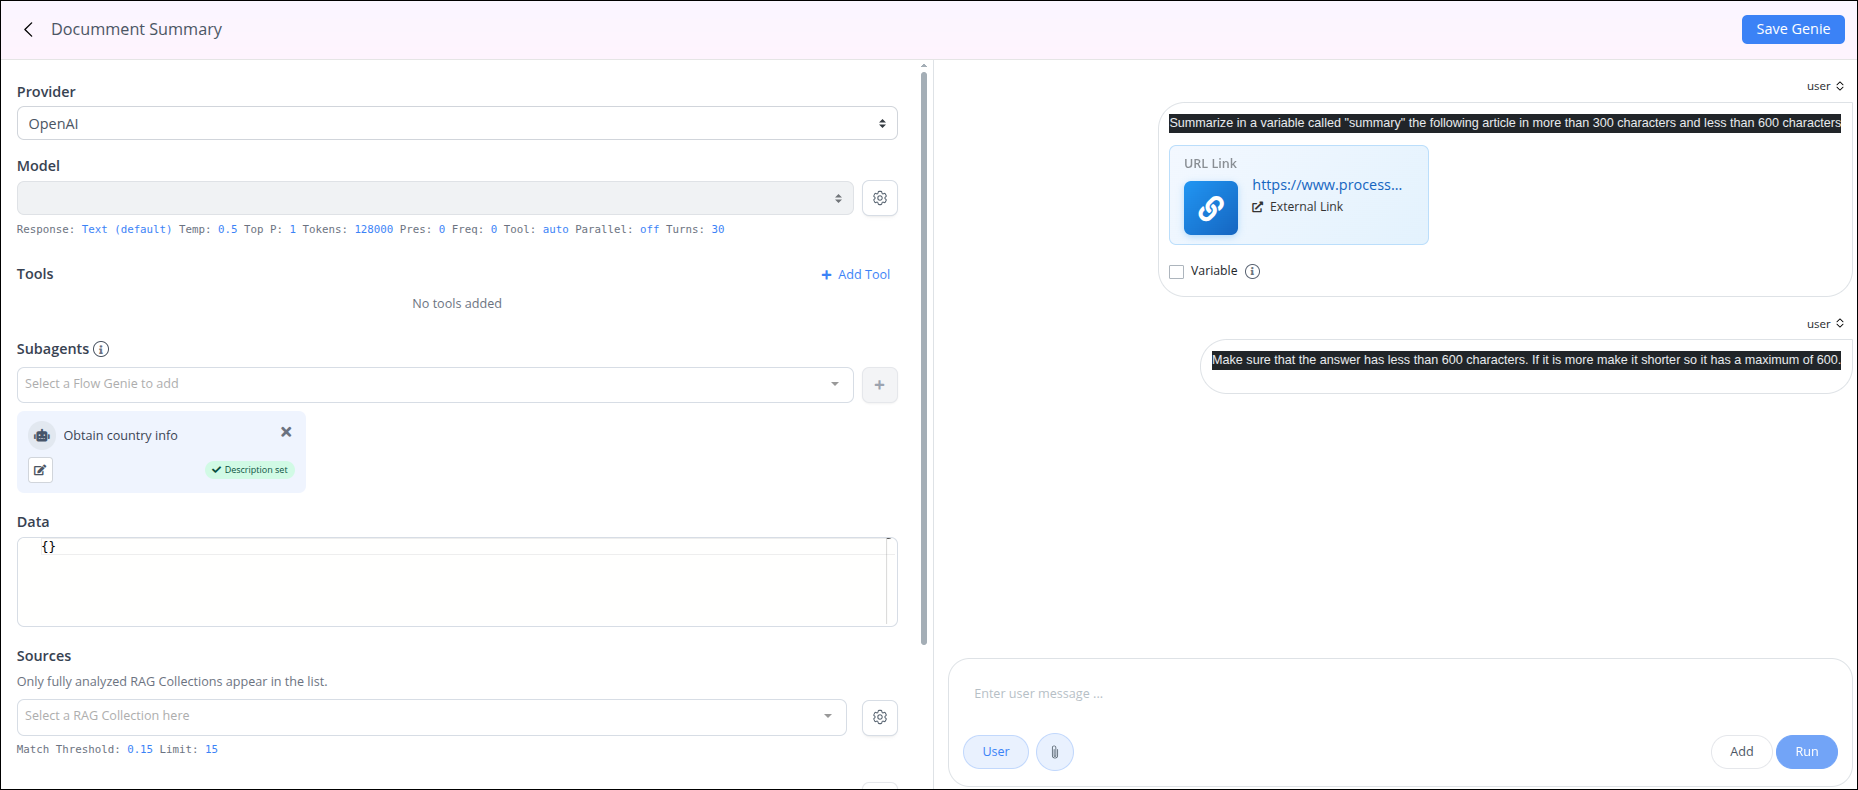
The FlowGenie Studio
The FlowGenie Studio provides an interface to preview, test and adjust Genie configurations.
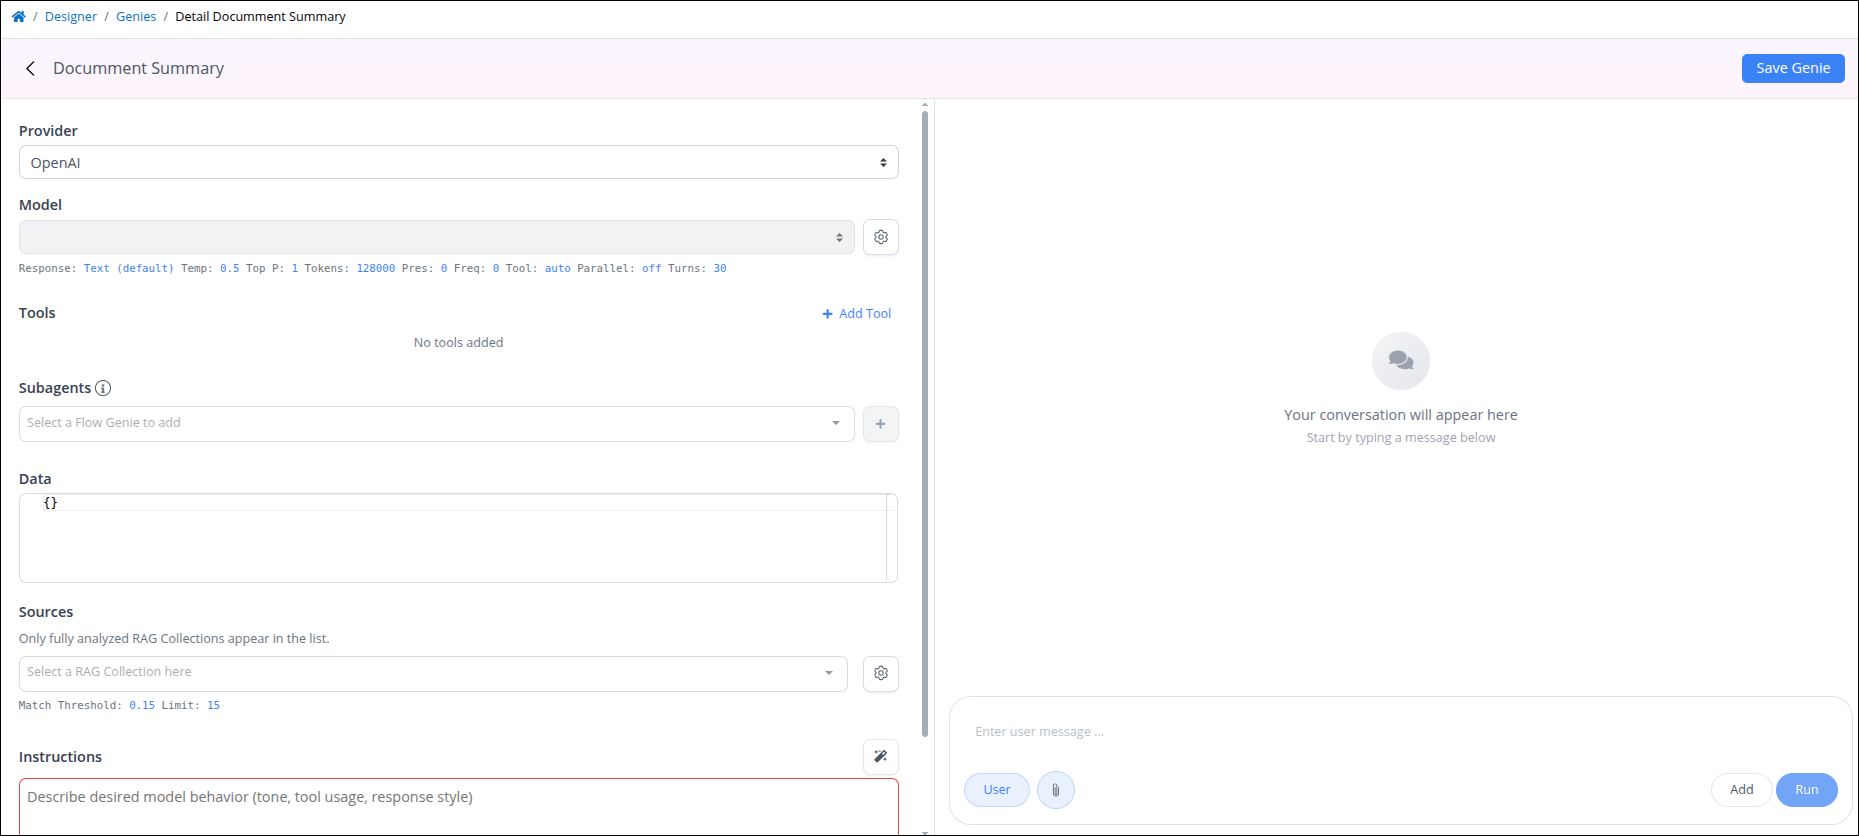
Genie Settings
Genie settings are displayed on the left, enabling users to configure the following settings:
Provider: Select the AI model provider the Genie uses to generate responses. Available providers include:
OpenAI
Google (Gemini)
Anthropic (Claude)
API Key: Enter the API key required to connect to the selected provider. This field is displayed when Google (Gemini) or Anthropic (Claude) is selected as the Provider. Then, click Load to display all models.
Model: Select the AI model the Genie uses to generate responses. The available options depend on the selected Provider. After choosing a provider, the Model dropdown displays the models supported for that provider, allowing you to select the most appropriate model for your Genie configuration.
Model Settings: Click the
 icon to configure the following model settings:
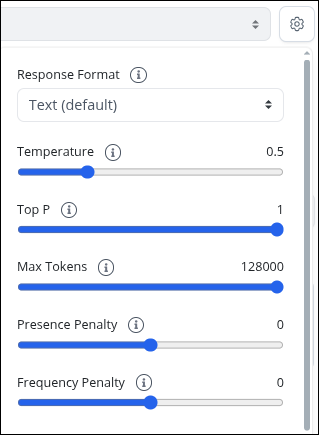
Response Format: Response format configuration options include:
Text (This is the default format)
JSON
Table
For example, if JSON is selected, the Genie will return a response in the following format:
.png "image(125).png")
Temperature: Adjust the slider to control the response style. Lower values produce more consistent responses, while higher values increase diversity and creativity.
Top P: Adjust the slider to control token diversity, affecting the variety of word choices.
Max Tokens: Use the slider to set the maximum length of the response. One token represents approximately 4 characters or 0.75 words in English text.
Presence Penalty: Adjust the slider to decrease the chance of reusing already generated tokens, encouraging new content.
Frequency Penalty: Modify the slider to reduce the likelihood of repeating frequent tokens, minimizing redundancy.
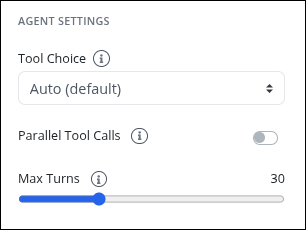
Tool Choice: Select how the agent uses tools while generating responses. This setting controls whether the model can decide when to use tools, must use a tool, or cannot use tools. Select one of the following options:
Auto: The model decides when to use tools. This is the default option.
Required: The model must use at least one tool when responding.
None: The model cannot use tools when responding.
Parallel Tool Calls: Enable this setting to allow the agent to run multiple tool calls at the same time. This can improve response speed when a task requires several independent tool actions. Disable this setting for workflows that require tools to run in a specific order or depend on the result of a previous tool call.
Max Turns: Set the maximum number of agent turns allowed before the agent stops running. An agent turn includes a tool call, a response, or both.
Increase this value for complex tasks that require multiple tool calls or several steps to complete. Keep the value limited enough to prevent the agent from running too long or entering an infinite loop.
Tools: Manage the tools available to the agent. Tools allow the agent to perform actions, retrieve information, and interact with external services.
To learn how to add, configure, or remove tools, see Agent Tools.
Subagents: Add genies as a subagent. To learn about it, see Subagents.
Data: Enter sample data in JSON format to test Genie's response in the Studio. It includes JSON variables.
Sources: Select the RAG Collection the Genie uses as a knowledge source. Only fully analyzed RAG Collections appear in the list, allowing you to choose the collection the Genie can use to retrieve relevant information when generating responses.
Source Settings: Click the
icon to configure the following source settings: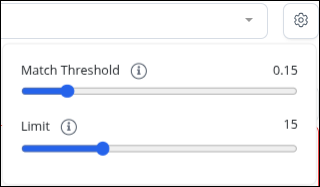
Match Threshold: Set the minimum similarity score required for a document section to be included in the Genie’s response context. Higher values return only more closely related content, while lower values allow broader matches.
Limit: Set the maximum number of document sections the Genie can retrieve from the selected RAG Collection when generating a response.
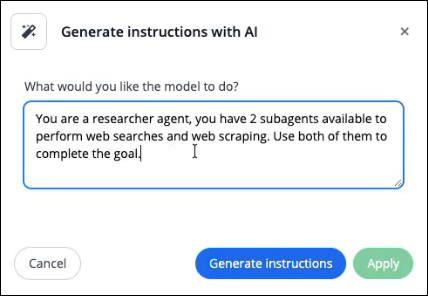
Instructions: Enter the system prompt that defines the agent’s behavior, role, and response guidelines. Optionally, click the wizard icon to generate instructions with AI.
Agent Tools
Tools allow an agent to perform actions, retrieve information, and interact with external services. To add tools to an agent, click + Add Tool in the Genie settings.
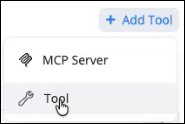
Two options are available:
Add Default Tools
Use Tool to add tools from the ProcessMaker MCP Server. This option provides a set of default tools that are commonly used by agents.
Select Tool.
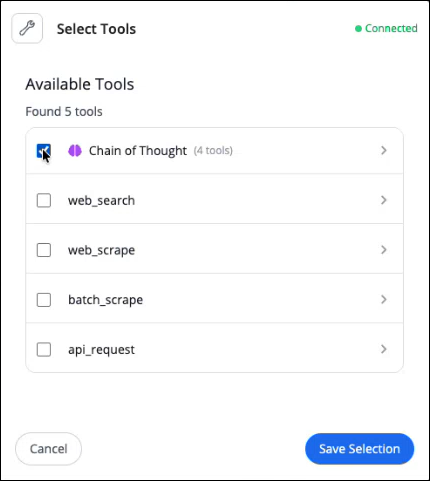
In the Select Tools window, review the available default tools.
Default tools include:
Chain of Thought
Web Search
Web Scrape
Batch Scrape
API Request
To review a tool before adding it, click the arrow next to the tool name. The expanded view displays the tool details, including:
Definition: Describes what the tool does.
Arguments: Lists the input values required by the tool.
Returns: Describes the response generated by the tool.
Response Example: JSON answer example.
.png)
Select the checkbox for each tool the agent can use.
Click Save. The selected tools are added to the agent.

Add a Remote MCP Server
Use this option to connect the agent to a remote third-party MCP Server.
Select MCP Server.
Configure the MCP Server settings:
Server Name: Enter a name to identify the MCP Server.
Connection Type: Select HTTP-SSE or HTTP.
URL or Command: Enter the server URL or command used to connect to the MCP Server.
Authentication Method: Select the authentication method required by the server. Available authentication methods include:
None
Access Token/API Key
Custom Headers
OAuth 2.0 (Client Credentials)
OAuth 2.0 (PKCE)
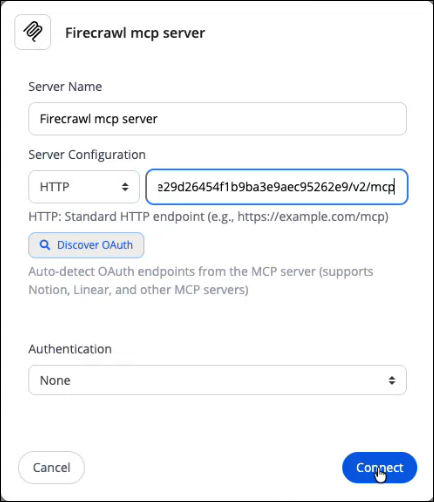
Click Connect. If the connection is successful, the available tools from the MCP Server are displayed.
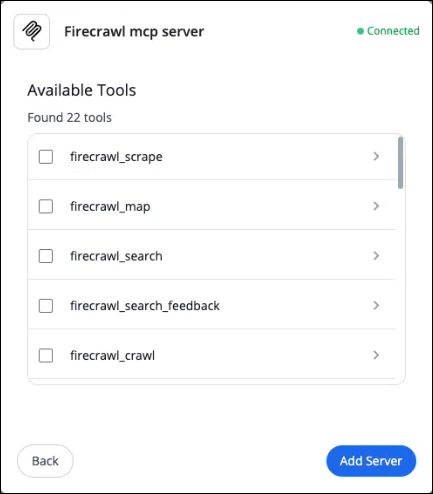
Select the tools the agent can use.
For MCP Servers that require OAuth authentication:
Click Discover OAuth to automatically detect the server authentication configuration.
Click Authorize to sign in with the MCP Server account.
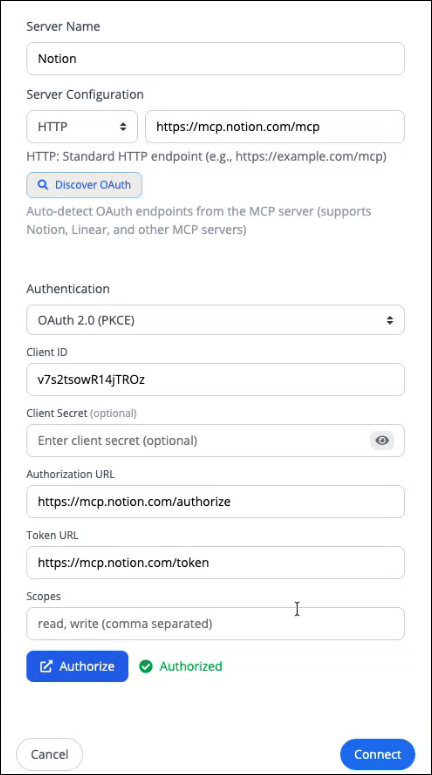
After authorization is complete, click Connect to display the available tools.
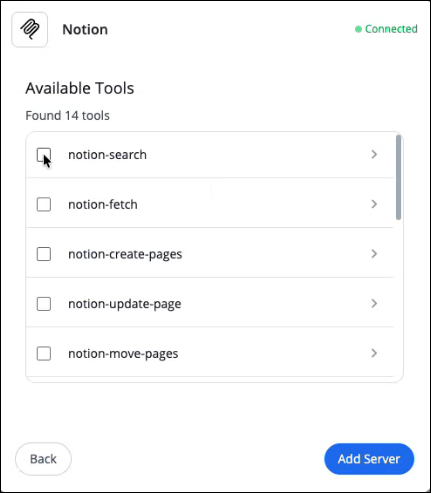
Select the required tools.
Click Add Server. The MCP Server and its selected tools are added to the agent.
Manage Added Tools
After tools are added, they are listed in the agent configuration.
From the tools list, you can:
Click a tool to view or configure its settings.
Click the X icon to remove a tool from the agent.
Subagents
Use the Subagents setting to delegate work from a parent FlowGenie to one or more specialized Genies. Each Subagent acts as a specialist that the parent FlowGenie can call when a task matches the subagent’s purpose.
A parent FlowGenie calls each Subagent as a tool. Nested specialists are also displayed as tools in their parent Genie.
The runtime timeline shows which subagent ran and which tools the subagent used during execution.
If a subagent stops before completing its tools, increase the Max Turns value in the child Genie configuration.
Add a Subagent
Click Subagents. The list of available Genies in the platform is displayed.
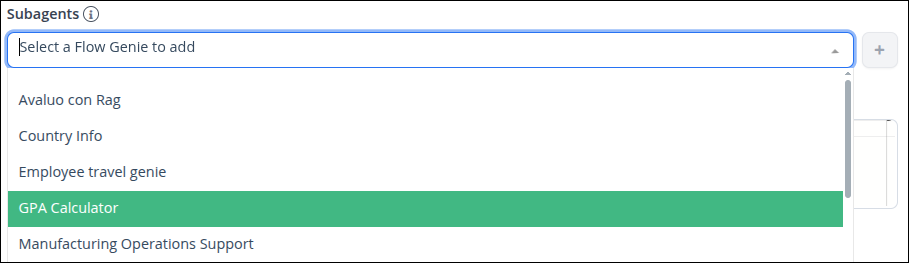
Locate and select the Genie to use as a subagent.
Click the Plus icon next to the Genie. The selected Genie is added as a subagent and displayed in the Subagents list.

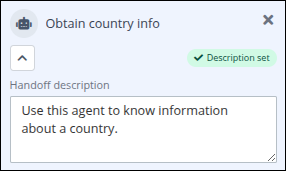
Configure the Handoff Description
The handoff description defines when the parent FlowGenie should use the subagent. This description helps the parent Genie decide which subagent to call for a specific task.
In the Subagents list after adding the agent, the system displays a No description alert.
Click the
 icon for the subagent.
Enter a handoff description that explains when this subagent should be used. For example, describe the type of task, topic, or responsibility assigned to the subagent.
The status is updated.
Handoff descriptions are important because they help the parent FlowGenie determine when to call one Subagent instead of another.
Genie Training
The center of the FlowGenie Studio provides an interface where Genies can be trained to perform specific tasks. The prompting can render Markdown instructions.
Follow these steps to train a Genie:
Enter a prompt for the Genie in the Enter a user message box.
Click Add to add the message to the chat box.
Click Run to get a response from the Genie. You can also add several messages and then run them all at once to get a response.
Use the attach file icon
.png "image(126).png") to include a file for the Genie to analyze.
to include a file for the Genie to analyze. Supported File Types
Images: Must be 2MB or less. Support multiple image uploads at once
PDFs: Must be 2MB or less and contain 3 pages or fewer.
CSV: Must be 0.2MB or less.
URL links: Should be publicly accessible and contain no copyrighted content.
To delete a file or message, click the Trash icon at the top of the message.
After uploading and adding a file, select Use Process Variable to replace the file dynamically with the variable value during a Request of the process.
.png "image(127).png")
Click Save Genie to save all configurations.
User vs. Assistant
Use the User/Assistant button to switch between editing the chat as a user or the assistant. The assistant in this context is the Genie itself, and this feature allows you to modify the Genie's response as needed. Follow these steps to switch between user and assistant modes:
While editing a Genie, click the User button
.png "image(129).png") .
.The User button will change to Assistant
 , and any message typed will now be added on behalf of the Genie.
Click the User/Assistant button at the top of a previously added message to switch the sender for that message.