Use these rules to describe how to validate your Screen controls.
Overview
Use validation rules in a control to constitute what is a valid value entered for that control.
If a control that has a Validation Rules setting but does not contain any value or properly structured validation rule, that control automatically passes validation.
If a control is hidden using Visibility Rules, any Validation Rules associated with that control are not evaluated upon submission of the Screen.
Controls That Provide Validation
The following Screen Builder controls use the validation rules:
Line Input control
Textarea control
Select List control
Checkbox control
Date Picker control
Create a Validation Rule
Follow these steps to add a validation rule to a Screen Builder control that provides validation:
Access the Variable panel for the control while in Design mode, and then locate the Validation Rules setting.
Click the Add Rule button. The Select drop-down menu displays.
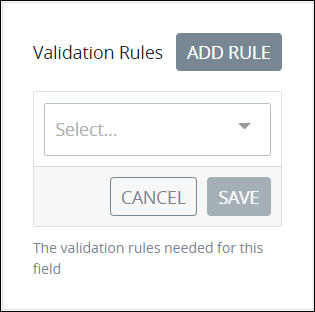
Select the rule that this control validates against.
Click Save. Parameters for the selected rule display. Parameter settings display which ones are required to properly configure the rule.
Enter the parameter settings that this control uses to validate against. See Validation Rule Settings, and then locate the validation rule for its parameters.
Ensure Validation Fails for an Undefined Setting
If you want a validation to fail for undefined or
'', use the required rule.
Validation Rule Settings
Accepted
Use the Accepted validation rule to validate acknowledgement of this control. This is useful to validate "Terms of Service" acceptance.
Follow these steps to configure the parameter(s) for an Accepted validation rule:
From the Select drop-down menu in the Validation Rules setting, select Accepted. The
Acceptedvalidation rule has no parameters.
After Date
Use the After Date validation rule to validate that the value entered into this control must be after (later than) a specified date. If the entered value is in datetime format, then the time format is ignored.
The value entered into this control must be in one of the following formats:
Date format:
YYYY-MM-DD. Example:"2020-07-01"Datetime format:
YYYY-MM-DD HH:MM:SS. Example:"2020-07-01 14:25:15"
Follow these steps to configure the parameter(s) for an After Date validation rule:
From the Select drop-down menu in the Validation Rules setting, select After Date. The Date setting displays.
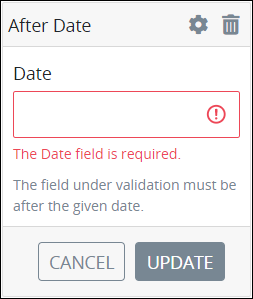
In the Date setting, enter the date in date format that this control's value must be after (later than). This is a required setting.
After Or Equal To Date
Use the After or Equal to Date validation rule to validate that the value entered into this control must be the same or after (later than) a specified date. If the entered value is in datetime format, then the time format is ignored.
The value entered into this control must be in one of the following formats:
Date format:
YYYY-MM-DD. Example:"2020-07-01"Datetime format:
YYYY-MM-DD HH:MM:SS. Example:"2020-07-01 14:25:15"
Follow these steps to configure the parameter(s) for an After or Equal to Date validation rule:
From the Select drop-down menu in the Validation Rules setting, select After or Equal to Date. The Date setting displays.
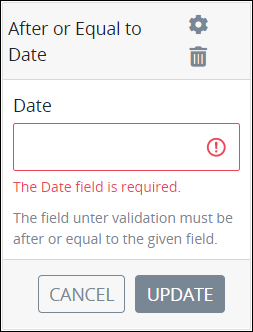
In the Date setting, enter the date in date format that this control's value must be the same or after (later than). This is a required setting.
Alpha
Use the Alpha validation rule to validate that the value entered into this control must be contain only alphabetic characters.
Follow these steps to configure the parameter(s) for an Alpha validation rule:
From the Select drop-down menu in the Validation Rules setting, select Alpha. The
Alphavalidation rule has no parameters.
Alpha-Numeric
Use the Alpha-Numeric validation rule to validate that the value entered into this control must contain only alphanumeric characters.
Follow these steps to configure the parameter(s) for an Alpha-Numeric validation rule:
From the Select drop-down menu in the Validation Rules setting, select Alpha-Numeric. The
Alpha-Numericvalidation rule has no parameters.
Before Date
Use the Before Date validation rule to validate that the value entered into this control must be before (earlier than) a specified date. If the entered value is in datetime format, then the time format is ignored.
The value entered into this control must be in one of the following formats:
Date format:
YYYY-MM-DD. Example:"2020-07-01"Datetime format:
YYYY-MM-DD HH:MM:SS. Example:"2020-07-01 14:25:15"
Follow these steps to configure the parameter(s) for a Before Date validation rule:
From the Select drop-down menu in the Validation Rules setting, select Before Date. The Date setting displays.
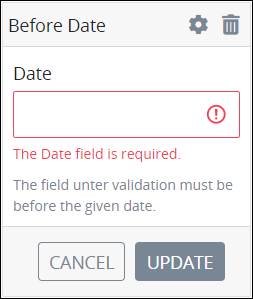
In the Date setting, enter the date in date format that this control's value must be before (earlier than). This is a required setting.
Before Or Equal To Date
Use the Before or Equal to Date validation rule to validate that the value entered into this control must be the same or before (earlier than) a specified date. If the entered value is in datetime format, then the time format is ignored.
The value entered into this control must be in one of the following formats:
Date format:
YYYY-MM-DD. Example:"2020-07-01"Datetime format:
YYYY-MM-DD HH:MM:SS. Example:"2020-07-01 14:25:15"
Follow these steps to configure the parameter(s) for a Before or Equal to Date validation rule:
From the Select drop-down menu in the Validation Rules setting, select Before or Equal to Date. The Date setting displays.
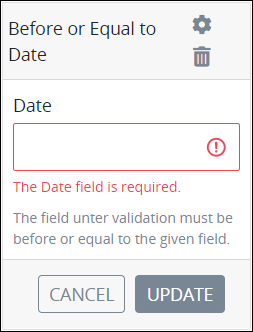
In the Date setting, enter the date in date format that this control's value must be the same or before (earlier than). This is a required setting.
Between Min & Max
Use the Between Min & Max validation rule to validate that the numerical value that this control contains is between the specified minimum value and a maximum value.
The Between Min & Max validation rule evaluates the following:
integers
file sizes
The Between Min & Max validation rule does not evaluate the number of characters in a text, but only the value of an entered number. Use one or both of the following to validate the number of characters in a text:
Furthermore, the Between Min & Max validation rule does not evaluate calendar dates, such as when an entered value in that control is between two dates. Use any of the following to validate date-related values:
Follow these steps to configure the parameter(s) for a Between Min & Max validation rule:
From the Select drop-down menu in the Validation Rules setting, select Between Min & Max. The Min and Max parameter settings display.
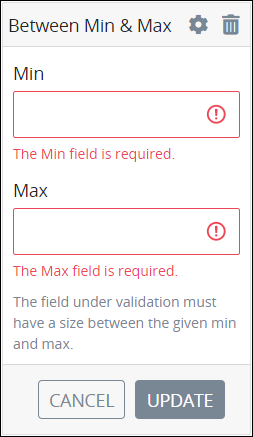
In the Min parameter setting, enter the numeric value that this control's value must be equal to or no lower than. This is a required setting.
In the Max parameter setting, enter the numeric value that this control's value must be equal to or no greater than. This is a required setting.
Date
Use the Date validation rule to validate that the value entered into this control is in date or datetime format.
One of the following formats validates that the entered value is a date:
Date format:
YYYY-MM-DD. Example:"2020-07-01"Datetime format:
YYYY-MM-DD HH:MM:SS. Example:"2020-07-01 14:25:15"
Follow these steps to configure the parameter(s) for an Date validation rule:
From the Select drop-down menu in the Validation Rules setting, select Date. The
Datevalidation rule has no parameters.
Use the Email validation rule to validate that the value entered into this control is formatted as an email address.
Follow these steps to configure the parameter(s) for an Email validation rule:
From the Select drop-down menu in the Validation Rules setting, select Email. The
EMailvalidation rule has no parameters.
In
Use the In validation rule to validate that the value entered into this control exactly matches the given parameter setting. The validation rule evaluates the entire value entered in the control and considers case-sensitivity and empty spaces. The control's scope of evaluation may be within an array or a string. See In Validation Rule Examples.
Follow these steps to configure the parameter(s) for an In validation rule:
From the Select drop-down menu in the Validation Rules setting, select In. The Values parameter setting displays.
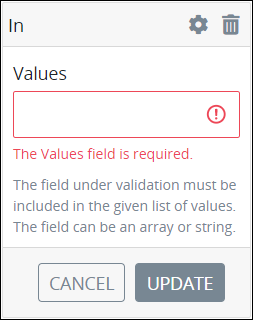
In the Values parameter setting, enter the value to evaluate if it exactly matches the control's selected or entered value. This is a required setting.
Format a list in the Values parameter setting by separating the values with commas only, no spaces:
value1,value2,value3
In Validation Rule Examples
The following JSON Request data represents the JSON array for a Select List control under evaluation.
doctors = [
    {id: 1, name: 'Adam Ardin', gender: 'male'},
    {id: 2, name: 'Amanda Creek', gender: 'female'},
    {id: 3, name: 'Lucy Morales', gender: 'female'},
    {id: 4, name: 'Mindy Smith', gender: 'female'},
    {id: 5, name: 'Toby Tomlinson', gender: 'male'}
]
The Select List control contains the following settings:
This control is configured to return the value of the property
name. Therefore, the doctors' names display as options in the Select List control.This control has an
Invalidation rule to evaluate ifMindy Smithis included in that control's selection.
If the Request participant selects the Mindy Smith option from that Select List control, then that control passes validation.
A Line Input control under evaluation has the following validation rule:
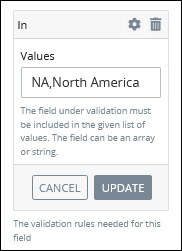
The validation rule is evaluated as follows:
Entered Value | Validation Rule Evaluation |
|---|---|
NA | True |
North America | True |
NA,North America | False |
This is North America | False |
Niagara Falls, NA | False |
Max Length
Use the Max Length validation rule to validate that the value entered into this control is no greater than a specified length.
The Max Length validation rule evaluates the following:
a maximum number of characters in a string
a maximum integer value
a maximum file size
The Max Length validation rule does not evaluate calendar dates, such as when an entered value in that control is no later than a particular date.
Follow these steps to configure the parameter(s) for a Max Length validation rule:
From the Select drop-down menu in the Validation Rules setting, select Max Length. The Max Input parameter setting displays.
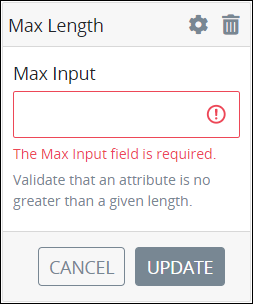
In the Max Input parameter setting, enter the numeric value that this control's value must be equal to or no greater than. This is a required setting.
Min Length
Use the Min Length validation rule to validate that the value entered into this control is no less than a specified length.
The Min Length validation rule evaluates the following:
a minimum number of characters in a string
a minimum integer value
a maximum file size
The Min Length validation rule does not evaluate calendar dates, such as when an entered value in that control is no earlier than a particular date.
Follow these steps to configure the parameter(s) for a Min Length validation rule:
From the Select drop-down menu in the Validation Rules setting, select Min Length. The Min Input parameter setting displays.
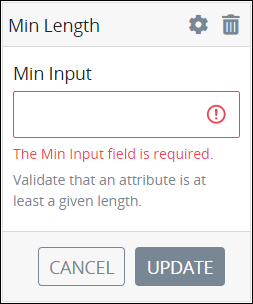
In the Min Input parameter setting, enter the numeric value that this control's value must be equal to or no less than. This is a required setting.
Not In
Use the Not In validation rule to validate that the value entered into this control does not match the given parameter setting. The validation rule evaluates the entire value entered in the control and considers case-sensitivity and empty spaces. The control's scope of evaluation may be within an array or a string. See Not In Validation Rule Examples.
Follow these steps to configure the parameter(s) for a Not In validation rule:
From the Select drop-down menu in the Validation Rules setting, select Not In. The Values parameter setting displays.
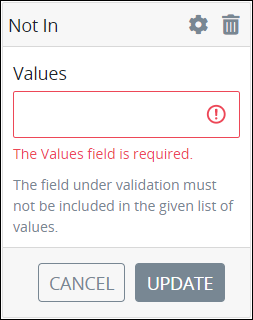
In the Values parameter setting, enter the value to evaluate if it is not within the control's selected or entered value. This is a required setting.
Format a list in the Values parameter setting by separating the values with commas only, no spaces:
value1,value2,value3
Not In Validation Rule Examples
The following JSON Request data represents the JSON array for a Select List control under evaluation.
doctors = [
    {id: 1, name: 'Adam Ardin', gender: 'male'},
    {id: 2, name: 'Amanda Creek', gender: 'female'},
    {id: 3, name: 'Lucy Morales', gender: 'female'},
    {id: 4, name: 'Mindy Smith', gender: 'female'},
    {id: 5, name: 'Toby Tomlinson', gender: 'male'}
]
The Select List control contains the following settings:
This control is configured to return the value of the property
name. Therefore, the doctors' names display as options in the Select List control.This control is configured to allow multiple selections.
This control has a
Not Invalidation rule to evaluate ifMindy Smithis not included in that control's selection.
If the Request participant selects multiple options from that Select List control, but the Mindy Smith option is not among them, then that control passes validation.
A Line Input control under evaluation has the following Validation Rule:
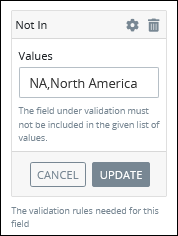
The Validation Rule is evaluated as follows:
Entered Value | Validation Rule evaluation |
|---|---|
NA | False |
North America | False |
NA,North America | True |
This is North America | True |
Niagara Falls, NA | True |
Regex
Use the Regex validation rule to validate that this control's value contains content as determined by a specified regular expression. A regular expression, abbreviated as regex, is a sequence of letters and symbols that defines a logical search pattern from which to search this control's content to validate that strings meet the defined pattern. This validation rule is useful to parse the contents of a control's value even if that control's Request variable contains programming code such as HTML or JSON.
Need a primer on regular expression syntax? See this primer, and then use RegExr to learn, build, and test your regular expressions.
Follow these steps to configure the parameter(s) for a Regex validation rule:
From the Select drop-down menu in the Validation Rules setting, select Regex. The Regex Pattern setting displays.
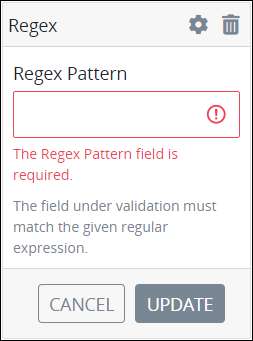
In the Regex Pattern setting, enter the regular expression from which to validate this control's value contains that content. This is a required setting.
Required
Use the Required validation rule to validate that this control has a value and is not empty.
A control constitutes as having no value in the following circumstances:
The value is
null.The value is an empty string that contains no characters.
The value is an empty JSON array or empty JSON object.
The value is an uploaded file with no path.
Follow these steps to configure the parameter(s) for a Required validation rule:
From the Select drop-down menu in the Validation Rules setting, select Required. The
Requiredvalidation rule has no parameters.
Required If
Use the Required If validation rule to validate that this control has a value and is not empty if another control in that Screen page contains a specific value. If the control being monitored contains a specific value, then the control under evaluation is required. See Required If Validation Rule Examples.
The Required If validation rule is the inverse of the Required Unless rule.
A control constitutes as having no value in the following circumstances:
The value is
null.The value is an empty string that contains no characters.
The value is an empty JSON array or empty JSON object.
The value is an uploaded file with no path.
Follow these steps to configure the parameter(s) for a Required If validation rule:
From the Select drop-down menu in the Validation Rules setting, select Required If. The Variable Name and Variable Value parameter settings display.
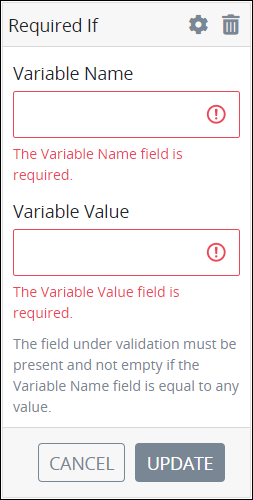
In the Variable Name parameter setting, enter the Variable Name setting value to monitor for its value. This is a required setting.
In the Variable Value parameter setting, enter the value that must be entered into that control to make this control required. This is a required setting.
Required If Validation Rule Examples
A Request participant enters information into a Task for a job application. If that Task assignee selects from a Select List control in which country that person lives. If the Task assignee selects the option United States (US), then another Select List control becomes required to select from which US state that person lives.
This example demonstrates depending controls: one control depends on another to be required. This example also demonstrates how a control depends on the specific value of another.
See the following .json files below for this example:
List of countries in JSON format: Countries for Select List Control "Required If" Validation Example
List of US states and territories in JSON format: US States for Select List Control "Required If" Validation Example
Follow these steps to implement this example:
Add a Select List control to your Screen, and then configure its settings. Make note of its Variable Name setting value you set for that control. This control displays the list of countries as its options.
Provide the options for this Select List control. In doing so, edit options as JSON:
Download the file below Countries for Select List Control "Required If" Validation Example.
Review the JSON data. Notice that each JSON object contains the following:
content: A property called
contentrepresents the label for each option (in this example, a country name). The label for each Select List option may contain any string as long as it is in thecontentproperty of each JSON object.value: A property called
valuethat contains a numeric value that corresponds with each label option. Thevalueproperty may contain any string as long as it is in thevalueproperty of each JSON object. Notice that the JSON object that contains thecontentproperty value ofUnited Stateshas a value property of232. In this example, if the option corresponding with the232value is selected, then the second Select List control is required.
Copy this file's JSON data.
Paste it into the JSON Data setting.
Add a second Select List control to the same Screen page, and then configure its settings. This control displays the list of US states and territories as its options, and represents the required control if a specific setting in the first Select List control contains a specific value.
Provide the options for this Select List control. In doing so, edit options as JSON:
Download the file below US States for Select List Control "Required If" Validation Example.
Copy this file's JSON data.
Paste it into the JSON Data setting.
Add a
Required Ifvalidation rule to the second Select List control that displays the list of US states and territories.In the Variable Name setting of the
Required Ifvalidation rule, enter the Variable Name setting value for the first Select List control that displays the list of countries as its options.In the Variable Value setting of the
Required Ifvalidation rule, enter232, which is thevalueproperty value that corresponds with thecontentproperty valueUnited States.Add a Submit Button control to the same Screen page, and then configure its settings.
A Request participant enters information into a Task for a job application. If that Task assignee selects the Yes option from a Select List control labeled Have you been convicted of a felony within the past 10 years?, a Textarea control labeled Describe your felony conviction. becomes required. The Task assignee cannot submit the form without describing the felony conviction(s).
This example demonstrates depending controls: one control depends on another to be required. This example also demonstrates how a control depends on the specific value of another.
Follow these steps to implement this example:
Add a Select List control to your Screen, and then configure its settings. Make note of its Variable Name setting value you set for that control.
Provide the options for this Select List control. In doing so, provide the following values:
No:
Value: 0
Content: No, I do not have a felony conviction within the past 10 years.
Yes:
Value: 1
Content: Yes, I have a felony conviction within the past 10 years.
The Value settings represent the values the Textarea control evaluates to determine if that control is required; these settings may contain any value, not necessarily Boolean values. The Content settings represent the label for each option. In this example, if the option corresponding with the
1value is selected, then the Textarea control is required.Add a Textarea control to the same Screen page, and then configure its settings.
Add a
Required Ifvalidation rule to the Textarea control.In the Variable Name setting of the
Required Ifvalidation rule, enter the Variable Name setting value for the Select List control.In the Variable Value setting of the
Required Ifvalidation rule, enter1.Add a Submit Button control to the same Screen page, and then configure its settings.
Required Unless
Use the Required Unless validation rule to validate that this control has a value and is not empty unless another control in that Screen page contains a specific value. If the control being monitored for its value has a specific value, then the control under evaluation is not required. See Required Unless Validation Rule Examples.
The Required Unless validation rule is the inverse of the Required If rule.
A control constitutes as having no value in the following circumstances:
The value is
null.The value is an empty string that contains no characters.
The value is an empty JSON array or empty JSON object.
The value is an uploaded file with no path.
Follow these steps to configure the parameter(s) for a Required Unless validation rule:
From the Select drop-down menu in the Validation Rules setting, select Required Unless. The Variable Name and Variable Value parameter settings display.
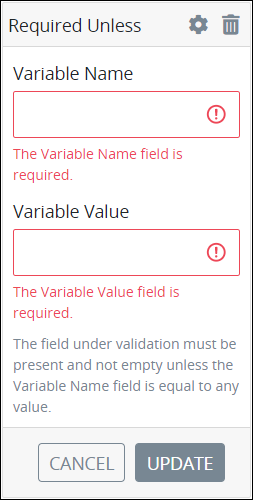
In the Variable Name parameter setting, enter the Variable Name setting value to monitor for its value. This is a required setting.
In the Variable Value parameter setting, enter the value that must be entered into that control to exempt this control from being required. This is a required setting.
Required Unless Validation Rule Examples
A Request participant enters information for a Task regarding United States (US) federal taxes. If that Task assignee selects from a Select List control that person lives in California, then that person is exempt from a federal tax credit. If the Task assignee selects the option California, then a Line Input control becomes required to enter tax information. If any other option is selected, then the Line Input control is not required.
This example demonstrates depending controls: one control depends on another to be required. This example also demonstrates how a control depends on the specific value of another.
See the following .json file below for this example: US States for Select List Control "Required Unless" Validation Example.
Follow these steps to implement this example:
Add a Select List control to your Screen, and then configure its settings. Make note of its Variable Name setting value you set for that control. This control displays the list of US states and territories as its options.
Provide the options for this Select List control. In doing so, edit options as JSON:
Download the file below US States for Select List Control "Required Unless" Validation Example.
Review the JSON data. Notice that each JSON object contains the following:
content: A property called
contentrepresents the label for each option (in this example, a US state or territory). The label for each Select List option may contain any string as long as it is in thecontentproperty of each JSON object.value: A property called
valuethat contains a numeric value that corresponds with each label option. Thevalueproperty may contain any string as long as it is in thevalueproperty of each JSON object. Notice that the JSON object that contains thecontentproperty value ofCaliforniahas a value property of6. In this example, if the option corresponding with the6value is selected, then the Line Input control is not required.
Copy this file's JSON data.
Paste it into the JSON Data setting.
Add a Line Input control to the same Screen page, and then configure its settings. The Request participant enters into this control required information unless a specific setting in the Select List control contains a specific value.
Add a
Required Unlessvalidation rule to the Line Input control control.In the Variable Name setting of the
Required Unlessvalidation rule, enter the Variable Name setting value for the Select List control that displays the list of US states and territories as its options.In the Variable Value setting of the
Required Unlessvalidation rule, enter6, which is thevalueproperty value that corresponds with thecontentproperty valueCalifornia.Add a Submit Button control to the same Screen page, and then configure its settings.
A Request participant enters information for a Task that solicits viewer feedback for a streaming video. The organization soliciting viewer feedback is particularly interested in viewer feedback for a particular demographic: if that viewer indicates that she or he is in a specific age group, then that person does is not required to provide feedback on a particular question.
If that Task assignee selects from a Select List control the option 65 years old or older, then a Textarea control is not required. If any other option is selected, then the Textarea control is required.
This example demonstrates depending controls: one control depends on another to be required. This example also demonstrates how a control depends on the specific value of another.
Follow these steps to implement this example:
Add a Select List control to your Screen, and then configure its settings. Make note of its Variable Name setting value you set for that control.
Provide the options for this Select List control. In doing so, provide the following values that represent demographic age groups:
Option 1:
Value: 1
Content: 18 years old or younger
Option 2:
Value: 2
Content: 19 to 35 years old
Option 3:
Value: 3
Content: 36 to 64 years old
Option 4:
Value: 4
Content: 65 years old or older
The Value settings represent the values the Textarea control evaluates to determine if that control is required; these settings may contain any value, not necessarily Boolean values. The Content settings represent the label for each option. In this example, if the option corresponding with the
4value is selected, then the Textarea control is not required.Add a Textarea control to the same Screen page, and then configure its settings.
Add a
Required Unlessvalidation rule to the Textarea control.In the Variable Name setting of the
Required Unlessvalidation rule, enter the Variable Name setting value for the Select List control.In the Variable Value setting of the
Required Unlessvalidation rule, enter4.Add a Submit Button control to the same Screen page, and then configure its settings.
Same
Use the Same validation rule to validate that the value entered into this control matches the value of a specified control.
Follow these steps to configure the parameter(s) for a Same validation rule:
From the Select drop-down menu in the Validation Rules setting, select Same. The Values parameter setting displays.
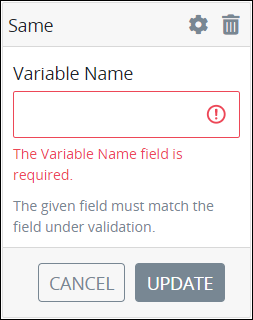
In the Variable Name parameter setting, enter the Variable Name setting value to evaluate if the control under evaluation matches its value. This is a required setting.
URL
Use the URL validation rule to validate that the value entered into this control is formatted as a Uniform Resource Locator (URL).
Follow these steps to configure the parameter(s) for a URL validation rule:
From the Select drop-down menu in the Validation Rules setting, select URL. The
URLvalidation rule has no parameters.