Login settings provide a secure and reliable authentication experience by allowing administrators to manage user access and enforce security measures. As an administrator, you can:
Enforce password policies to maintain security standards.
Enable and configure two-factor authentication (2FA) for added protection.
View the Log-In Options
Permissions
Your user account or group membership must have the "Settings: View Settings" permission to view Password Policies unless your user account has the Make this user a Super Admin setting selected.
See the Settings permissions or ask your Administrator for assistance.
Follow these steps to view the Log-In Options settings:
Ensure that you are logged on to ProcessMaker Platform.
Click the Admin option from the top menu to view the Users page.
Click the Settings icon
 from the left sidebar to view all settings.
From the Settings panel on the left, expand the Log-in & Auth section.
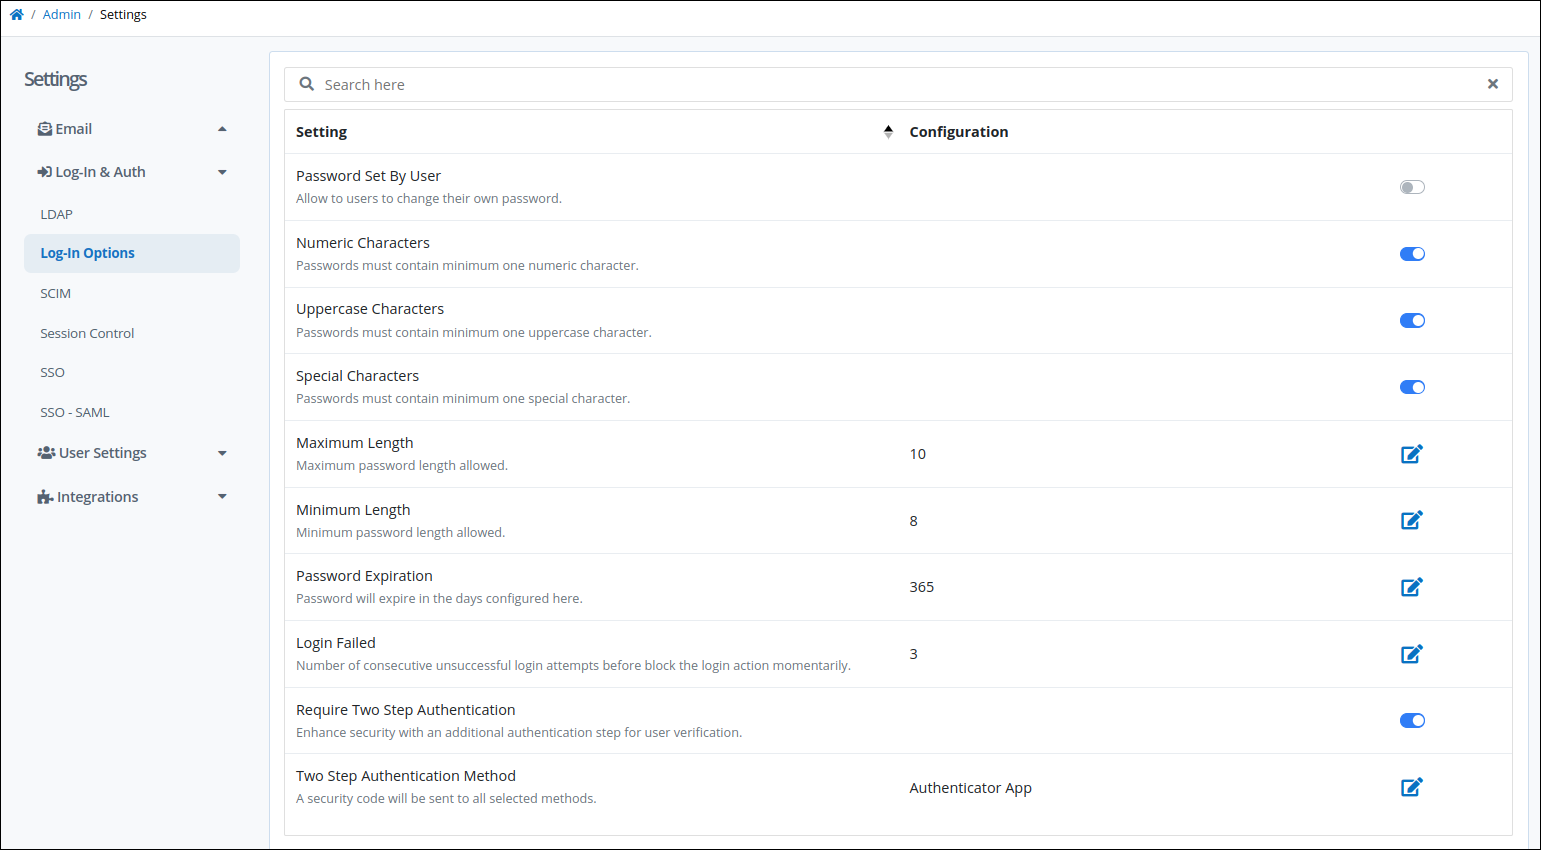
Select Log-In Options to view the following details:
Setting: The Setting column displays the Log-In Options Setting name.
Configuration: The Configuration column displays the setting value and how it is configured.
Configure the Log-In Options
Permissions
Your user account or group membership must have the "Settings: Update Settings" permission to edit settings from the Log-In Options tab unless your user account has the Make this user a Super Admin setting selected.
See the Settings permissions or ask your Administrator for assistance.
The following settings can be configured in the Log-In Options tab:
Set Password Policies
Follow these steps to enable a user to change their password:
Enable the Password Set By User toggle key to allow users to change their passwords. When this setting is enabled, users are able to change their passwords when editing their user profile.
If this setting is toggled off, users won't have the option to update their password while editing their user profile.
Note:
This setting applies to all users except Super Admins. Users with Super Admin permissions will always have the ability to change passwords.
Enable the Numeric Characters toggle key to allow numeric characters in passwords.
Enable the Uppercase Characters toggle key to allow uppercase characters.
Enable the Special Characters toggle key to allow special characters.
Click the Edit icon
 for the Maximum Length setting to set the maximum password length.
Enter the maximum number of characters allowed for the password, and click Save.
Click the Edit icon
for the Minimum Length setting to set the minimum password length. 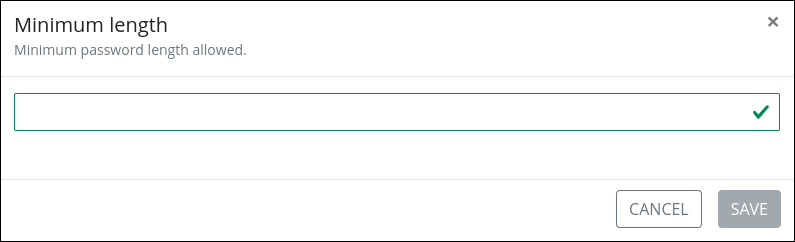
Enter the minimum number of characters allowed for the password, and click Save.
Click the Edit icon
for the Password Expiration setting. 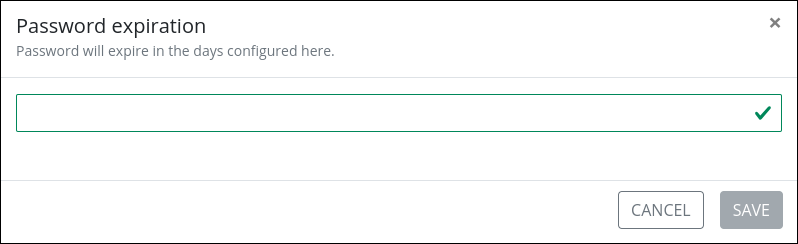
Enter the number of days after which a password will expire, and click Save.
Click the Edit icon
for the Login Failed setting.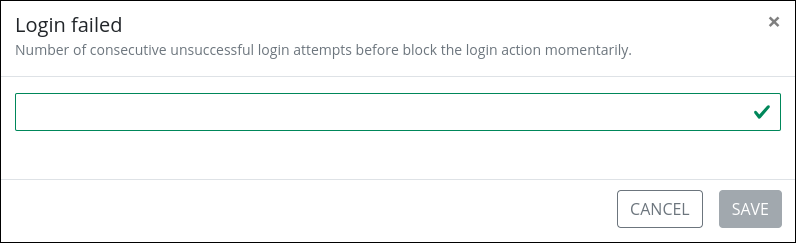
Enter a number of consecutive unsuccessful login attempts before blocking the login action, and click Save.
Enable Two-Factor Authentication
Enhance login security by enabling two-factor authentication for user verification.
Follow these steps to set up two-factor authentication (2FA):
Enable the Require Two Step Authentication toggle key.
Click the Edit icon
for the Two Step Authentication Method setting.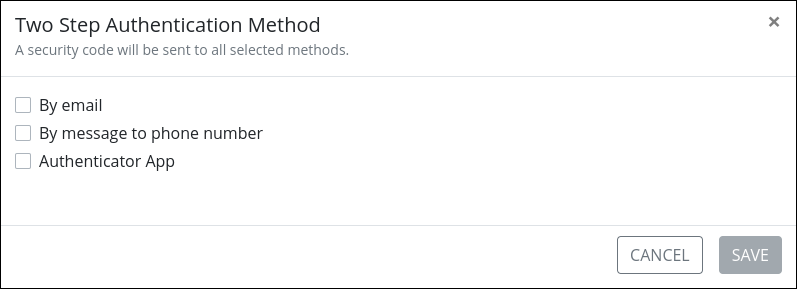
Select one or more authentication methods:
Select By email to send the code to your account email. An email address must be configured in user properties.
Select By message to phone number to send the code to your account phone number. A phone number must be configured in user properties.
Select Authenticator App to send the code to an authenticator app such as Google Authenticator.
Code Validity
The length and validity of the security code depend on the selected 2FA method.
When 2FA codes are delivered via Email or SMS, users receive an 8-digit code that is valid for 5 minutes. This extended validity accounts for potential delivery delays caused by background processing, external providers, or email and mobile carriers.
When using an authenticator app (such as Google Authenticator), users receive a 6-digit code that is valid for 1 minute, following standard industry practices since the code is generated locally on the user’s device.
Click Save to save all changes.
Two-factor authentication must also be enabled in group-level settings.
Two-Factor Authentication for SSO and Active Directory Users
If SSO is enabled, the Two-Factor Authentication setting is bypassed for SSO users, allowing them to log in without it.
Additionally, Two-Factor Authentication is also bypassed when users authenticate against Active Directory.
Non-SSO and non-Active Directory users must still enter two-factor verification codes to log in.