Manage Projects, which is a way to group assets under the same goal. Projects makes it easier and more efficiently organize assets to develop the same business solution.
Create a New Project
Permissions
Your user account or group membership must have the following permissions to create a new Project unless your user account has the Make this user a Super Admin setting selected:
Projects: View Projects
Projects: Create Projects
See the Projects permissions or ask your Administrator for assistance.
Follow these steps to create a new Project:
Click the Designer option from the top menu. The Designer page displays.
Click the Projects icon
 from the left sidebar. The Projects tab displays all Projects in the Projects page.
Click the +Add Project button. The Add New Project page displays.
In the Name setting, enter the unique name for the Project. Project names can only use apostrophe characters (
') and spaces. This is a required setting.In the Description setting, enter a description of the Project. This is a required setting.
From the Category drop-down menu, select one or more Project Categories to associate with this Project. In doing so, Project Categories may be sorted from the Projects page. To remove a Project Category currently selected, click the
 icon for that selection or press
 Enterwhen the drop-down is visible. This is a required setting.Click Add. Your new Project displays in the Projects page.
To delete a project, click the
 icon and select Delete
  .
.
Configure a Project
Permissions
Your user account or group membership must have the "Projects: View Projects" permission to configure Projects unless your user account has the Make this user a Super Admin setting selected.
This permission is enabled by default for all user accounts. Note that you can only configure Projects in which you are a member or which you created. If you cannot configure your Projects, see the Projects permissions or ask your Administrator for assistance.
Follow these steps to configure a Project:
View your Projects. The Projects page displays.
Click the
dropdown menu, and then select the Configure option for the Project to configure. The Configure Project screen displays. 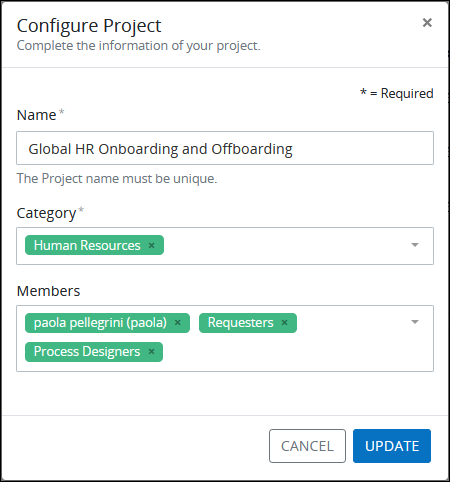
Configure Project screen Edit any of the following settings as necessary:
In the Name setting, enter the unique name for the Project. Project names must be unique in your organization, and can only use apostrophe characters (
') and spaces. This is a required setting.From the Category drop-down menu, select one or more Project Categories to associate with this Project. In doing so, Project Categories may be sorted from the Projects page. To remove a Project Category that is currently selected, click the
icon for that selection or press Enterwhen the drop-down is visible. This is a required setting.From the Members drop-down menu, select which user(s) or groups to invite to this Project. When inviting a group, all members of that group are invited to that Project.
Click Update.
Delete a Project
Deleting a Project does not delete the assets within it.
Your user account or group membership must have the "Projects: View Projects" permission to delete a Project unless your user account has the Make this user a Super Admin setting selected.
This permission is enabled by default for all user accounts. Note that you can only delete Projects in which you are a member or which you created. If you cannot delete a Project, see the Projects permissions or ask your Administrator for assistance.
Follow these steps to delete a Project:
View your Projects. The Projects page displays.
Click the
dropdown menu, and then select the Delete option for the Project to delete. The Caution screen displays to confirm the deletion of the Project. 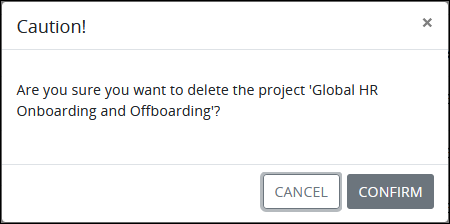
Click Confirm.