Microsoft Office 365 Driver Settings
Microsoft Office 365 is one of the most widely use email services in the world. Configure an email server to authenticate with Office 365 Simple Mail Transfer Protocol (SMTP) from which to send emails.
Configure Office 365 Mailer Driver Settings
Permissions
Your user account or group membership must have the "Settings: Update Settings" permission to edit email server settings unless your user account has the Make this user a Super Admin setting selected.
See the Settings permissions or ask your Administrator for assistance.
Refer to the following sections in this order to configure an email server for Office 365 SMTP authentication:
Enable Office 365 SMTP OAuth in Email Server Settings
Follow these steps to enable SMTP authentication for the Office 365 email server settings:
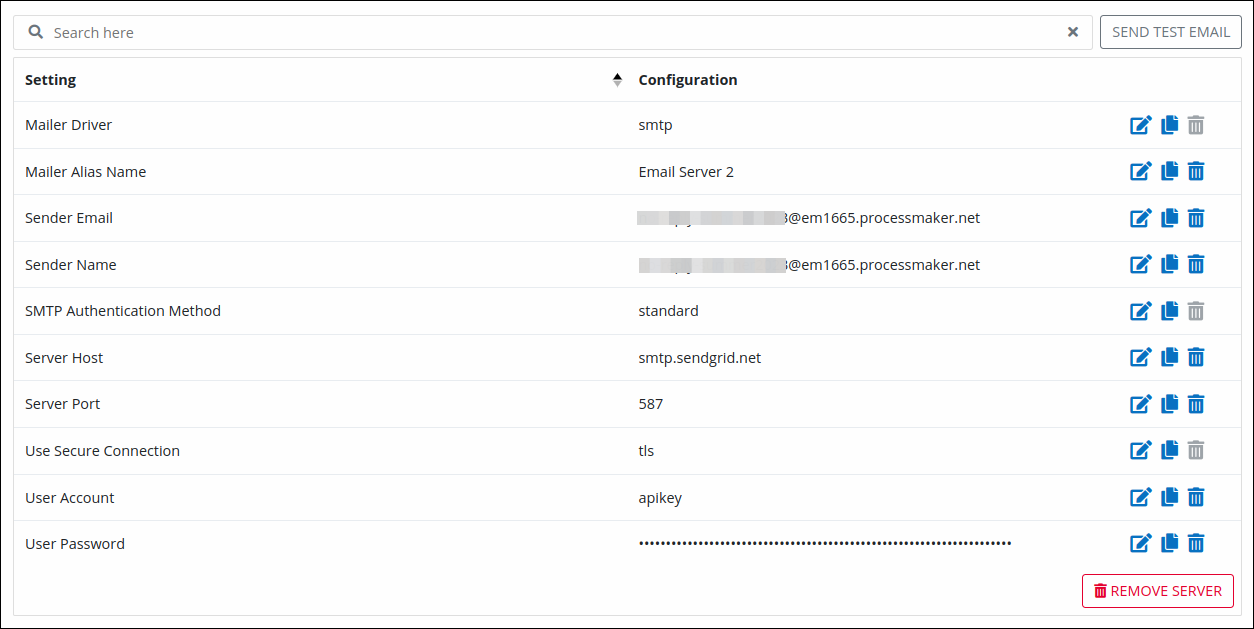
Create a new email server configuration. Email server settings display. The settings for the SMTP mailer driver display.
Click the SMTP Authentication Method setting. The SMTP Authentication Method screen displays.
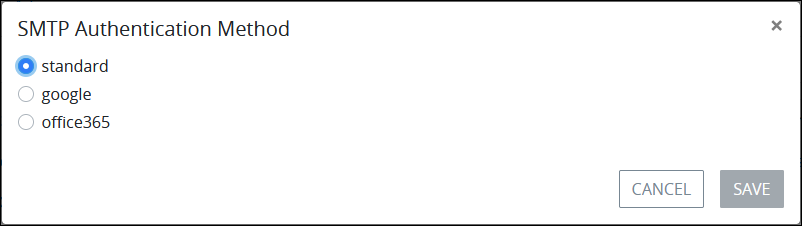
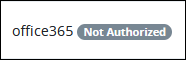
Select the office365 option, and then click Save. The settings for the Office 365 email server display. Until providing the Office 365 client ID and Office 365 client secret, the label Not Authorized displays in the SMTP Authentication Method setting.
Click the Edit
 icon for the Use Secure Connection setting. The Use secure connection screen displays.
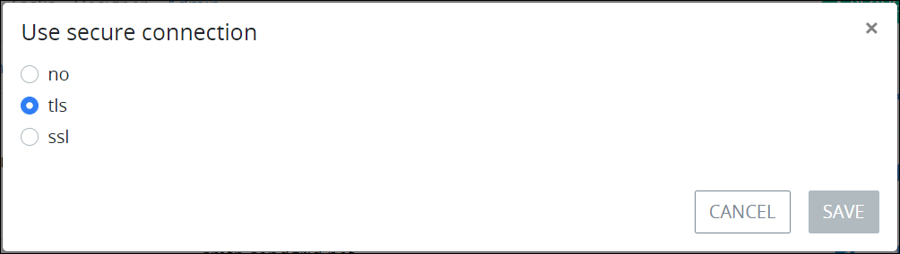
Select the tls option if it is not currently selected. Click Save if you changed this setting.
Click the Edit
icon for the Server Port setting. The Server Port screen displays. 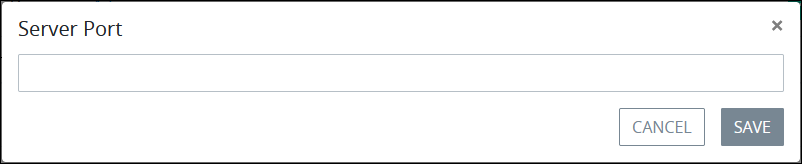
Enter
587, and then click Save.Click the Edit
icon for the Server Host setting. The Server Host screen displays. 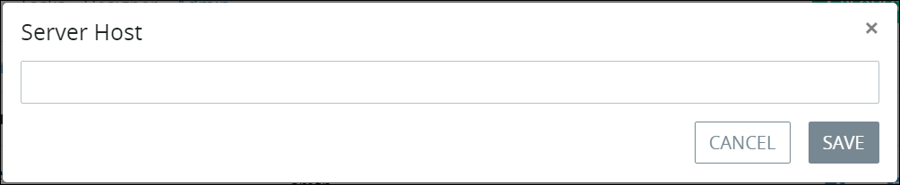
Enter
smtp.office365.com, and then click Save.From the Office 365 Redirect URI setting, copy the redirect URI for creating the Office 365 SMTP OAuth integration. This redirect URI is automatically configured for this email server after selecting the SMTP Authentication Method setting. Microsoft calls back to this URL after Microsoft authenticates a valid Azure Active Directory (Azure AD) application in ProcessMaker.
Enable SMTP authentication for an email address in Microsoft 365 Admin Center.
Enable SMTP Authentication for an email address in Microsoft 365 Admin Center
SMTP authentication must be enabled in Microsoft 365 Admin Center so the Microsoft email address configured in the email server can send emails. Otherwise, Microsoft 365 will block requests to the SMTP server.
Follow these steps to enable SMTP authentication in Microsoft 365 Admin Center:
Ensure that SMTP authentication is enabled for the Office 365 email server.
Log on to Microsoft 365 Admin Center.
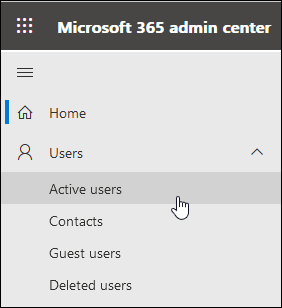
From the menu icon in the upper-left, select Users, then the Active users option.
The list of active users in your Microsoft 365 account displays.
Select the active user from whom to send emails from the email server. Details about that user display in the right-side panel.

Select the Mail tab for within that user's information.
From the Email apps column, select the Manage email apps link.
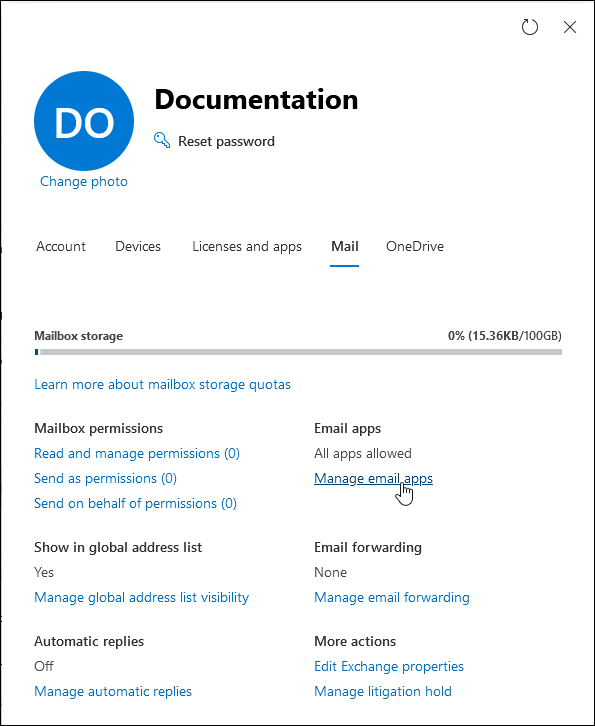
The Manage email apps screen displays.
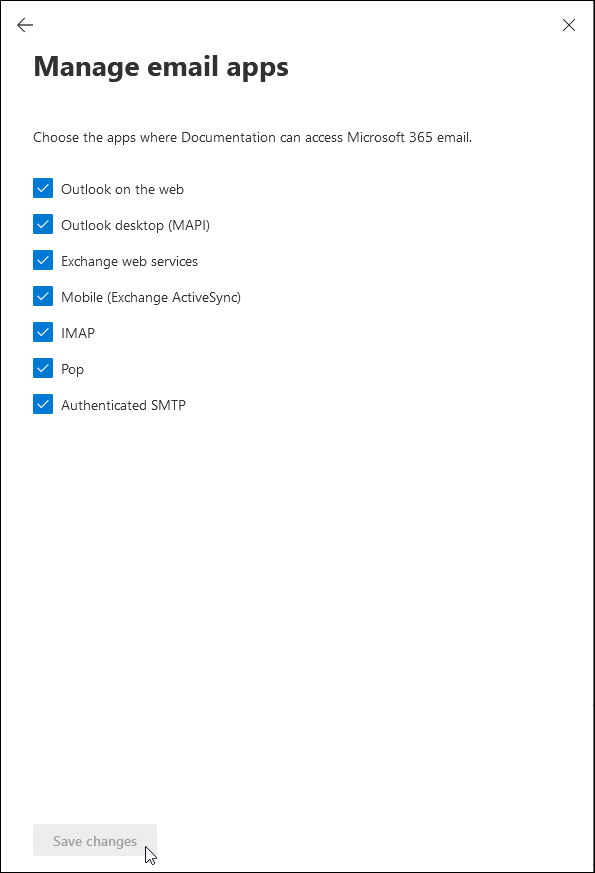
Select the Authenticated SMTP option if it is not already selected. Click the Save changes button if you enabled this option.
Create an Azure Active Directory Application
Follow these steps to create a Microsoft Azure Active Directory (Azure AD) application:
Ensure the following:
Log on the Microsoft Azure Portal with the Microsoft email address configured on Microsoft Office 365 Admin Center.
Search for, and then select the App registrations service.
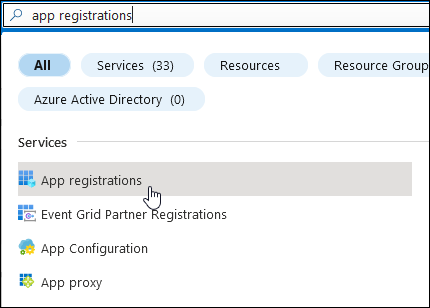
The App registrations page displays.
Below the App registrations page title, click the +New registration button.
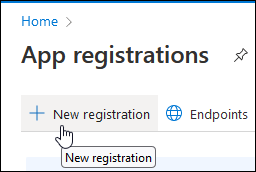
The Register an application page displays.
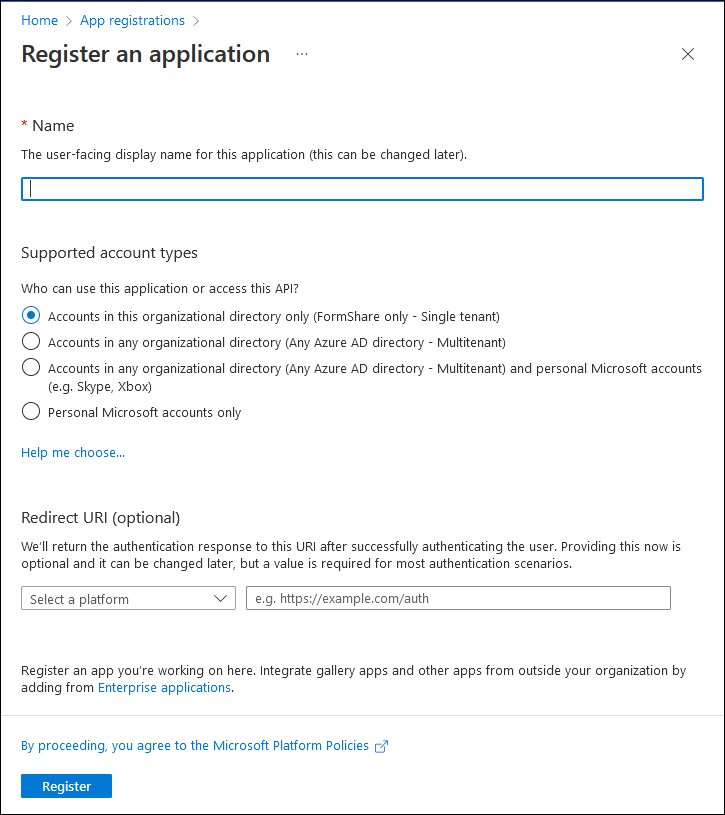
In the Name setting, enter a name for this application. This is a required setting.
From the Supported account types setting, select which account type this application will support for your organization. If unsure, keep the default Accounts in this organizational directory only (FormShare only - Single tenant) option.
From the Redirect URI (optional) setting, do the following:
From the Select a platform setting, select the Web option.
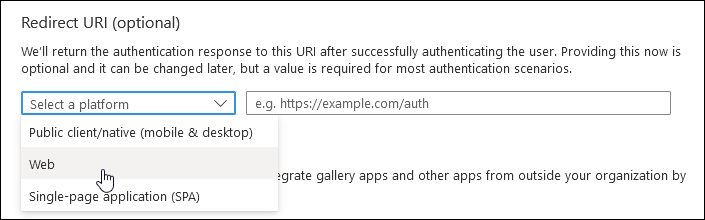
To the right of the Select a platform setting, enter the Office 365 redirect URI copied from your ProcessMaker instance.
Click the Register button. The Azure platform creates the Azure AD application, and then displays information about the application.
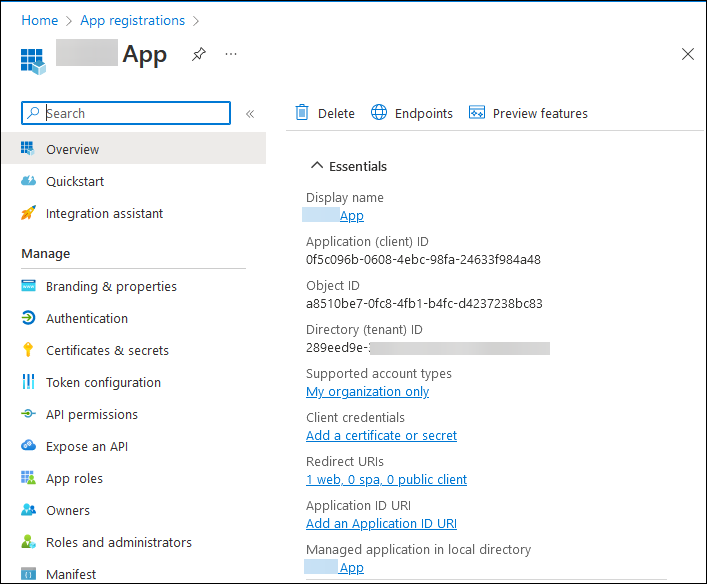
From the Essentials section, click the Copy to Clipboard icon to copy beside the Application (Client) ID, and then save it for later configuration in the Office 365 email server.
From the Essentials section, click the Copy to Clipboard icon to copy beside the Directory (Tenant) ID, and then save it for later configuration in the Office 365 email server.
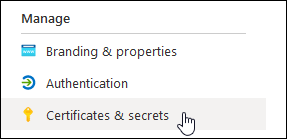
From the Manage left-side menu, select the Certificates & secrets option.
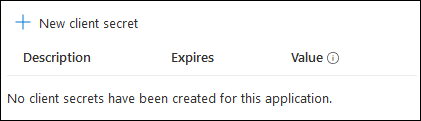
The Certificates & secrets page for this Azure AD application displays.
Click the +New client secret button.
The Add a client secret screen displays.
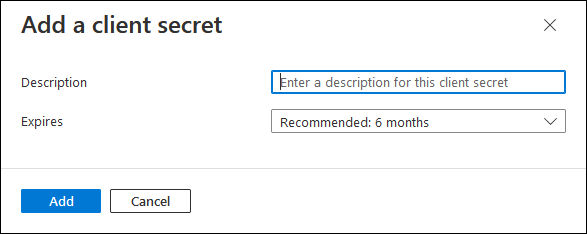
In the Description setting, enter a description for how this client secret will be used.
From the Expires setting, select at which date this client secret expires. After this date, a new client secret should be generated and updated in the PM4 instance 30 days before it is set to expire.
Click Add. A new client secret generates.
Click the Copy to Clipboard icon to copy the client secret value, in the middle column, and then save it for later configuration in the Office 365 email server. Ensure to copy this client secret before refreshing or leaving this page.

Authorize the Azure Active Directory application on the email server.
Authorize the Azure Active Directory Application on the Email Server
Follow these steps to authorize the Office 365 account for the Office 365 SMTP OAuth integration:
Ensure the following:
In the ProcessMaker settings, access the email server configured for the Office 365 SMTP OAuth integration.
Click the Edit
icon for the Office 365 Tenant ID setting. The Office 365 Tenant ID screen displays. 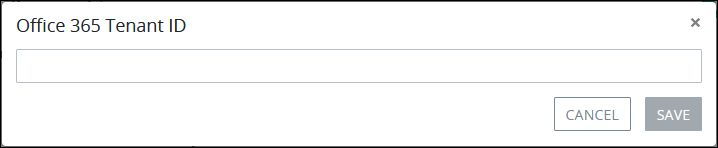
Enter the Office 365 tenant ID copied from the Azure AD application.
Click the Edit
icon for the Office 365 Client ID setting. The Office 365 Client ID screen displays. 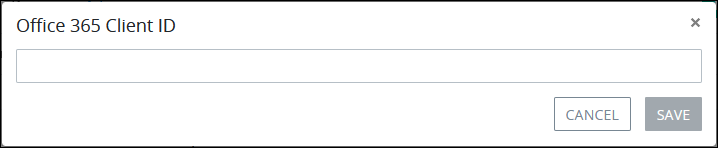
Enter the Office 365 client ID copied from the Azure AD application.
Click the Edit
icon for the Office 365 Client Secret setting. The Office 365 Client Secret screen displays. 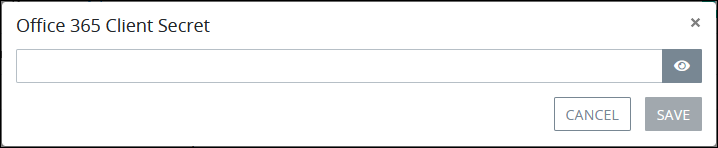
Enter the Office 365 client secret copied from the Azure AD application.
Click the Authorize Account button at the top of the email server settings. The Pick an account screen displays.

Select the email address configured to send emails from the email server.
Select the Consent on behalf of your organization checkbox if the Permissions requested screen displays, and then click the Accept button.

If the Office 365 SMTP OAuth integration is configured correctly on your email server settings, then the email server settings display again, and the SMTP Authentication Method setting indicates that Microsoft authorized this email server to use the Azure AD app.

Optionally, send a test email to ensure that the email server configuration functions correctly.