Access RAG Collection Configuration Settings
Permissions
Your user account or group membership must have the following permissions to configure a Collection unless your user account has the Make this user a Super Admin setting selected:
Collections: Edit Collections
Collections: View Collections
These permissions are different than record permissions in a Collection that allow you to view or edit records in that Collection.
See the Collections permissions or ask your Administrator for assistance.
Follow these steps to configure your Collection:
View your Collections. The Collections page displays.
Click the Configure icon
 for your RAG Collection.
Configure Basic Settings
Use the Configuration tab to configure basic settings for your Collection.
In the Name setting, edit the name of your RAG Collection.
In the Description setting, edit the description of your Collection.
In the Custom Record Title setting, edit the text displayed in the breadcrumbs menu when viewing a record from a RAG Collection. This setting supports Mustache syntax, allowing dynamic references to Collection data. Here are some guidelines for using this setting.
All references within Mustache syntax are case-sensitive.
By default, the Custom Record Title is set to
{{ id }}, which displays the record ID of the Collection record being viewed.While spacing within Mustache syntax is optional, using spaces improves readability.
You can also include plain text in Custom Record Title for clarity.
To reference Collection data, use the Collection variable within Mustache syntax, prefixing it with
data.to indicate it belongs to the Collection. For example:{{ data.CollectionVariableName }}When viewing a child collection record, its parent collection's Custom Record Title is displayed to highlight the relationship. For example, in a List of Courses (child Collection) related to a List of Professors (parent Collection), the parent Collection's Custom Record Title might be:
{{ data.professor_name }} - {{ data.professor_email }}This ensures the professor’s name and email appear above the course details, providing clear context.
Enable the Use Randomly-Generated IDs for Links toggle key to generate random IDs for hyperlinks to records in this Collection instead of sequential numbering as each record is created. By default, each record in a Collection is numbered sequentially, which can potentially be determined to access a record without configured permission.
Optionally, configure if the Signals broadcast when record events in this Collection occur.
Click Save.
Configure RAG Collection Signals for Subscription
Each RAG Collection's Signals are created and display in Signal Manager when that Collection is created. Configure if the Signals are broadcasted for this RAG Collection when any of the following record events occur.
Record is created: When a record is created in this Collection, broadcast the Collection Signal for subscribing Signal-type events that listen for this event to occur. If this Collection Signal is disabled, it does not broadcast when this type of event occurs.
Record is edited: When a record is edited in this Collection, broadcast the Collection Signal for subscribing Signal-type events that listen for this event to occur. If this Collection Signal is disabled, it does not broadcast when this type of event occurs.
Record is deleted: When a record is deleted in this Collection, broadcast the Collection Signal for subscribing Signal-type events that listen for this event to occur. If this Collection Signal is disabled, it does not broadcast when this type of event occurs.
Each RAG Collection's Signals are automatically created and displayed in the Signal Manager when the Collection is created. You can configure whether these Signals are broadcasted when specific record events occur in the Collection.
Record Created: Broadcasts the Collection Signal when a new record is added, triggering any subscribing Signal-type events that listen for this action. If disabled, no Signal is broadcasted.
Record Edited: Broadcasts the Collection Signal when an existing record is modified, triggering subscribing Signal-type events. If disabled, no Signal is broadcasted.
Record Deleted: Broadcasts the Collection Signal when a record is removed, triggering subscribing Signal-type events. If disabled, no Signal is broadcasted.
Follow these steps to configure your Collection's Signals for subscription:
Access the Collection's settings. The Configuration tab displays.
Locate the Collection Signals group of settings.
Configure the Collection's Signals for subscription following these guidelines:
Throw Signal on Insert: Enable the Throw Signal on Insert toggle key to broadcast this Signal each time a record is created in this Collection. Note that if a comma-separated value (CSV) file is imported into this Collection to create records and the Throw Signal on Insert toggle key is enabled, that Signal will broadcast for each new record, possibly triggering that Signal's webhook if it is enabled.
Throw Signal on Update: Enable the Throw Signal on Update toggle key to broadcast this Signal each time a record is edited in this Collection. Note that if multiple records from a Collection are edited in a batch, such as from a script, and the Throw Signal on Update toggle key is enabled, that Signal will broadcast for each edited record, possibly triggering that Signal's webhook if it is enabled.
Throw Signal on Delete: Enable the Throw Signal on Delete toggle key to broadcast this Signal each time a record is deleted in this Collection. Note that if multiple records from a Collection are edited in a batch, such as from a script, and the Throw Signal on Delete toggle key is enabled, that Signal will broadcast for each deleted record, possibly triggering that Signal's webhook if it is enabled.
Click Save.
Configure Record Permissions for Users
Configure user permissions to access the records in your RAG Collection. Permissions may be set differently for each user or group. Super Admins automatically have full access to all RAG collections.
Follow these steps to configure how users have access to your Collection:
Access the Collection's settings. The Configuration tab displays.
Click the User Permissions tab.
Use the Search field to find user accounts, if necessary.
Enable any of the permission settings to allow each user appropriate access to records in this Collection.
Follow these guidelines:Create: Toggle this setting to allow or restrict the user's ability to create records in this Collection.
Delete: Toggle this setting to allow or restrict the user's ability to delete records in this Collection.
Edit: Toggle this setting to allow or restrict the user's ability to edit records in this Collection.
Edit Raw Data: Toggle this setting to allow or restrict the user's ability to edit the JSON data associated with each record in this Collection.
View: Toggle this setting to allow or restrict the user's ability to view individual records in this Collection.
List: Toggle this setting to allow or restrict the user's ability to view the full list of records in this Collection.
Click Save.
Configure Record Permissions for Groups
Configure group permissions to control access to records in your RAG Collection. Permissions can be assigned individually to users or applied at the group level. A group’s access to records in this Collection depends on the following factors:
Cumulative Record-Level Permissions: A user's individual permissions take precedence, even if they belong to a group with different permissions. If a user is granted specific permissions not assigned to their group, they retain those permissions regardless of group membership.
Super Admin Override: These permissions do not apply for Super Admins and they have full access to all RAG Collections.
For more information about this setting, see Permission Description for Users and Groups.
By default all groups do not have any access to records in your Collection.
Follow these steps to configure how groups have access to your Collection:
Access the Collection's settings. The Configuration tab displays.
Click the Group Permissions tab.
Use the Search field to search for a group, if necessary.
Enable any of the permission settings to allow each user appropriate access to records in this Collection.
Follow these guidelines:Create: Toggle this setting to allow or restrict the user's ability to create records in this Collection.
Delete: Toggle this setting to allow or restrict the user's ability to delete records in this Collection.
Edit: Toggle this setting to allow or restrict the user's ability to edit records in this Collection.
Edit Raw Data: Toggle this setting to allow or restrict the user's ability to edit the JSON data associated with each record in this Collection.
View: Toggle this setting to allow or restrict the user's ability to view individual records in this Collection.
List: Toggle this setting to allow or restrict the user's ability to view the full list of records in this Collectionindividual records in this Collection.
Click Save.
Configure Columns of Record Attributes to Display in the Collection View
When a record in a Collection is viewed, the record data is displayed in tabular format with customizable columns. Use the Columns tab to customize how the records in a Collection when viewed. Collection records display in tabular format when the View icon ![]() is clicked for a record.
is clicked for a record.
Follow these steps to configure the columns to display when viewing records of your Collection:
Access the Collection's settings. The Configuration tab displays.
Click the Columns tab.The Active Columns column displays the currently selected or default columns to present the Collection records in tabular format. The Available Columns column displays optional informational components that can be displayed.
To remove a column, click the Remove icon
 from the Active Columns list. Alternatively, drag the column from the Active Columns list to the Available Columns list.
 To add a column, drag it from the Available Columns list to the Active Columns list.
Click the Configuration icon
to set properties for a column. Note that columns that do not have the Configuration icon are default columns that cannot be configured. Configure the following properties:In the Label setting, edit the column label that displays for the Collection record.
In the Field setting, edit the variable name that represents the Collection variable used in the Create screen for this Collection.
data.represents that what follows derives from a Collection variable. To derive that information, view the Collection variable used in that Collection's Create Screen, then use the specific key name in the following syntax, whereCollectionDatarepresents the variable name:data.CollectionData.Use the Sortable toggle key to adjust whether the column is sortable in search results.
Click Save.
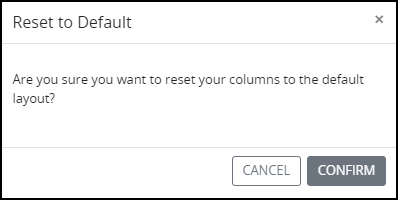
If it is necessary to reset the columns in your Collection to the default layout, click the Reset to Default button.
Click Save after you configure all your Collection settings.