The System for Cross-domain Identity Management (SCIM) is an open standard designed to automate user identity management across cloud-based applications and services. By integrating SCIM with Azure Active Directory (Azure AD), organizations can streamline the provisioning and deprovisioning of user accounts between Azure AD and external platforms such as ProcessMaker.
Configuring SCIM ensures that user and group information is consistently maintained across systems, reducing administrative overhead and enhancing security. Once enabled, Azure AD automatically manages user lifecycles, including creation, updates, and deletion, within the connected application based on changes in the directory.
Prerequisites for SCIM Setup in Azure
To successfully configure SCIM provisioning for ProcessMaker in Azure AD, you will need:
An Azure AD application (either custom-built or sourced from the gallery).
The SCIM endpoint URL provided by ProcessMaker.
A bearer token for secure authentication with ProcessMaker’s SCIM API.
Assigned users or groups in Azure AD to be provisioned.
Customized attribute mappings to align Azure AD fields with ProcessMaker user schema. This setting is optional.
Azure Active Directory Configuration
To assign groups to an application for SCIM provisioning, ensure that your Azure Active Directory configuration supports group assignments. This capability may depend on your organization's Azure AD settings or subscription features.
Access Azure and Create the SCIM Application
Step 1: Create the Application in Azure
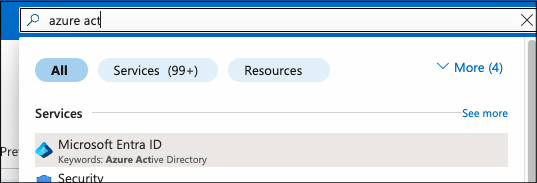
Sign in to Azure Portal.
Navigate to the Azure Active Directory section from the left-hand menu.
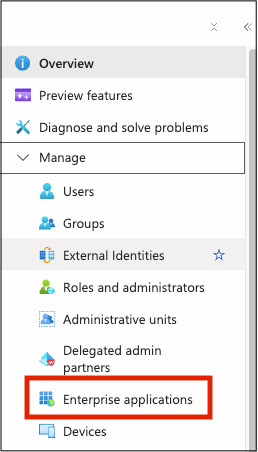
Under Manage, select Enterprise applications.
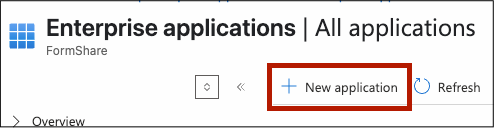
Click + New application.
Select Create your own application.

Enter a name for the application (e.g.,
SCIM - ProcessMaker) and choose Integrate any other application you don't find in the gallery..png)
Click Create to generate the custom enterprise application.
Step 2: Assign Users or Groups
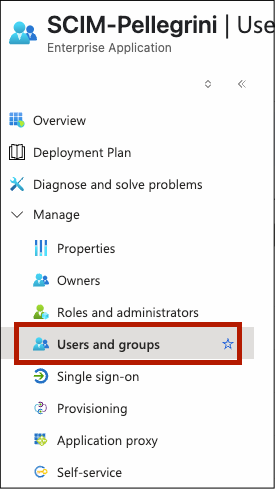
In your newly created application, go to Users and groups.
Click + Add user/group.

Create users or groups as needed within Azure AD.
Select the users and/or groups you want to provision to ProcessMaker.
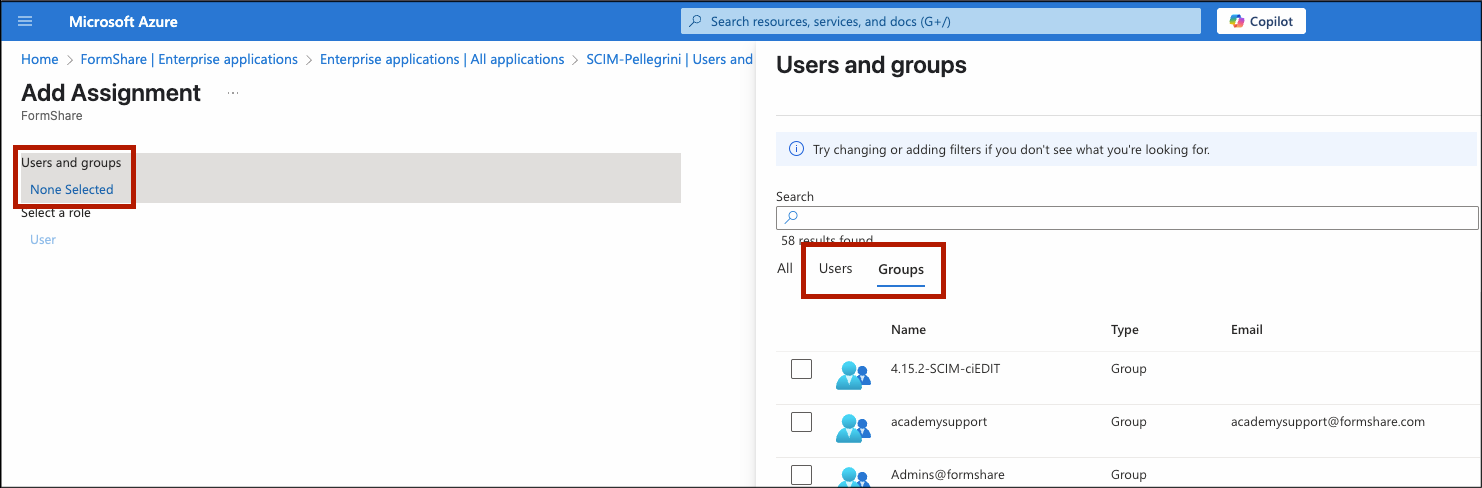
Click Assign.
📌Note: Ensure group assignment capabilities are available in your Azure AD configuration.
Step 3: Configure Provisioning
In the app's side panel, select Provisioning.
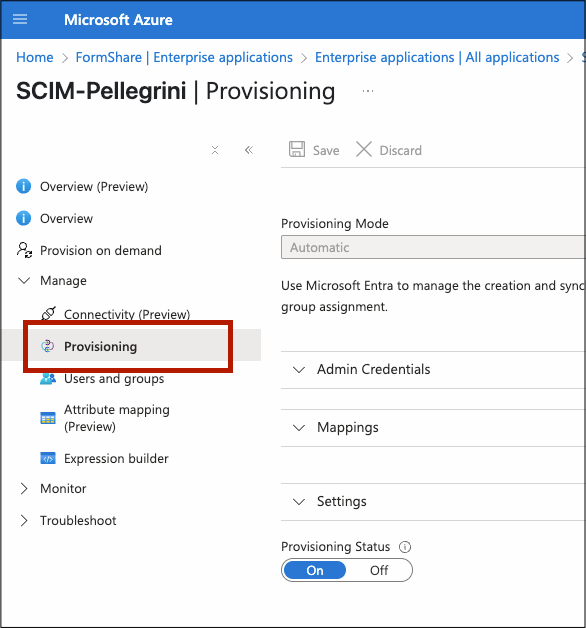
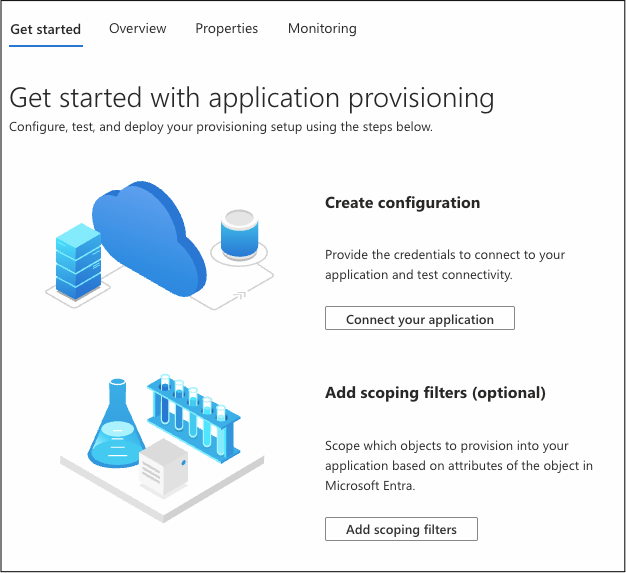
Click the Get Started tab if this is your first time setting up provisioning.
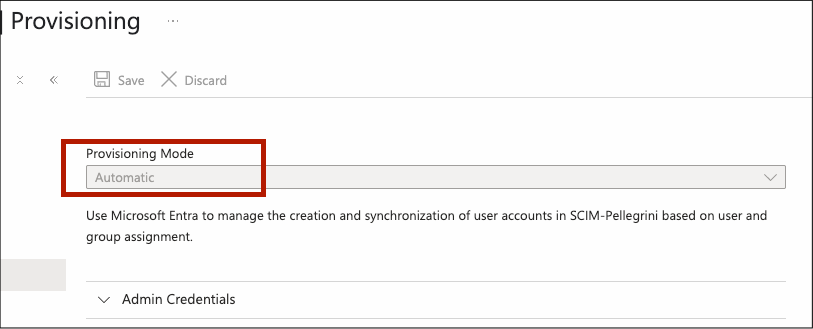
Under Provisioning Mode, select Automatic.
SCIM Attribute Mappings
Both users and groups have a standard set of attributes that Azure can send, using the SCIM 2.0 format.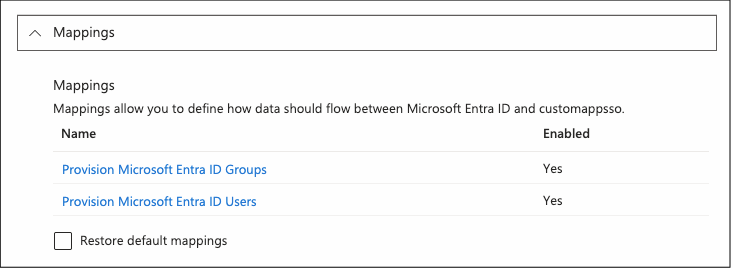
Group Attributes
SCIM Attribute | Description |
|---|---|
| Group name (required). |
| List of user references (SCIM IDs). |
| Optional external group identifier. |
User Attributes
SCIM Attribute | Description |
|---|---|
| Unique username (typically an email). |
| First name. |
| Last name. |
| Full or preferred display name. |
| Work email address. |
| Whether the account is active. |
| Optional external user ID. |
| Job title. |
| Department or unit. |
| Work phone number. |
| Language preference (e.g., |
| Groups the user belongs to. |
Step 4: Activate SCIM Provisioning
To connect Azure AD with ProcessMaker, you’ll need specific details from your ProcessMaker instance:
In the Azure SCIM app’s Provisioning section, locate the Admin Credentials panel.

Enter the following:
Tenant URL: This is the SCIM Base URL provided by ProcessMaker.
Example:https://yourdomain.processmaker.net/scim/v2Secret Token: A bearer token generated in ProcessMaker to authorize Azure’s SCIM requests.
📌Note: Be sure to copy and paste the token exactly as provided—tokens are case-sensitive and must not include extra spaces.
Step 5: Test the Connection
Click Test Connection.
If successful, Azure will display a confirmation message indicating the SCIM endpoint is reachable and authorized.
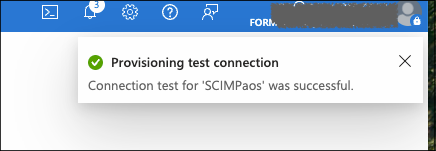
Once validated, click Save to store the configuration.
Step 6: Start Provisioning
Click Start Provisioning to begin automatic synchronization of users and groups.
Azure AD will immediately initiate the provisioning process.
Go to Provisioning Logs to monitor sync activity, errors, and user-level provisioning results.
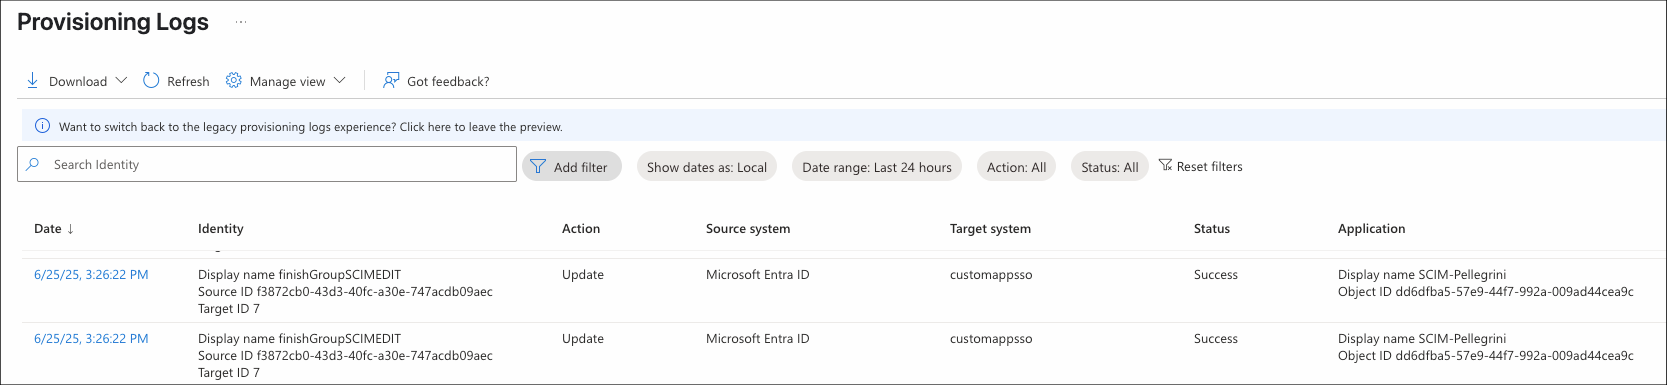
📌 Note: Azure AD performs SCIM synchronization approximately every 40 minutes by default.
Verify in ProcessMaker
After synchronization begins, log into your ProcessMaker instance to confirm the following:
User accounts and groups are created automatically.
Any changes in Azure (e.g., name updates, deactivations) are reflected in ProcessMaker.
Group membership and role assignments align with your configuration.
💡 Helpful Tips
Only users and groups assigned to the SCIM application in Azure AD will be synchronized.
You can customize attribute mappings to match fields such as email, name, role, and department according to your ProcessMaker configuration.
Use ProcessMaker's user management interface to confirm attributes like username, email, and group membership are provisioned correctly.
If synchronization fails, check the SCIM endpoint URL and bearer token for formatting issues—incorrect entries are a common cause of provisioning errors.
Behavior and Constraints
For important details about provisioning behavior and limitations, see On-demand provisioning in Microsoft Entra ID by Microsoft.