Overview
Intended audience: Process Owners and Designers
Tags: Decision Table; Request Variables; Formulas
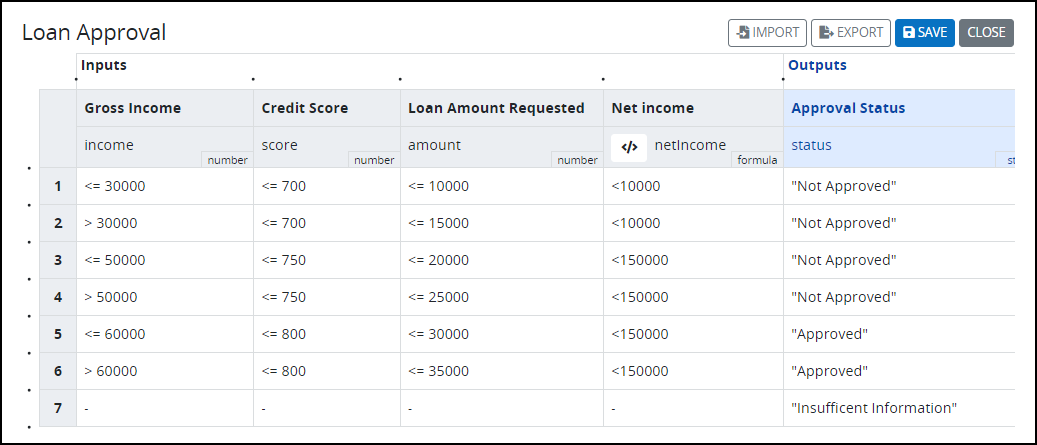
This example show how to use formulas in a Decision table. The Decision table used in this example has four input columns: Gross Income, Credit Score, Loan Amount Requested, and Net Income. The table also has one output column: Approval Status.
Click on the following link to download this Decision Table.
Follow these steps to import and use this Decision Table:
Click the Import button. The Import Decision Table displays.

Click Browse to locate the downloaded Decision Table.
Click Import. The Import Decision Table screen displays to indicate that the Decision Table imported correctly.
From the list of Decision tables, click the
 menu next to the table just created, and select Edit to open the Decision Table for editing.
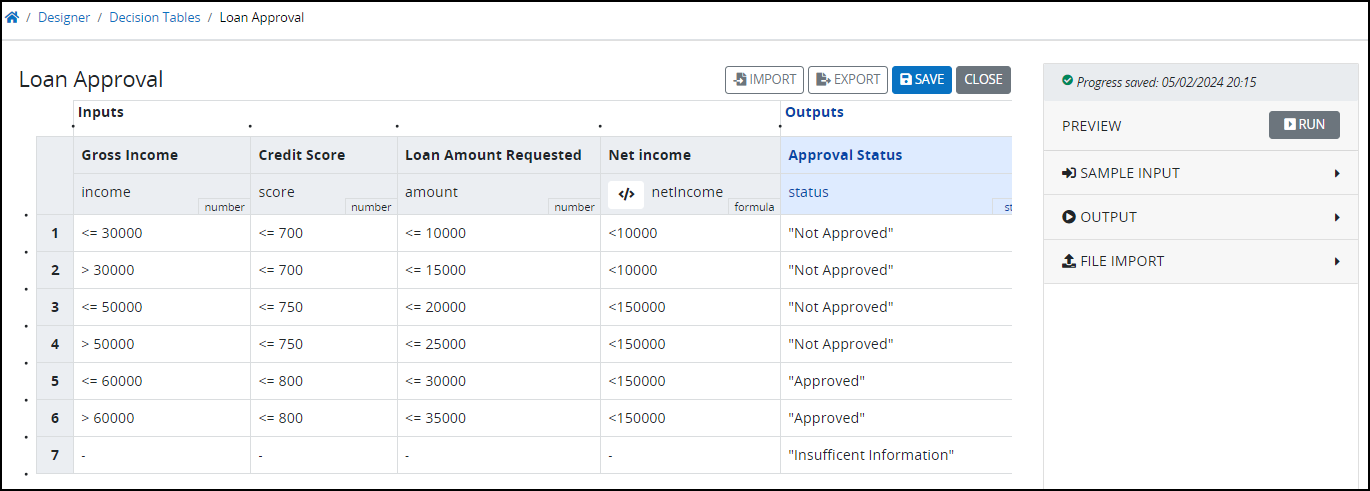
Click on the formula icon
 to view the formula defined on this column. This formula uses Request Variables, income and tax, which are part of the JSON data for the request.
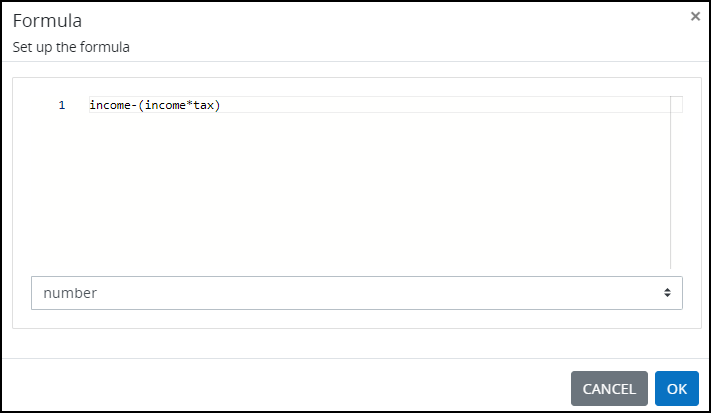
From the Preview options on the right, select Sample Input to test the Decision Table.
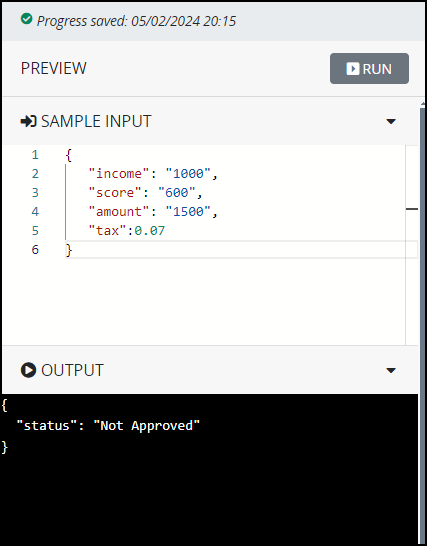
Enter the following JSON data.
{
   "income": "1000",
   "score": "600",
   "amount": "1500",
   "tax":0.07
}
Click Run to test the table. The table output will be shown in the Output section.
Modify the JSON as needed to try out different input values.
Insert a Decision Task into a process and configure properties to use Decision Tables in your processes.
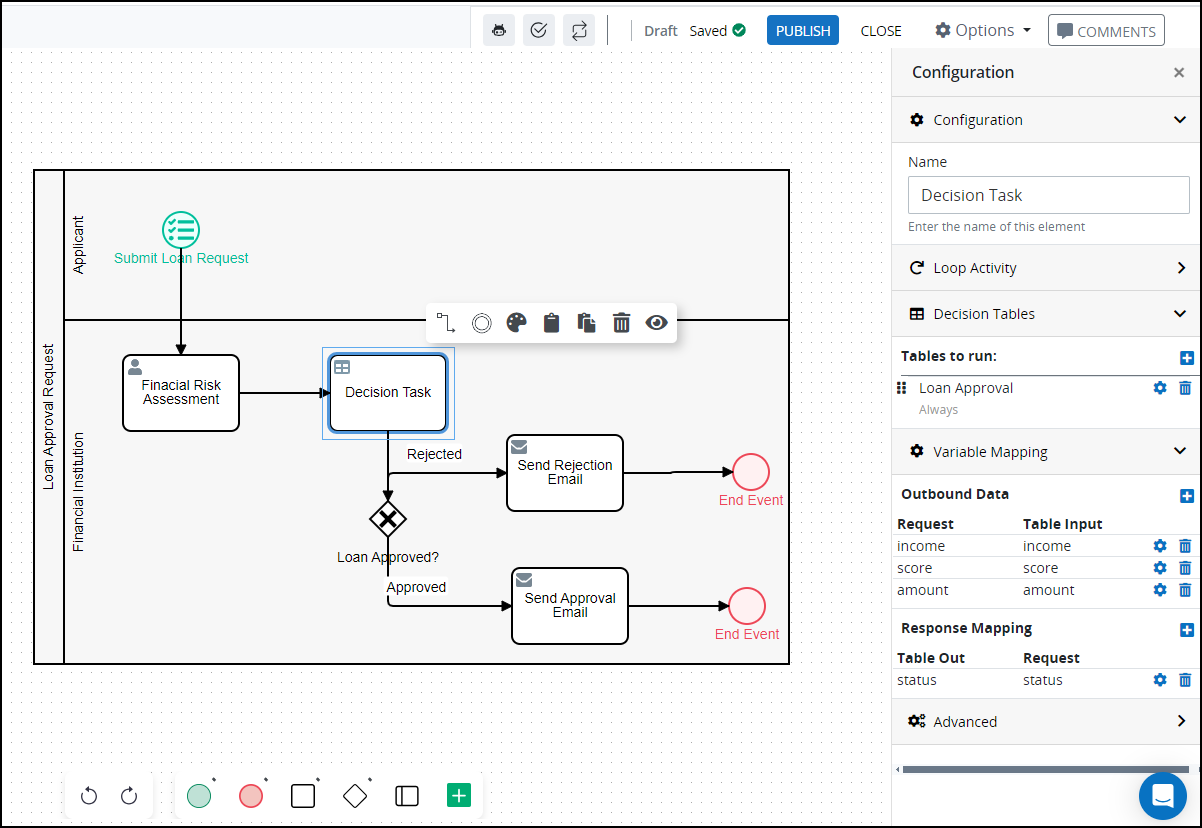
Variable Mapping for a Decision Task